
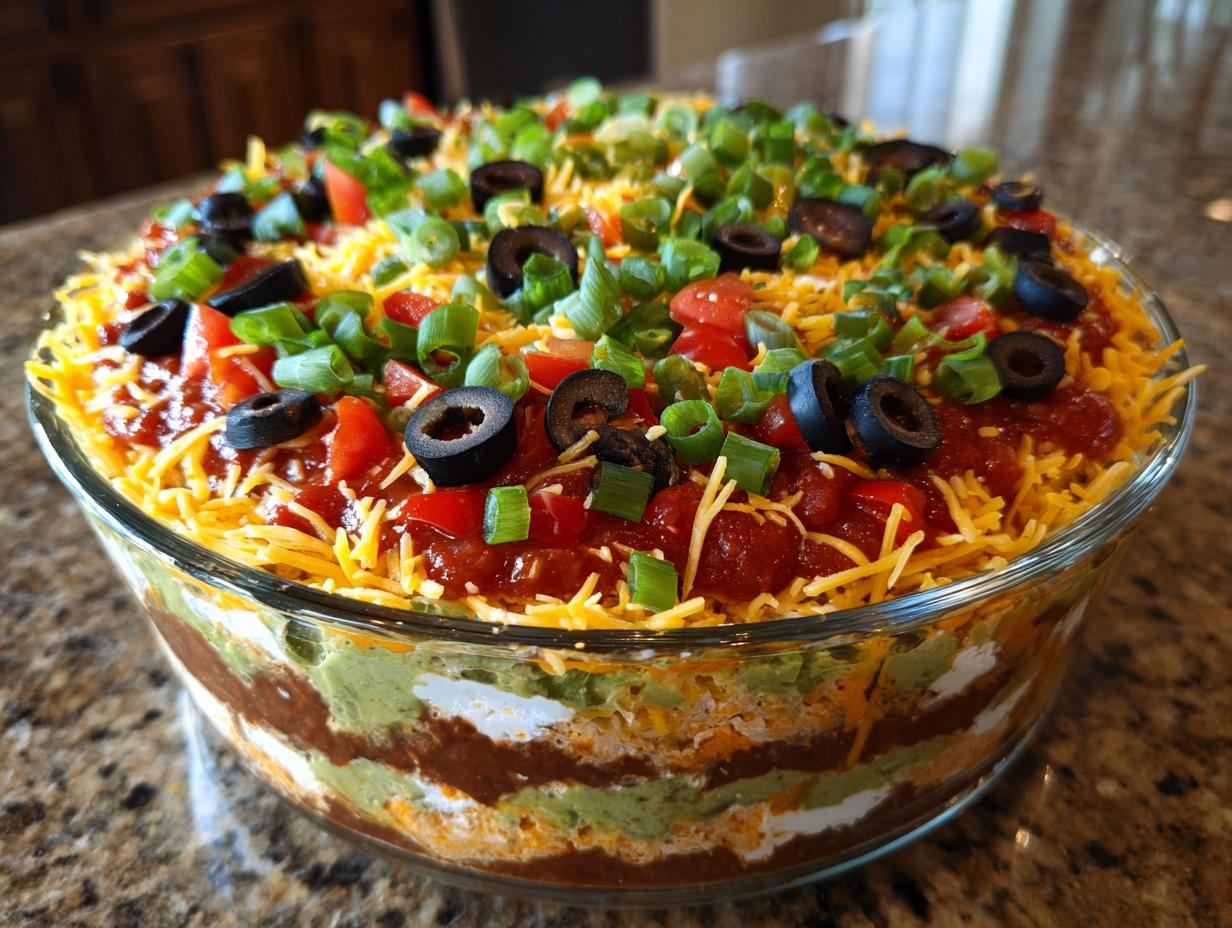

If you’re anything like the old me—trapped in a world of deadlines and forgetting that food should be fun—the thought of hosting a party can bring a little dread. You need something show-stopping, something that requires zero oven time, and something that disappears before the main event even starts. Well, I’ve perfected the answer, and it ties directly into my journey away from spreadsheets and toward real flavor: the ultimate layer dip. This isn’t just snack food; this Classic Seven Layer Dip is my proof that simple assembly can yield a showstopper. It’s vibrant, it’s incredibly satisfying, and frankly, it always steals the spotlight at any gathering I bring it to.
When I was developing recipes for Gourmet Gaze, I knew I had to nail the essentials, the dishes that truly bring people together. This Tex-Mex classic represents the best of both worlds—it looks like a feast for the eyes with those beautifully distinct layers, and the soul of it is pure comfort food. Forget complicated cooking; this dip is pure, magnificent layering magic, and you’re going to want to keep this recipe handy for every single Sunday football game or holiday get-together coming up.
You can find all my favorite quick assembly recipes, including this one, over in my main section for Appetizers and Snacks.
- Why This Classic Seven Layer Dip Recipe is Your New Party Staple
- Ingredients for the Ultimate Layer Dip Recipe
- How to Assemble Your Perfect Seven Layer Taco Dip
- Expert Tips for the Best Layered Dip
- Serving Suggestions for Your Game Day Appetizer
- Storage and Reheating Instructions for This Simple Layered Appetizer
- Variations on the Classic Layer dip
- Frequently Asked Questions About Layered Dip Recipes
- Nutritional Estimates for This Party Food Idea
Why This Classic Seven Layer Dip Recipe is Your New Party Staple
Look, I spent years building marketing campaigns, but I can tell you this layer dip beats any pitch deck I ever made. The absolute best part? It’s a no-bake dip. You’re looking at maybe 20 minutes of active assembly, and then you let the fridge do the heavy lifting. That convenience makes it the definition of an easy party dip.
I remember one year I was hosting a last-minute viewing party for that massive championship game. Everything was last minute, I hadn’t planned beyond chips and salsa, and panic was setting in. Then I remembered the layers! I whipped this up in under half an hour, and by kick-off, it was perfectly chilled and ready. It was the crowd pleasing dip that people were lining up for.
This recipe is foolproof, and frankly, that reliability is what I chase now in my kitchen. It’s so satisfying to serve something that looks incredible but took almost no sweat. If you need another simple assembly that always hits, you have to check out my recipe for my Cheese Crunch Bites. They share that same effortless party appeal!
Ingredients for the Ultimate Layer Dip Recipe
When you’re building a beautiful stack like this, clarity is everything. If the ingredients aren’t prepped right, the whole structure can collapse, and nobody wants a soupy mess when they are looking for a fantastic Layered Dip Recipe. That’s why I’ve listed everything out precisely as I use it. Remember, the draining of the salsa is key—I cannot stress that enough for structural integrity!
Layer Components Checklist
- 1 (16 ounce) can refried beans
- 1 teaspoon taco seasoning (for the beans)
- 8 ounces cream cheese, softened to room temperature
- 1 cup sour cream
- 1 packet (1.25 ounces) taco seasoning mix (for the creamy layer)
- 1 cup prepared guacamole (make sure it’s not oxidized!)
- 1 cup salsa, drained well (seriously, drain it!)
- 1 cup shredded Mexican cheese blend
- 1/2 cup chopped black olives, drained
- 1/2 cup chopped fresh tomatoes
- 1/4 cup sliced green onions for that final pop of color
How to Assemble Your Perfect Seven Layer Taco Dip
This is where the satisfaction kicks in! As someone who used to dread complex recipes, I appreciate how straightforward this process is. We are essentially building a beautiful, edible tower, so you want to work carefully and make sure each layer is spread evenly right up to the edges of your pie plate. This ensures every scoop gets a taste of every incredible flavor. This entire assembly process moves along quickly, but remember—we need patience at the end for the chill time!
Preparing the Flavor Base Layers
First up, we tackle the foundation. Take those refried beans and mix in that single teaspoon of taco seasoning right in a small bowl. Don’t just dump it on top! Seasoning the beans directly marries that initial flavor into the base of your layer dip. Spread that seasoned bean mixture smoothly across the bottom of your 9-inch serving dish. It should be your first, solid plane.
Next, we make the creamy powerhouse layer. Beat that softened cream cheese until it’s light and fluffy—this gets rid of any lumps. Then, whip in your sour cream and the rest of that taco seasoning packet. This creamy mixture is vital for the texture, so beat it well until it’s one cohesive, light mass. Gently spoon this over the beans and use an offset spatula to spread it out into an even second layer. Make sure those edges look neat!
Building the Top Layers of This Mexican Layer Dip
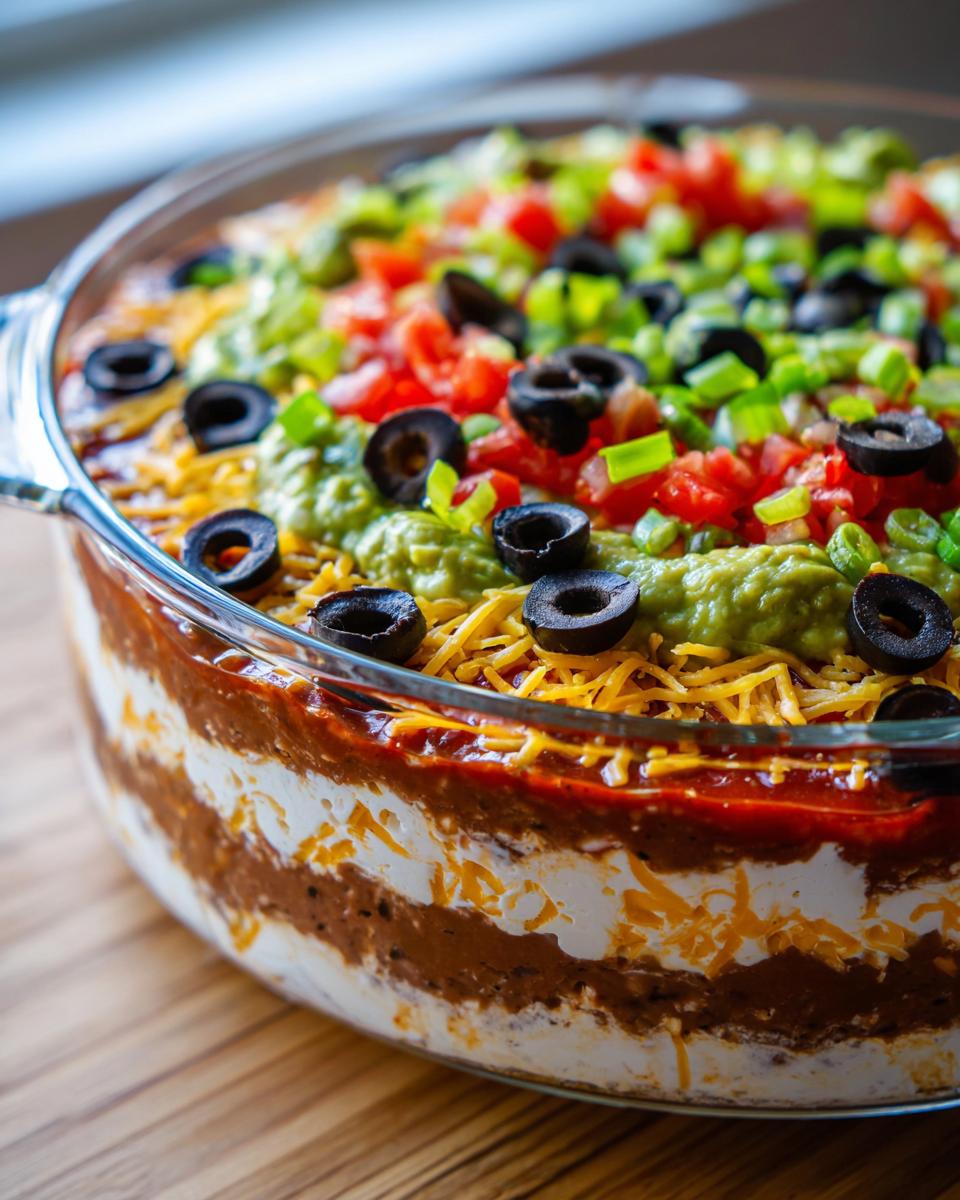
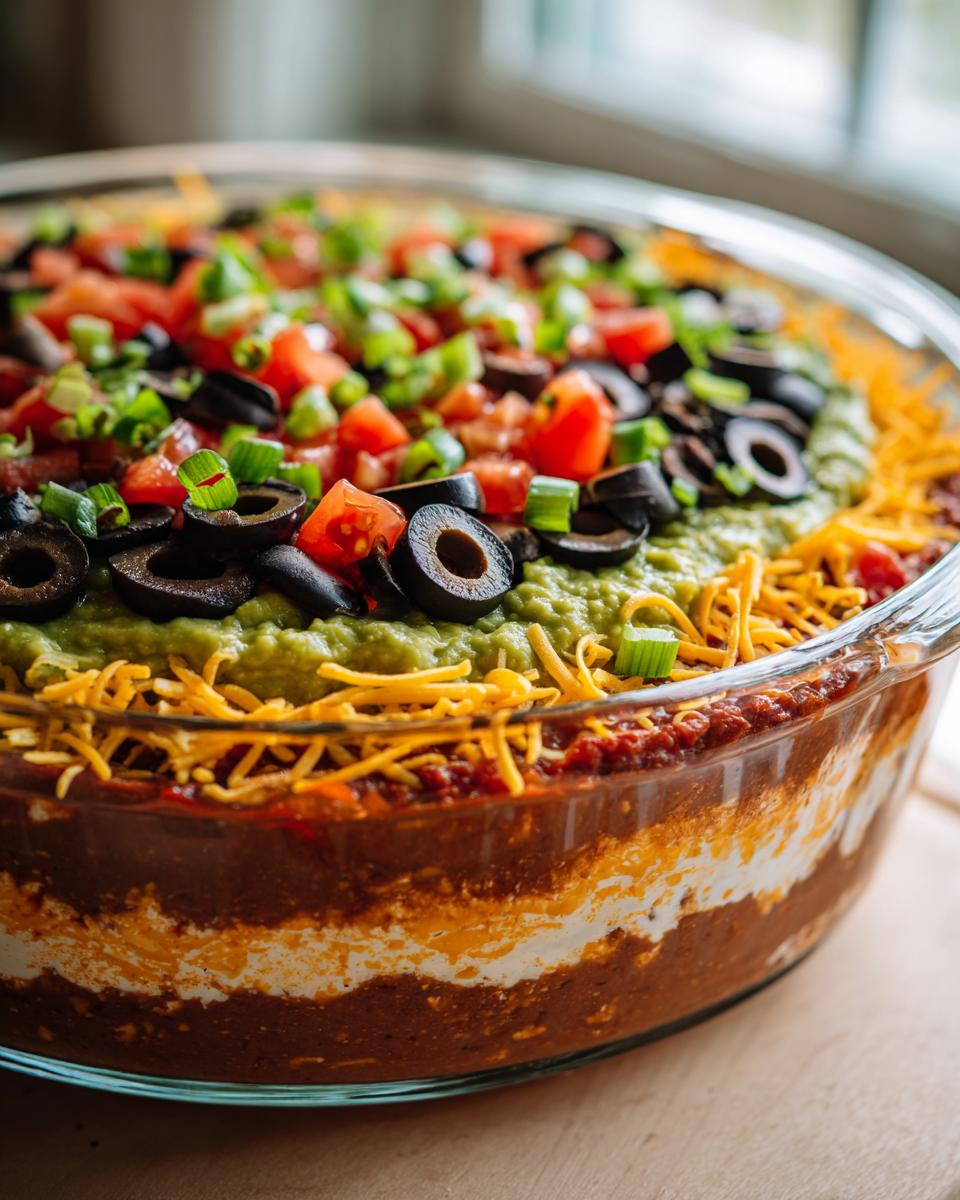
Now it’s time for color! Carefully spread your prepared guacamole over the cream cheese layer. I know it sounds crazy, but if you spread it too aggressively, you might pull up the white layer underneath, so be gentle here. Next comes the salsa, and this is where my road trip lesson comes back hard: make sure that salsa is DRAINED. Seriously, strain it hard. If you skip this, the moisture seeps down overnight, and you end up with a runny bottom layer instead of a magnificent Mexican Layer Dip.
Once the salsa is set, sprinkle that festive Mexican cheese blend right over the top. Then, scatter your drained black olives and chopped fresh tomatoes evenly. Finally, that pop of green from the sliced green onions on top seals the deal visually. Don’t forget step four: cover this masterpiece and put it in the fridge for at least one hour. This chilling time lets the layers set up so they don’t slide into each other when people start digging in. If you want to see another dish that looks amazing and is a huge crowd-pleaser, you must try my Dorito Taco Salad.
Expert Tips for the Best Layered Dip
When you transition from just throwing things together to actually crafting something visually stunning, small details make a massive difference. I’ve learned through all my recipe tweaking that the secret to a phenomenal cold layered dip isn’t just the ingredients, but the timing. A great layer dip is all about maintaining clear, distinct borders between those creamy and chunky parts, and humidity is the enemy!
Make Ahead Dip Strategy
This is a lifesaver for anyone hosting. You definitely can prepare this well ahead of time! I often assemble every layer except for the very top—that means stop right before the cheese, tomatoes, and green onions. Cover everything tightly with plastic wrap and tuck it away in the fridge for up to 24 hours. When your guests arrive, you just pull it out, add those fresh garnishes on top, and boom, instant presentation!
Achieving the Perfect Texture in Your Layer dip
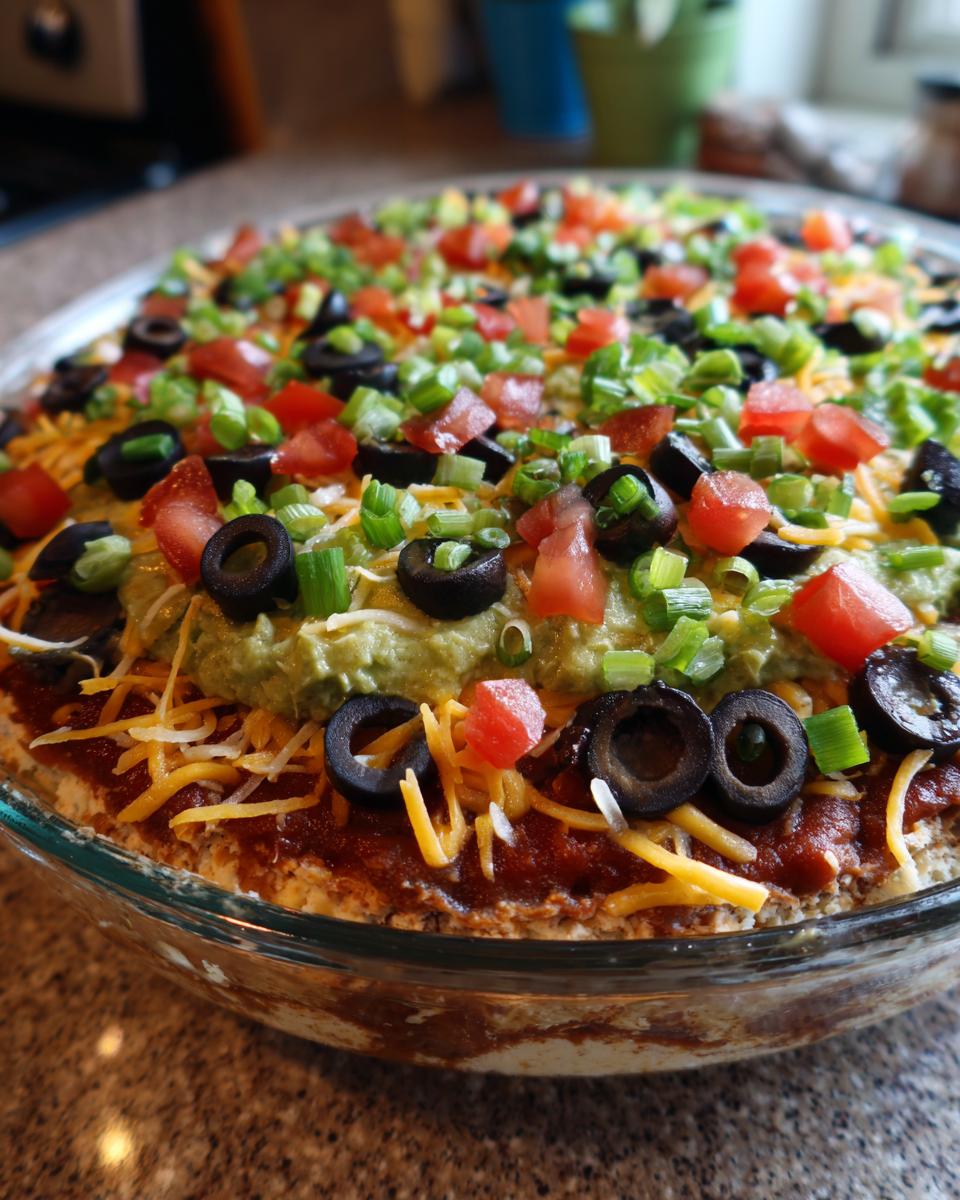
If there’s one thing that ruins a beautiful dip, it’s water pooling at the bottom. I cannot stress enough how important it is to drain that salsa! Truly wring it out or let it sit in a fine-mesh sieve for a good 15 minutes before you even think about spooning it on. Excess liquid will seep down into the cream cheese and bean layers overnight, turning what should be firm layers into a slightly sad, soupy situation. Resist the urge to use extra watery salsa; it’s the enemy of a perfect make ahead dip.
If you want to add a little extra punch to those top layers, you should definitely try adding some of my quick pickled red onions right alongside the tomatoes. They add the perfect acidic brightness!
Serving Suggestions for Your Game Day Appetizer
Once that beautiful layer dip is chilled, the only thing left is deciding what to scoop it up with! A great dip demands a worthy vehicle, right? For a true Tex-Mex experience, you absolutely need sturdy tortilla chips. Skip the thin, brittle ones; you need something reliable that won’t break off in that thick bean layer. I also love offering contrast with crisp, fresh vegetables.
Think about slicing up some firm bell peppers—red and yellow look amazing next to the green and red of the dip—and maybe some sturdy celery sticks. It keeps things feeling lively and colorful on the snack table. If you’re putting together a full spread for your Game Day Appetizer lineup, this dip pairs beautifully with something zingy, like my recipe for Corn and Black Bean Salad. It’s a perfect sidekick!
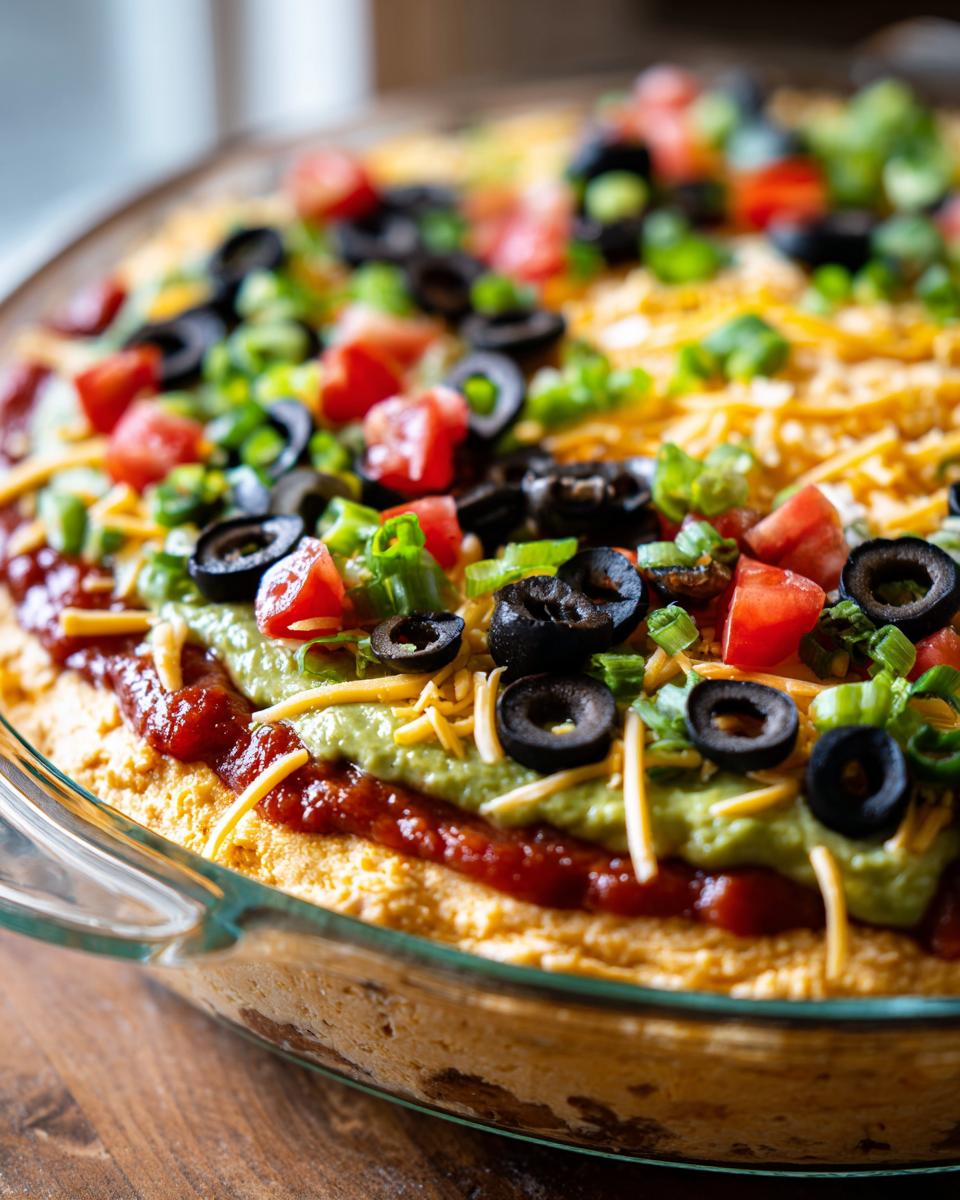
Honestly, this dip is so satisfying on its own, but pairing it correctly elevates the whole experience. It’s all about creating that perfect textural moment with every chip scoop!
Storage and Reheating Instructions for This Simple Layered Appetizer
Because this is a stunning, cold layered dip, the storage rules are simple, but very important. Once it’s set and you’ve served it, cover the platter tightly with plastic wrap or transfer any leftovers into an airtight container. Always keep your layer dip refrigerated. The creamy layers and fresh toppings don’t handle room temperature well for long, so get it back into the cold quickly!
Now, about reheating—don’t even think about it! This dip is designed to be served chilled, and heating it will just cause the dairy and guacamole layers to break and separate into a greasy mess we definitely want to avoid. Leftovers are usually great for about two to three days, though you might notice the fresh onions and tomatoes on top get a little softer after day one.
Variations on the Classic Layer dip
While I wholeheartedly believe this seven-layer structure is perfection, I totally get that sometimes you need to customize things, especially if you have picky eaters or someone who wants a heftier meal component in their snack. If you want to turn this into more of a substantial dish, definitely consider taking inspiration from the notes and adding a layer of seasoned ground beef—think gently browned and seasoned with a touch of chili powder—right between that bean layer and the cream cheese layer. It transforms this into an incredible Tex Mex Dip!
For those looking for a slightly lighter take, perhaps dipping into the Vegetarian Layer Dip Option space, you can swap out the refried beans for black beans. Just mash them slightly and season them exactly the same way you would the refried beans. It keeps that core earthy flavor but makes it feel a little cleaner.
And trust me, once you master this base, you can play all day. I’ve seen fantastic takes using mashed avocado mixed with feta cheese for a Greek-inspired twist, which is wild for a layer dip but surprisingly good! If you’re looking for great side components that use beans—because why not use beans in everything?—check out my Dense Bean Salad Recipe; it offers a different texture profile entirely.
Frequently Asked Questions About Layered Dip Recipes
It’s always smart to have a few backup questions addressed before game day hits! People ask me all the time about adjusting this Layered Dip Recipe for dietary needs or saving time. Since this is such a popular party food idea, I’ve gathered the most common things folks want to know about making this the absolute best Tex Mex Dip for their guests.
Can I substitute the refried beans in this layer dip?
Absolutely! While the classic recipe calls for refried beans because they spread so beautifully and help anchor the entire structure, you have options if you’re looking for a slightly different texture or a leaner base. If you want to keep the Mexican Layer Dip profile but increase the fiber, you can take a can of standard black beans, rinse them, and mash them up with that same teaspoon of taco seasoning. It works wonderfully! You just have to be a little more careful spreading them, similar to how you handle the guacamole, to keep that layer smooth.
How long does this cold layered dip stay fresh in the fridge?
Because we are dealing with fresh dairy, guacamole, and cheese, I always recommend planning on serving this within 24 hours of assembly for peak brightness. However, if it’s tightly covered, this cold layered dip will keep well in the refrigerator for up to three days. The caveat is freshness: the crunchy green onions and juicy tomatoes on top will start to lose their crispness after the first day. If you’re making it ahead, remember my tip about saving those top garnishes until just before serving!
If you’re looking for more behind-the-scenes details on how I develop and test all my favorite recipes, you can always check out my main Blog page!
Nutritional Estimates for This Party Food Idea
When I was in marketing, every piece of data had to be precise. Now, I approach recipe nutrition with a similar eye for detail, though I always caution everyone that these are estimates! This layer dip is definitely one of those party food ideas where you might lose track of how many scoops you’ve had, because it’s just so delicious. These numbers are based on dividing the total recipe into 8 generous servings, which is what I typically aim for when I’m planning out a game day spread.
Keep in mind that actual values can shift based on the specific brand of taco seasoning, whether you use low-fat or full-fat sour cream, and how much guacamole you pile on! But this gives you a really good baseline for what you are serving your guests.
Here is the breakdown for one serving (1/8th of the dip):
- Serving Size: 1/8 of dip
- Calories: 250
- Fat: 18g (with 9g Saturated Fat)
- Carbohydrates: 15g
- Protein: 8g
- Sugar: 4g
- Sodium: 450mg
As you can see, there’s a good balance of macronutrients here, making it satisfying. The fat content comes primarily from the cheese and the smooth dairy layers, but those carbs and protein help keep everyone feeling full long enough for the next quarter to start! It’s a truly hearty snack!
PrintThe Ultimate Seven Layer Dip Recipe for Game Day
Make this classic seven layer dip for your next party. This cold, no-bake Tex-Mex dip layers refried beans, guacamole, sour cream, salsa, cheese, and toppings for a guaranteed crowd-pleaser.
- Prep Time: 20 min
- Cook Time: 0 min
- Total Time: 1 hr 20 min
- Yield: 8 servings 1x
- Category: Appetizer
- Method: No Bake
- Cuisine: Tex-Mex
- Diet: Vegetarian
Ingredients
- 1 (16 ounce) can refried beans
- 1 teaspoon taco seasoning
- 8 ounces cream cheese, softened
- 1 cup sour cream
- 1 packet (1.25 ounces) taco seasoning mix
- 1 cup prepared guacamole
- 1 cup salsa, drained well
- 1 cup shredded Mexican cheese blend
- 1/2 cup chopped black olives, drained
- 1/2 cup chopped fresh tomatoes
- 1/4 cup sliced green onions
Instructions
- In a small bowl, mix the refried beans with 1 teaspoon of taco seasoning. Spread this mixture evenly over the bottom of a 9-inch pie plate or shallow serving dish. This is your first layer.
- In a separate bowl, beat the softened cream cheese until smooth. Mix in the sour cream and the remaining packet of taco seasoning until fully combined. Spread this creamy mixture over the bean layer.
- Carefully spread the prepared guacamole over the sour cream layer.
- Spoon the well-drained salsa evenly over the guacamole layer.
- Sprinkle the shredded Mexican cheese blend over the salsa layer.
- Top the cheese with the drained black olives and chopped fresh tomatoes.
- Garnish the top layer with sliced green onions.
- Cover the dip and chill in the refrigerator for at least 1 hour before serving. This allows the layers to set.
- Serve your best layer dip cold with tortilla chips, crackers, or fresh vegetables.
Notes
- Drain your salsa thoroughly; excess liquid will make the lower layers watery.
- You can make this dip ahead of time. Prepare all layers except the final vegetable toppings, cover tightly, and refrigerate for up to 24 hours. Add the final toppings just before serving.
- For a heartier dip, you can add a layer of seasoned ground beef between the bean layer and the cream cheese layer.
Nutrition
- Serving Size: 1/8 of dip
- Calories: 250
- Sugar: 4
- Sodium: 450
- Fat: 18
- Saturated Fat: 9
- Unsaturated Fat: 9
- Trans Fat: 0.5
- Carbohydrates: 15
- Fiber: 3
- Protein: 8
- Cholesterol: 35