
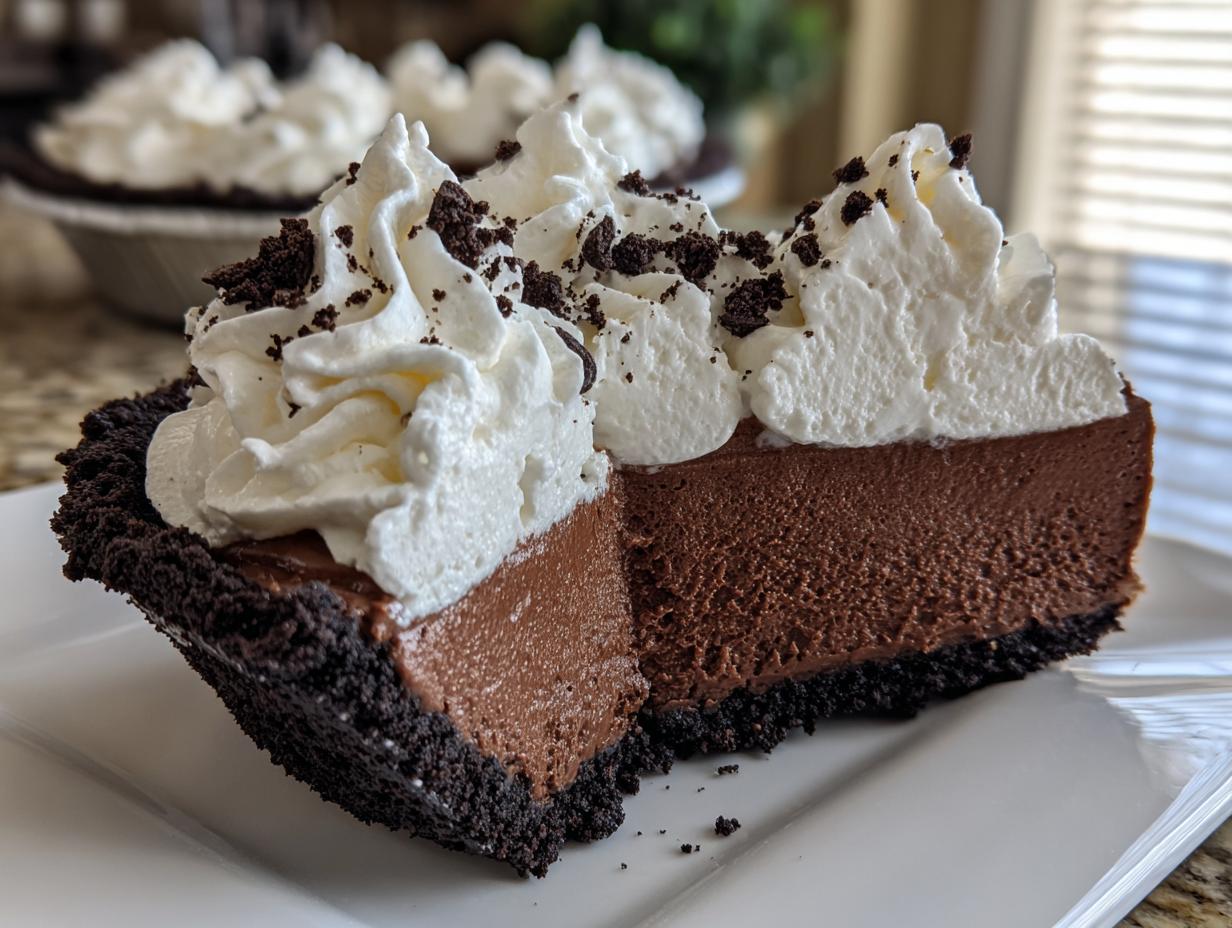

When that deep, undeniable chocolate craving hits—the one that requires something truly decadent but you’re facing a busy week—what do you do? For years, I’d just sigh and skip dessert, mourning the loss of those amazing creations I used to see in magazines. Not anymore! Making a show-stopping, deeply satisfying chocolate mousse pie that tastes like it took all day? That’s my specialty now. Trust me, after trading in spreadsheets for whisks, I learned how to perfect recipes that deliver on beauty and soul, and this no-bake marvel is proof. It’s rich, it’s creamy, and the best part? No oven required. This is the kind of easy chocolate pie that makes you feel like a culinary genius without breaking a sweat. If you want to know more about how I got from the corner office to testing these perfect desserts, you can always check out my About page!
- Why This No-Bake Chocolate Mousse Pie Recipe Works (Easy Chocolate Pie)
- Gathering Ingredients for Your Chocolate Mousse Pie
- Step-by-Step Instructions for the No-Bake Chocolate Mousse Pie
- Tips for Success with Your Chocolate Mousse Pie Recipe
- Serving Suggestions for This Decadent Dessert
- Storage and Make Ahead Dessert Tips for Chocolate Mousse Pie
- Frequently Asked Questions About Making Chocolate Mousse Pie
- Estimated Nutritional Snapshot for This Creamy Pie Filling
- Share Your Experience Making Chocolate Mousse Pie
- Estimated Nutritional Snapshot for This Creamy Pie Filling
- Share Your Experience Making This Chocolate Mousse Pie
Why This No-Bake Chocolate Mousse Pie Recipe Works (Easy Chocolate Pie)
When you’re chasing that perfect mouthful of chocolate, you need reliability, and this chocolate mousse pie delivers pure decadence without the drama. Forget turning on your oven, especially when the weather is hot! This is a true no bake dessert, which means less stress and more chilling time (which is dessert time in my book). The structure is amazing, too.
- It uses a ready-made, crunchy Oreo crust—no fuss with pastry dough needed.
- The filling is incredibly light, giving you that luxurious mouthfeel you want from a creamy pie filling.
- It’s the ultimate make ahead dessert; the longer it chills, the better it sets!
Achieving That Silky Chocolate Mousse Texture
The secret to keeping this easy chocolate pie from becoming dense is all about aeration. We melt high-quality chocolate into rich cream—that creates the intense base flavor, of course—but the magic happens when we gently fold in separately whipped heavy cream. That folding action is what incorporates tiny air pockets, transforming a heavy ganache into that unbelievably light, yet deeply flavored, silky chocolate mousse.
Gathering Ingredients for Your Chocolate Mousse Pie
Before we can achieve that gorgeous, picture-perfect slice, we need to assemble our brigade of beautiful components. Since this is a celebration of chocolate, quality matters here, even in a no bake dessert. Don’t skip the good stuff! I’ve broken down everything you need into three groups: the base, the dreamy filling, and the crowning glory.
For the Oreo Crust Pie Base
This crust is all about crunch meeting buttery richness. Make sure your Oreo crumbs are fine; we want the base to hold together, not crumble apart when you slice it.
- 1 3/4 cups Oreo cookie crumbs (that usually means about 28 of those delicious cookies!)
- 6 tablespoons unsalted butter, melted
For the Creamy Pie Filling
This is where the magic happens, so pay attention to the cream! Notice how the heavy whipping cream is divided? That’s crucial for getting both the rich chocolate melt *and* the lofty airiness in the final mousse.
- 12 ounces semi-sweet chocolate, finely chopped
- 1 cup heavy whipping cream, divided (1/4 cup for the chocolate, and the rest for whipping)
- 1/4 cup granulated sugar
- 1 teaspoon vanilla extract
- 1 package (8 ounces) cream cheese, softened completely—this is key for smoothness!
- 1/2 cup powdered sugar
- 1/4 cup unsweetened cocoa powder
- Pinch of salt
For the Chocolate Whipped Cream Topping
You absolutely must make your own whipped cream for this chocolate mousse pie. The stuff out of a can? It just doesn’t have the same soul! This easy topping makes the whole decadent dessert shine.
- 1 cup heavy whipping cream (needs to be cold!)
- 2 tablespoons powdered sugar
- 1/2 teaspoon vanilla extract
Step-by-Step Instructions for the No-Bake Chocolate Mousse Pie
Alright, let’s get down to the assembly! Because this is a no-bake recipe, we rely entirely on chilling time to achieve that perfect structure. Don’t try to speed things up too much in the chilling phases, or your beautiful chocolate mousse pie might turn sad and soupy. Follow these steps precisely, and you’ll have the most gorgeous, creamy pie imaginable. If you’re looking for more show-stoppers, make sure to browse my full collection of dessert recipes!
Preparing and Chilling the Oreo Crust Pie
First up is our sturdy foundation. You’ll need a medium bowl for this quick job. Mix those fine Oreo crumbs and the melted butter until everything looks like wet sand—you want it thoroughly combined so it packs well. Press this mixture down into that 9-inch pie plate. I mean *really* press it! Use the bottom of a measuring cup to get it even across the bottom and up the sides. Don’t be shy about packing it tight. Once it’s solid, slide that crust into the freezer. It needs to chill completely while we move onto the filling, so give it at least 15 minutes in the deep freeze.
Creating the Smooth, Rich Chocolate Base
This part brings the deep, rich chocolate flavor. Chop your semi-sweet chocolate finely—the smaller the pieces, the smoother the melt. Heat just a little bit of your heavy cream until you see those tiny bubbles simmering around the edge, but don’t let it boil over! Pour that hot cream over the chopped chocolate and just let it sit there for five minutes. Resist the urge to stir! After five minutes, whisk it gently until you have a glossy, smooth chocolate mixture. Set that aside to cool down a bit so it doesn’t melt our cream cheese later.
While that cools, tackle the cream cheese mixture. Make sure that cream cheese is 100% room temperature! Beat it with the powdered sugar, cocoa powder, and salt until it’s perfectly smooth—no tiny lumps allowed if you want that silky chocolate mousse. Then, slowly beat in your slightly cooled chocolate mixture until everything is uniform in color.
Folding for an Airy Mousse Dessert
Here is the ultimate trust exercise in baking: folding. We need air in this mousse, and we get it from the cream we are about to whip. In a separate, spotless bowl, whip the remaining heavy cream with the granulated sugar and vanilla until you reach stiff peaks—when you pull the whisk out, the peak should stand straight up without flopping over. Now, the trick: take about a third of that glorious whipped cream and fold it right into your heavy chocolate base. This step is called “lightening the base,” and it makes the next step easier. Then, gently fold in the remaining whipped cream in two more additions. Use a spatula and cut down the middle and sweep up the side of the bowl. Stop mixing the second you see no white streaks. Overmixing deflates the air, and we want this to be a true airy mousse dessert!
Setting and Finishing the Chocolate Mousse Pie
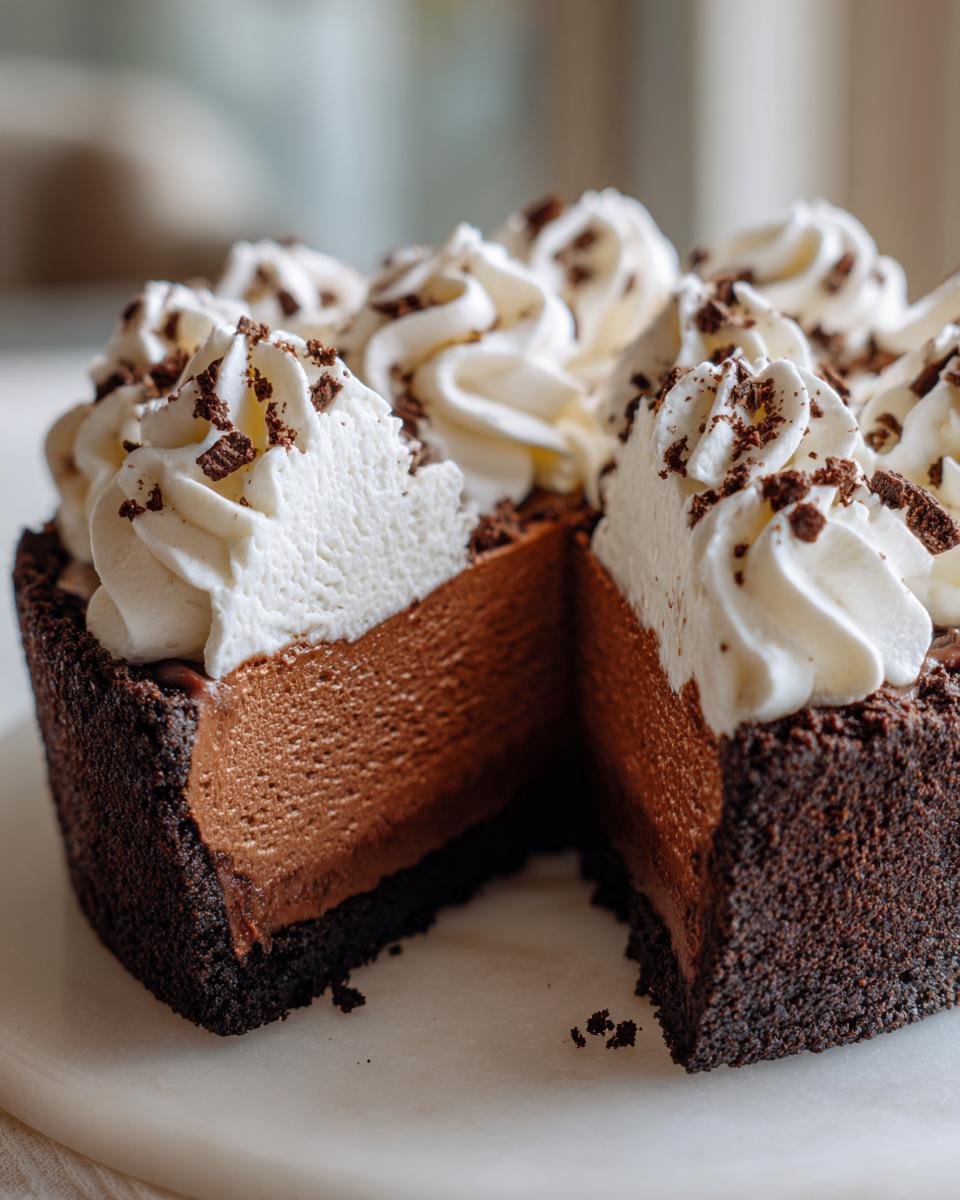
Grab that cold Oreo crust from the freezer and pour all that beautiful mousse filling right into it. Smooth the top gently with an offset spatula. Now, patience, my friend! Loosely cover your masterpiece and put it back into the refrigerator. It absolutely must chill for a minimum of six hours, but honestly? Make this a day ahead. Overnight chilling ensures your chocolate mousse pie is perfectly set and sliceable. Once it’s firm, whip up the final chocolate whipped cream topping, spread it over the top, and get ready to serve!
Tips for Success with Your Chocolate Mousse Pie Recipe
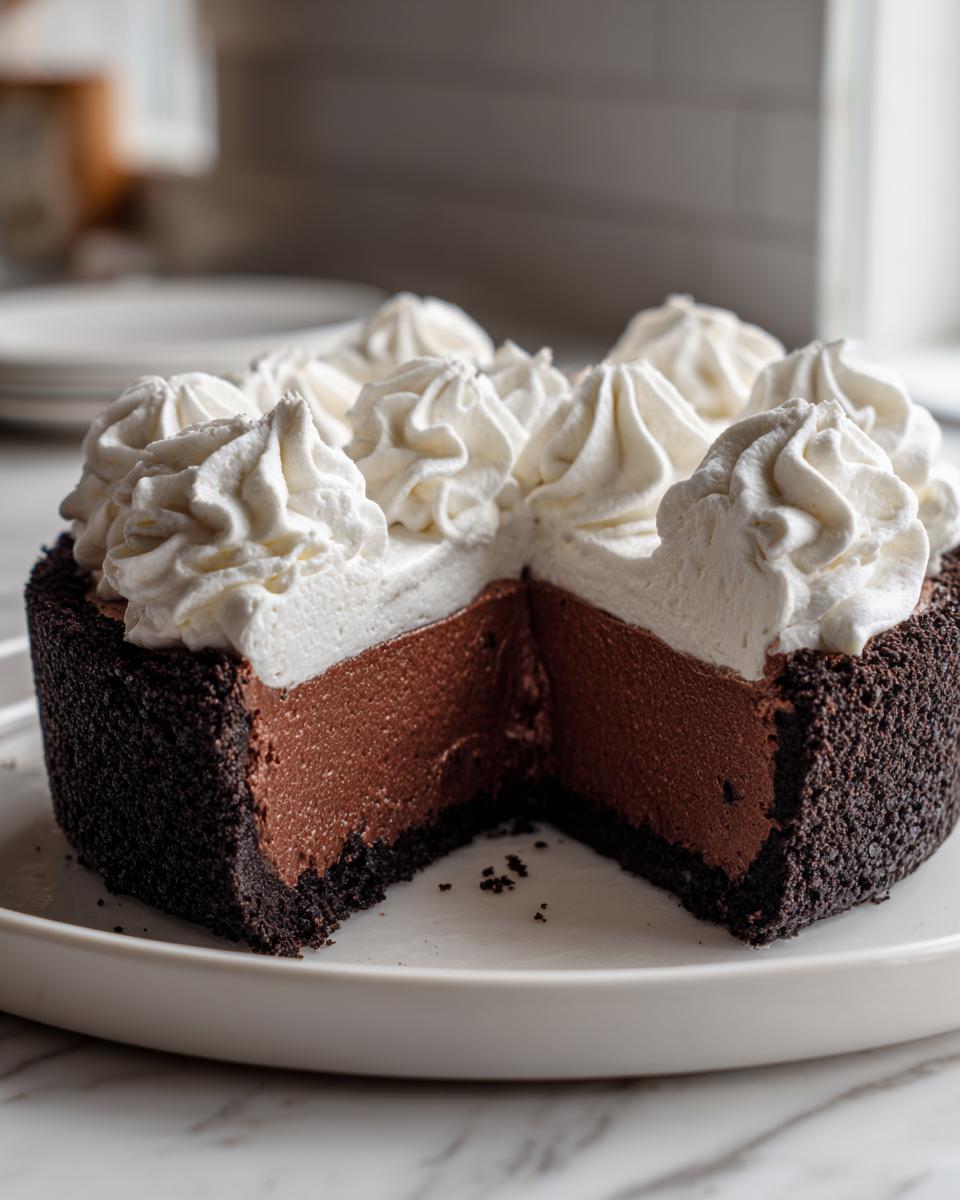
I know that chasing that perfect texture can feel stressful, especially with a dreamy dessert like this chocolate mousse pie. But remember, this is meant to be approachable! When I moved away from my corporate deadlines and started focusing on food, I learned that success often comes down to respecting a few key fundamentals. If you nail these small points, your pie will set beautifully, guaranteed.
- Temperature is Everything: Seriously, don’t rush bringing that cream cheese to room temperature! If it’s cold, you’ll get little hard lumps in your chocolate base, and that ruins the entire “silky” promise of this dessert. It should yield just slightly when you press it—not be greasy, just soft.
- Don’t Skimp on Chill Time: I know you want to see the end result immediately, but that 6-hour minimum chill time? That’s non-negotiable for stability. If you rush it, your beautiful creamy pie filling will slump when you slice it. Overnight is always best, making this a fantastic party dessert.
- Use the Right Chocolate: Since this has no oven time, the chocolate flavor carries the whole pie. I use semi-sweet because it balances the sugar in the crust and the topping perfectly. If you want a deeper, more intense flavor closer to a French Silk Pie alternative, use a high-quality 60% cacao dark chocolate instead, but you might need an extra tablespoon of sugar in the filling to balance the bitterness.
Ingredient Notes and Substitutions for This Easy Chocolate Pie
When you are making simple recipes like this one, every little substitution stands out. I want you to have success, so here are the notes I keep jotted down for variations on the crust or filling.
If you happen to be out of Oreos, or maybe you just prefer a slightly different crunch for your chocolate mousse pie, you can absolutely swap it out for a graham cracker crust. The recipe notes mention this swap! You’ll want about 1 1/2 cups of graham cracker crumbs, and stick with that 6 tablespoons of melted butter. It yields a slightly lighter, sandier crust, which is still delicious!
One more thing I learned while perfecting my make ahead dessert rotation: if you are worried about your mousse not setting because your kitchen is unusually warm, you can gently whisk in 1 teaspoon of instant gelatin (bloomed according to package directions) into the warm chocolate mixture just before adding the cream cheese. This gives the mousse an extra boost of stability, though usually, the combination of cream cheese and properly whipped cream handles it just fine. Find more great tips over at a fellow baker’s site; they have some great insights on mousse setting, too! Check out this guide to your perfect chocolate mousse pie.
Serving Suggestions for This Decadent Dessert
As I always say here at Gourmet Gaze, we eat with our eyes first! This chocolate mousse pie is already naturally stunning—that mound of fluffy chocolate whipped cream topping against the dark, rich filling is a showstopper on its own. But if you’re preparing this for a bigger holiday gathering or just want to turn a simple weeknight treat into a true statement piece, a few little touches can go a long way. This elevates it from an easy dessert to a truly rich chocolate dessert!
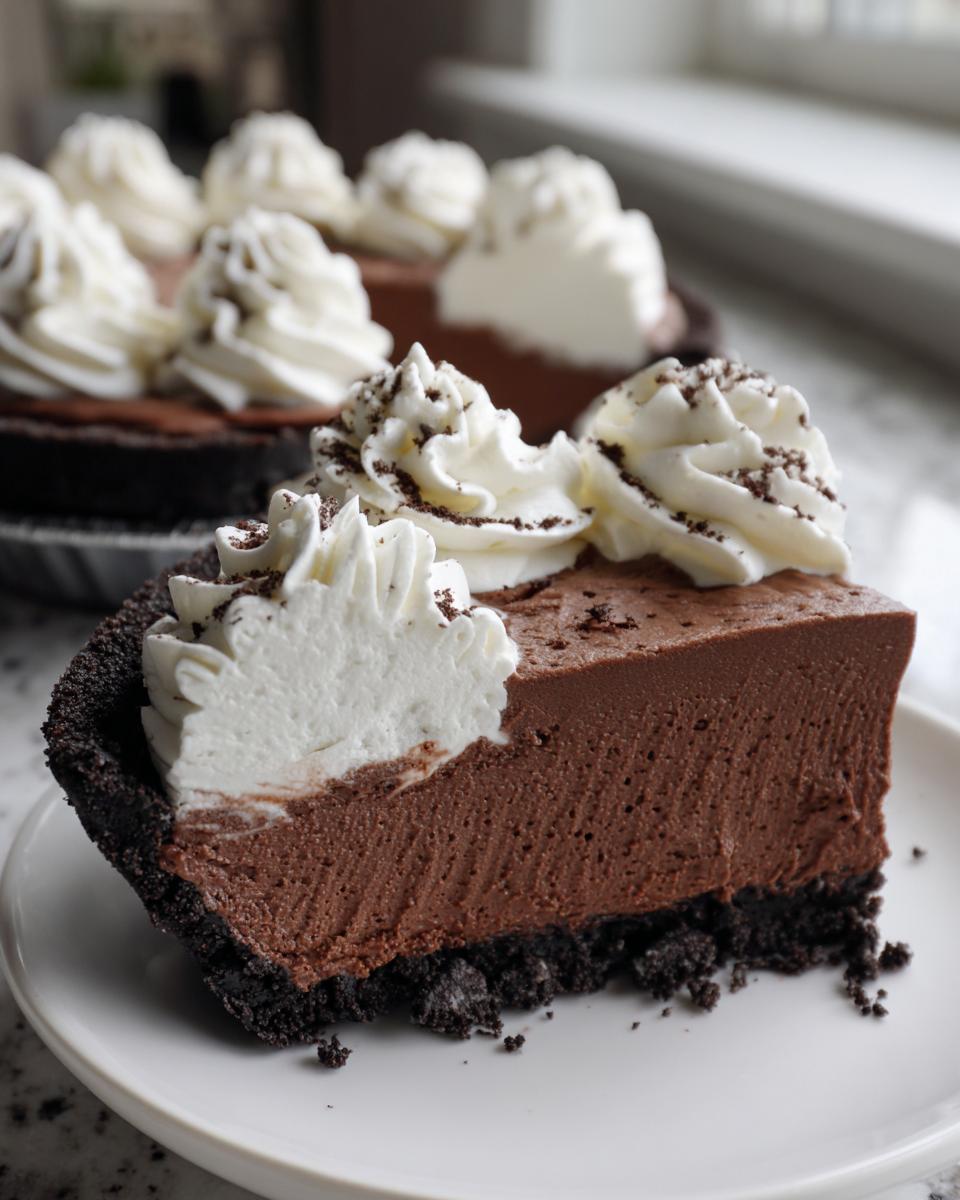
When plating, remember to use a very warm, sharp knife between slices. Wipe the knife clean after every cut. This keeps those layers looking sharp and defines that gorgeous cross-section of crust, mousse, and topping. A little extra care here makes a huge visual difference for guests.
Garnishes That Finish the Look
I love to keep garnishes simple so they don’t fight the intense chocolate flavor, but they add essential visual texture. Here are my go-to finishes:
- Flaked Sea Salt: A tiny sprinkle of flaky sea salt right over the whipped cream right before serving is pure genius. The salt amplifies the chocolate and cuts through the sweetness perfectly. It’s a sophisticated touch for such a simple no bake dessert.
- Dusting of Cocoa: A fine mesh sieve dusted lightly with deep, unsweetened cocoa powder over the top adds an elegant, velvety contrast. Don’t overdo it; just a soft veil is all you need.
- Chocolate Shavings: For maximum visual impact, use a vegetable peeler on a high-quality chocolate bar. Create curls or thin shavings. These look fabulous piled high in the center of the pie.
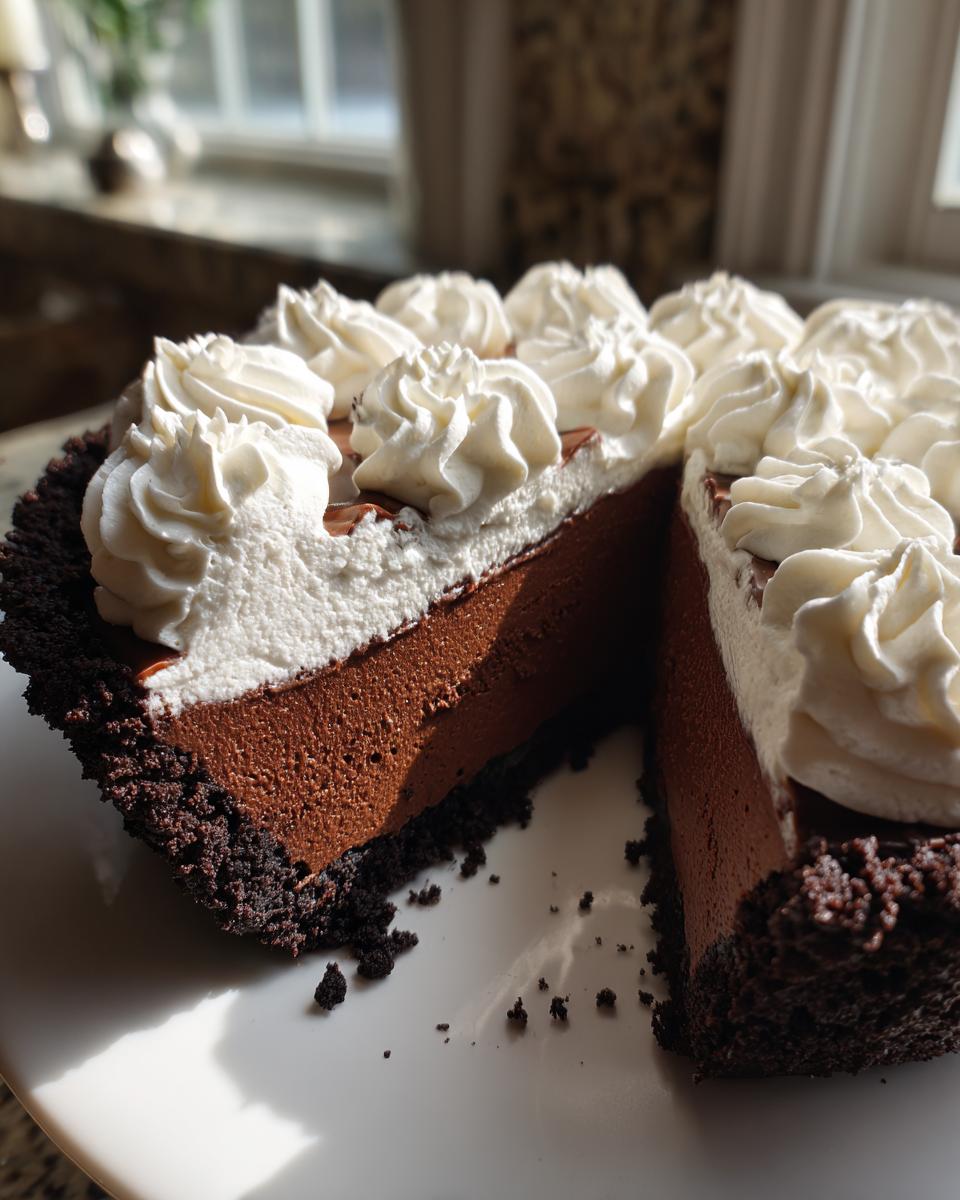
If you’re feeling extra adventurous and want to move beyond the traditional topping, I have a brilliant recipe for chocolate banana pops that uses a similar richness, but for this pie, I highly recommend serving it alongside something tart to keep things balanced.
Perfect Pairings for Your Slice
Because this silky chocolate mousse is so satisfying, you don’t need much else on the plate, but a small accompaniment can complement the richness beautifully. Think bright colors and tart flavors.
- Fresh Raspberries or Pomegranate Seeds: The pop of red or jewel-tone fruit is stunning against the dark brown pie. The acidity of the berries cleanses the palate after a bite of the heavy cream and chocolate.
- A Thin Cookie Wafer: If you want to echo the crust, place one extra Oreo, or even a delicate, unsweetened wafer cookie, leaning against the slice for added height.
Honestly, though, the best pairing for this creamy pie filling is a strong, hot espresso. That bitterness just wakes up the flavor of the cocoa powder we used in the filling. It’s the perfect ending to any meal, truly!
Storage and Make Ahead Dessert Tips for Chocolate Mousse Pie
This is one of my absolute favorite features when I’m planning a big meal or hosting a group—this chocolate mousse pie is truly the ultimate make ahead dessert. Since we aren’t dealing with egg custards that can scorch or split, this pie actually improves overnight! Giving that mousse filling the extra time to chill locks in the structure and lets the dark chocolate flavor fully deepen into that rich chocolate dessert profile.
Once your pie is completely set, which I hope you gave it the full overnight chill, covering it is the name of the game. You don’t want any fridge odors creeping into that beautiful whipped cream top layer, right? I take a large plate or perhaps an extra-large cake dome lid and gently tent it over the pie. If you don’t have a huge dome, plastic wrap works, but make sure it’s not touching the topping. If it is touching, you risk smearing that lovely chocolate whipped cream topping everywhere.
Keep the covered pie in the refrigerator. How long does it last? Honestly, it’s at its absolute peak texture for about three days. After that, the whipped topping might start weeping a little, but the filling underneath will still be divine. I usually aim to serve it within 48 hours of assembly for the best visual presentation.
Now, since this is entirely a no-bake recipe, reheating is definitely not on the menu! If you try to heat this up, you’ll end up with a bowl of melted chocolate soup—and we certainly don’t want that after all that careful folding! If you are planning a huge party and need to prep even further ahead, you can safely make the Oreo crust and store it snugly wrapped at room temperature for up to two days. You can even make the finished filling and store it in the pie plate, covered, for 24 hours before you whip the final layer of cream and top it. It’s just so helpful!
For anyone planning a big holiday spread, this recipe is a lifeline. You can assemble the whole thing the day before your event. When you’re trying to juggle oven space with turkey, roasts, and other baked goods, having this stunning, cool dessert waiting in the fridge is priceless. Check out these tips from E2 Bakes Brooklyn on streamlining your no-bake processes; they really understand how to keep things easy! See their approach to quick, no-bake assembly.
Frequently Asked Questions About Making Chocolate Mousse Pie
I get so many DMs and emails about this chocolate mousse pie, and honestly, the most common questions always circle back to texture and timing—you all want that perfect, light bite! I’ve gathered the absolute must-knows right here to ensure your pie is the star of your next gathering. We want that signature airy mousse dessert texture, not a dense brick!
Can I use a pre-made graham cracker crust instead of the Oreo Crust Pie?
Yes, absolutely! If you’re short on time or maybe don’t have a food processor to crush those Oreos into fine crumbs, using a store-bought graham cracker crust for this easy chocolate pie is totally fine. Just remember that the flavor profile shifts a little. The Oreo crust adds a deep, almost salty dark chocolate note that balances the filling. The graham cracker crust will be lighter and slightly sweeter, making the pie lean a little closer to a traditional, lighter French Silk Pie alternative. Either way, the filling is the real star here!
How do I know when the chocolate mousse pie is fully set?
This is where many people worry they’ve under-chilled, but I have a couple of tried-and-true tests that tell you it’s ready for its close-up. First, the look: the surface of the mousse shouldn’t look wet or jiggly anymore; it should have a nice matte finish, especially around the edges. Second, the touch test: gently press your fingertip right in the center—not too hard! If the mousse springs back slowly and doesn’t leave a deep imprint, you’re good to go. If your finger sinks deeply, give it at least another hour. That firmness means you’ll get pristine slices, which is essential for that visual feast factor. Don’t stop short of that solid set!
Can I make this chocolate mousse pie ahead of time for a party?
This is my number one tip for any busy host: Yes! You should make this chocolate mousse pie ahead of time. Seriously, it’s the best part of this no bake dessert. I find the flavor is actually better on Day Two because the chocolate has time to fully integrate with the cream cheese and sugar. As I mentioned in the storage section, you can assemble the entire thing—crust, filling, and topping—and keep it covered tightly in the fridge for up to three days. Having this beautiful make ahead dessert ready means you can actually enjoy your party instead of scrambling to finish dessert!
If you’re looking for more answers or just want to see what else I’ve been tinkering with in the kitchen lately, feel free to browse my main blog archives!
Estimated Nutritional Snapshot for This Creamy Pie Filling
I always include this data because transparency is important here at Gourmet Gaze—we need to know what we’re celebrating with! Please keep in mind these are estimates based on the standard ingredients and preparation methods listed in the recipe above. They’re certainly more accurate than guessing, but they serve as a general guide for this incredibly decadent dessert!
- Serving Size: 1 slice
- Calories: 450
- Sugar: 35g
- Sodium: 250mg
- Fat: 30g
- Saturated Fat: 18g
- Unsaturated Fat: 12g
- Trans Fat: 0.5g
- Carbohydrates: 40g
- Fiber: 2g
- Protein: 5g
- Cholesterol: 90mg
Share Your Experience Making Chocolate Mousse Pie
I truly hope you found this recipe for the ultimate chocolate mousse pie as satisfying to make as it is to eat. Creating something beautiful and deeply flavorful without turning on the heat? That’s a win in my book, and I know you’ll agree once you see that perfect slice!
Now, I want to see your creations! Snap a picture of that silky smooth filling and the beautifully piped whipped cream topping. Did you use the Oreo crush, or did you go for the graham cracker route? Let me know how it went! Drop your rating and any secret tips you discovered in the comments below—your feedback helps the whole Gourmet Gaze community improve. I read every comment, and I love hearing about your kitchen successes. Reach out anytime through my Contact page if you need a little extra help!
Estimated Nutritional Snapshot for This Creamy Pie Filling
I always include this data because transparency is important here at Gourmet Gaze—we need to know what we’re celebrating with! Please keep in mind these are estimates based on the standard ingredients and preparation methods listed in the recipe above. They’re certainly more accurate than guessing, but they serve as a general guide for this incredibly decadent dessert!
- Serving Size: 1 slice
- Calories: 450
- Sugar: 35g
- Sodium: 250mg
- Fat: 30g
- Saturated Fat: 18g
- Unsaturated Fat: 12g
- Trans Fat: 0.5g
- Carbohydrates: 40g
- Fiber: 2g
- Protein: 5g
- Cholesterol: 90mg
Share Your Experience Making This Chocolate Mousse Pie
I truly hope you found this recipe for the ultimate chocolate mousse pie as satisfying to make as it is to eat. Creating something beautiful and deeply flavorful without turning on the heat? That’s a win in my book, and I know you’ll agree once you see that perfect slice!
Now, I want to see your creations! Snap a picture of that silky smooth filling and the beautifully piped whipped cream topping. Did you use the Oreo crush, or did you go for the graham cracker route? Let me know how it went! Drop your rating and any secret tips you discovered in the comments below—your feedback helps the whole Gourmet Gaze community improve. I read every comment, and I love hearing about your kitchen successes. Reach out anytime through my Contact page if you need a little extra help!
PrintNo-Bake Oreo Chocolate Mousse Pie
Make this easy, no-bake chocolate mousse pie featuring a rich, silky chocolate mousse filling set in a crunchy Oreo cookie crust, topped with homemade whipped cream.
- Prep Time: 30 min
- Cook Time: 0 min
- Total Time: 6 hours 30 min
- Yield: 8 servings 1x
- Category: Dessert
- Method: No-Bake
- Cuisine: American
- Diet: Vegetarian
Ingredients
- 1 3/4 cups Oreo cookie crumbs (about 28 cookies)
- 6 tablespoons unsalted butter, melted
- 12 ounces semi-sweet chocolate, finely chopped
- 1 cup heavy whipping cream, divided
- 1/4 cup granulated sugar
- 1 teaspoon vanilla extract
- 1 package (8 ounces) cream cheese, softened
- 1/2 cup powdered sugar
- 1/4 cup unsweetened cocoa powder
- Pinch of salt
- For Topping: 1 cup heavy whipping cream
- 2 tablespoons powdered sugar
- 1/2 teaspoon vanilla extract
Instructions
- Prepare the Crust: In a medium bowl, combine the Oreo cookie crumbs and melted butter. Press the mixture firmly and evenly into the bottom and up the sides of a 9-inch pie plate. Place the crust in the freezer while you prepare the filling.
- Melt Chocolate: Place the chopped chocolate in a heatproof bowl. Heat 1/4 cup of the heavy whipping cream in a small saucepan until it just simmers. Pour the hot cream over the chocolate and let it sit for 5 minutes. Whisk until the chocolate is completely smooth and melted. Set aside to cool slightly.
- Make the Mousse Base: In a large bowl, beat the softened cream cheese, 1/2 cup powdered sugar, cocoa powder, and salt with an electric mixer until smooth. Beat in the cooled, melted chocolate mixture until fully combined.
- Whip Cream for Filling: In a separate, clean bowl, beat the remaining 3/4 cup heavy whipping cream, 1/4 cup granulated sugar, and 1 teaspoon vanilla extract until stiff peaks form.
- Fold Together: Gently fold about one-third of the whipped cream into the chocolate mixture to lighten it. Then, gently fold in the remaining whipped cream until no white streaks remain. Do not overmix; this keeps the mousse airy.
- Assemble and Chill: Pour the chocolate mousse filling into the chilled Oreo crust. Smooth the top with a spatula. Cover the pie loosely with plastic wrap and refrigerate for at least 6 hours, or preferably overnight, until the mousse is fully set.
- Prepare Topping: Just before serving, make the whipped cream topping. Beat 1 cup heavy whipping cream, 2 tablespoons powdered sugar, and 1/2 teaspoon vanilla extract until medium-stiff peaks form.
- Garnish and Serve: Spread or pipe the whipped cream topping over the chilled pie. Garnish with extra cookie crumbs or chocolate shavings if desired. Slice and serve immediately.
Notes
- For the silkiest mousse, ensure your cream cheese is fully softened to room temperature before mixing.
- To achieve a perfect set, do not rush the chilling time; the mousse needs several hours to firm up properly.
- If you prefer a graham cracker crust, substitute 1 1/2 cups of graham cracker crumbs for the Oreo crumbs.
Nutrition
- Serving Size: 1 slice
- Calories: 450
- Sugar: 35g
- Sodium: 250mg
- Fat: 30g
- Saturated Fat: 18g
- Unsaturated Fat: 12g
- Trans Fat: 0.5g
- Carbohydrates: 40g
- Fiber: 2g
- Protein: 5g
- Cholesterol: 90mg