
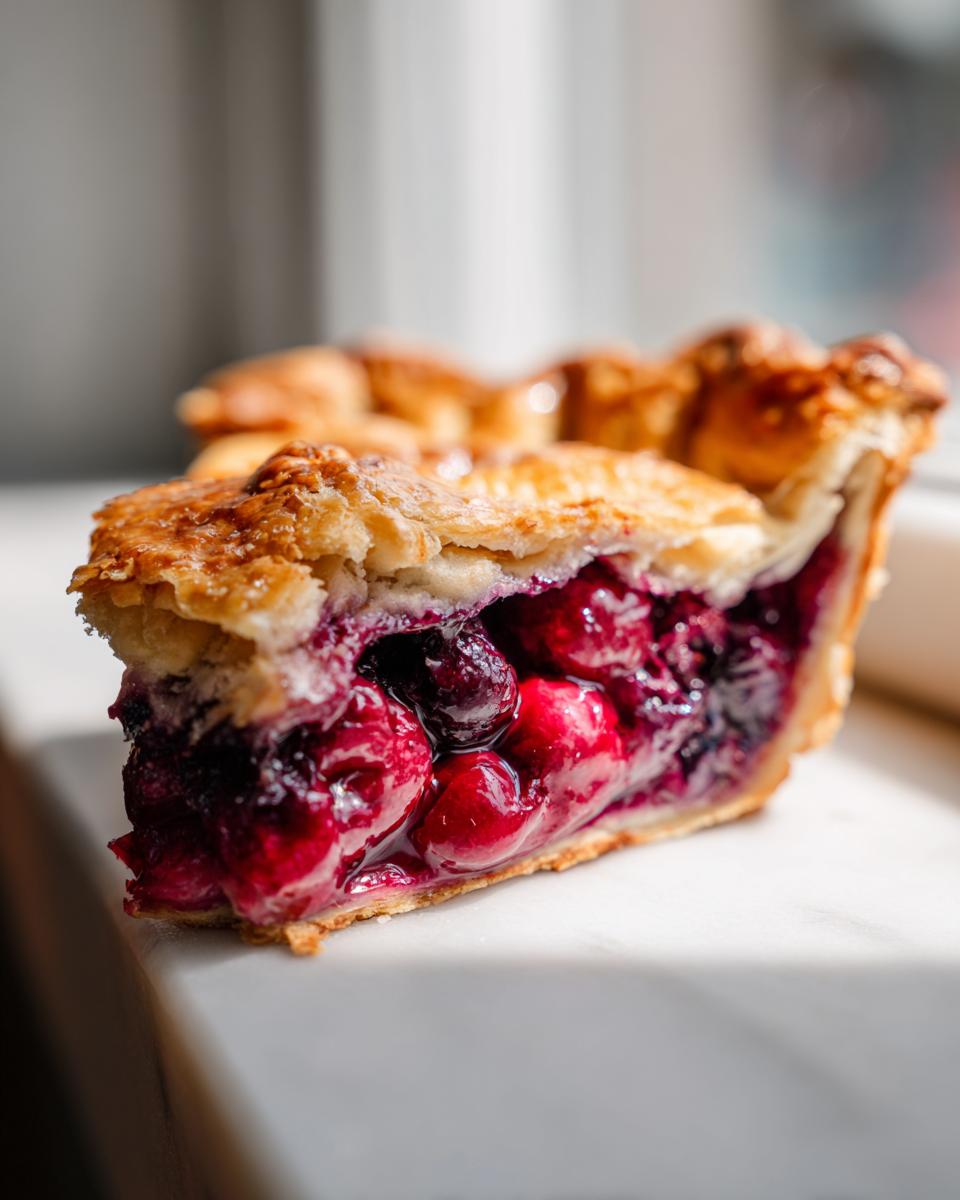

When summer hits, I crave that perfect slice of America’s sweetheart: the berry pie. You know the one—the intensely sweet and tart filling bursting through a perfectly golden, flaky crust. For years, I thought achieving bakery-quality results at home was impossible. Believe me, when I was still trapped behind a desk in corporate Chicago, my attempts at a homemade berry pie usually ended in watery sorrow and a soggy bottom. But after trading spreadsheets for spatulas, I finally cracked the code! This isn’t just another fruit pie recipe; this is the Ultimate Mixed Berry Pie, featuring the crispest, all-butter crust and, most importantly, a foolproof filling that sets beautifully every single time. Say goodbye to the dreaded runny slice!
- Why This Is the Best Berry Pie Recipe You Will Ever Make
- Ingredients for Your Ultimate Mixed Berry Pie
- How to Prepare the Flaky Crust for Your Berry Pie
- Assembling the Mixed Berry Pie: From Bowl to Plate
- Baking Your Berry Pie to Golden Perfection
- The Crucial Cooling Phase for a Sliceable Berry Pie
- Ingredient Notes and Variations for Your Berry Pie
- Serving Suggestions for This Classic American Berry Pie
- Frequently Asked Questions About Making Berry Pie
- Sharing Your Gourmet Gaze Berry Pie Creations
Why This Is the Best Berry Pie Recipe You Will Ever Make
I know, I know—everyone claims their recipe is the absolute Best Berry Pie Recipe. But seriously, stand by me on this one. My corporate life taught me how to analyze weak points, and the weak point in almost every fruit pie is that crust or that filling. We fixed both! You won’t find a limp bottom crust here, nor a watery mess pooling on your plate. This recipe guarantees a Perfectly Set Fruit Filling Pie, every time you bake it.
Achieving the Signature Flaky Pie Crust Tutorial
This is where butter meets willpower. My all-butter crust isn’t just good; it’s legendary. The secret to a real Flaky Pie Crust Tutorial is accepting that dough must be cold—I mean truly ice cold! Those pieces of butter need to survive the mixing process mostly intact so they steam into beautiful, distinct layers while baking. It creates that shatteringly crisp, Buttery Pie Crust Recipe texture we all dream about.
No Runny Berry Pie Filling Secrets Revealed
This is the game-changer, folks. If you’ve ever cursed a soggy slice, this next part is for you. The key to my No Runny Berry Pie Filling Secrets is actually simple: cornstarch, used correctly. We coat those berries generously *before* they even hit the crust. It absorbs all that glorious juice as it heats up, giving you a thick, glossy filling that holds its shape beautifully, even if you are using Mixed Berry Pie with Frozen Berries.
Ingredients for Your Ultimate Mixed Berry Pie
Here’s where we put the plan into motion. When I build a recipe, I obsess over the ingredient list because clarity builds confidence. If you have the right tools—and by tools, I mean accurate measurements—you’re already halfway to nailing this show-stopping berry pie. Remember, we’re aiming for that bakery-quality texture, so don’t swap out that cold butter for anything less premium!
For the Flaky Double Crust Berry Pie
This pie relies on structure, and structure comes from keeping things frigid. For the pastry, you’ll need the basics, but the *state* of those basics is everything. We start with 2 1/2 cups of good all-purpose flour and a teaspoon of salt for flavor balance. The star, though, is the fat: you must use 1 cup (that’s two full sticks!) of **cold unsalted butter, cut into cubes**. I mean cold right out of the fridge. Then, we slowly add about 1/2 cup of **ice water**, plus maybe a splash more if the dough needs coaxing. Don’t be tempted to use room-temperature anything here; cold ingredients equal separation, and separation equals flaky layers!
For the Perfectly Set Fruit Filling Pie
This is the juicy heart of the dessert. You’ll need about 6 cups of mixed berries—use whatever looks best that week! I love a combination: strawberries for sweetness, blueberries for that deep color, raspberries for tang, and maybe some blackberries if I’m feeling ambitious. To ensure you get that **Perfectly Set Fruit Filling Pie** and not a soupy disaster, we are using 1/4 cup of **cornstarch** as our main thickener. Mix that with 1 1/2 cups of granulated sugar (taste your berries first; you can tweak this!) alongside a tablespoon of bright lemon juice for balance, and just a whisper of ground cinnamon to enhance the fruit.
How to Prepare the Flaky Crust for Your Berry Pie
Alright, let’s tackle the foundation of this masterpiece: the crust. I honestly think people get intimidated by pastry, but once you understand the science—and trust me, after watching bakers along my road trip, I feel like I finally get it—it’s surprisingly intuitive. We are only focusing on Step 1 here, the dough making, because this is where we guarantee that shatteringly flaky texture.
Get your flour and salt ready in a large, wide bowl—the wider the bowl, the easier it is to blend without overworking things. Now, toss in those cubes of **cold unsalted butter** you cut earlier. You need to cut that butter into the flour. I prefer using a pastry blender because it keeps my hands from warming up the fat too much, but if you only have your fingertips, that works too. You’re aiming for inconsistency, which sounds weird, but it’s true! You want some bits to be the size of small peas, and some bits can be slightly larger, maybe the size of a kidney bean. Those larger pieces are what turn into steam pockets in the oven, giving you those beautiful, flaky layers in your berry pie.
Next comes the liquid—and this is crucial. Take your ice water. I mean *ice* water, maybe even with a few little ice shards floating in it. You add it slowly, maybe a tablespoon at a time, gently bringing the shaggy mix together with a fork. Stop the second the dough starts really clinging together. If you squeeze a piece and it holds its shape, you are basically done mixing! Overmixing develops gluten, and gluten makes tough pastry, which is the enemy of a good crust.
Once you have two roughly formed balls of dough—one for the bottom and one for the top—flatten each one into a nice, neat disk. Wrap them tightly in plastic wrap. Now, this part is non-negotiable if you want that professional result: they go into the refrigerator, and they stay there for at least a full hour. Don’t rush this! Chilling lets the gluten relax and the butter firm up again. Think of it as preparing your dough for battle; it needs to rest after all that gentle handling before it can shine in the oven.
Assembling the Mixed Berry Pie: From Bowl to Plate
Okay, our beautiful, firm dough disks have rested, and that berry mixture is waiting patiently! This assembly stage is pure choreography, turning those components into your stunning Mixed Berry Pie centerpiece. We start with the filling—and trust me, we toss it gently. You want the cornstarch coating to stay on every berry, so use a big rubber spatula and fold everything together like you’re handling fine silk. We don’t want to mash those strawberries!
Now for the bottom crust. Lightly flour your counter—just a dusting, we don’t want to add unnecessary flour to the dough itself. Roll out one disk into about a 12-inch circle. If you’re nervous about moving it, roll the dough around your rolling pin, then unroll it gently over your 9-inch pie plate. Don’t panic if it cracks a little; that’s okay! Just use your fingers to gently press it into the bottom and up the sides—this is part of what makes it a truly rustic, homemade fruit pie.
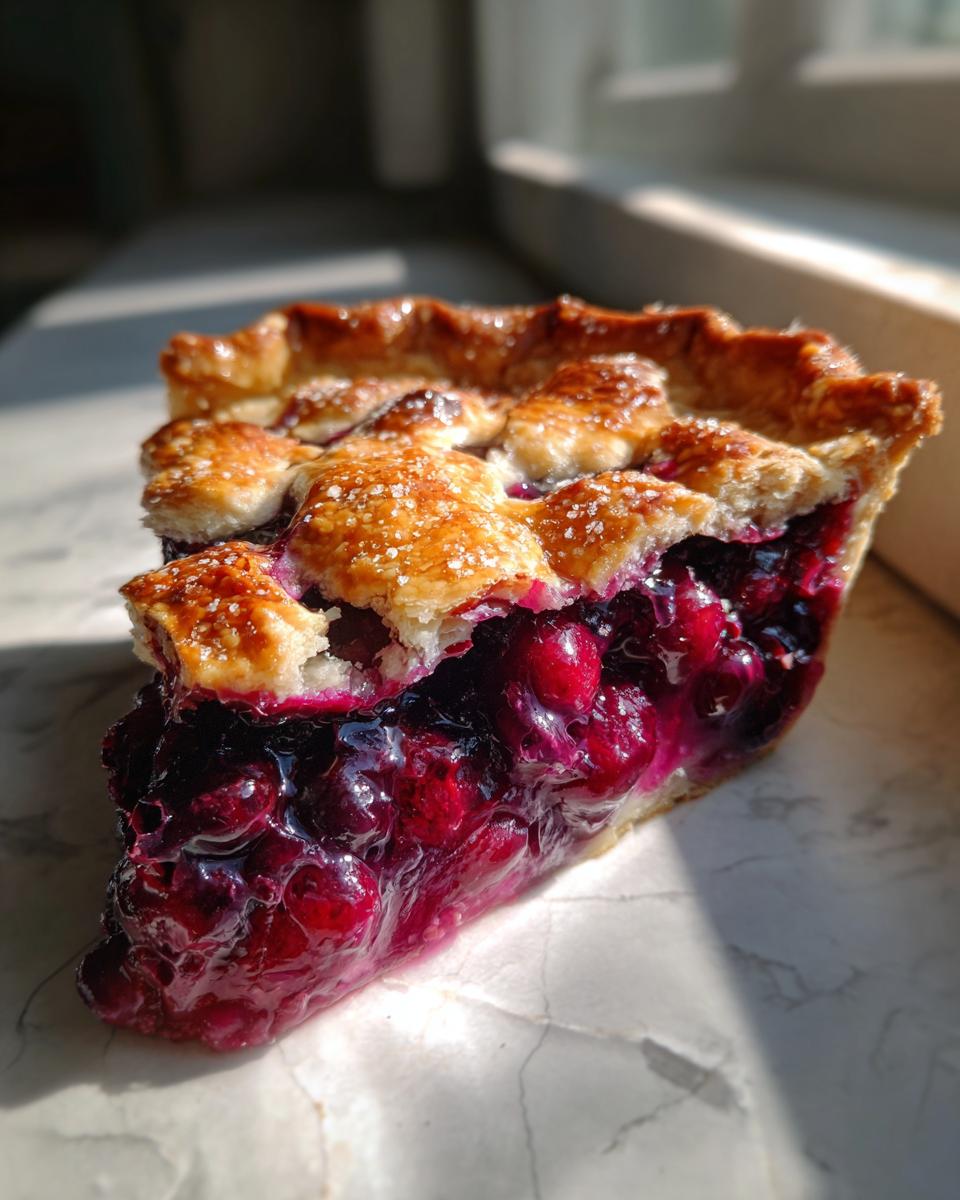
Pour in all those sugared-up berries. If you want that signature richness, dot the top of the fruit with a few tiny slivers of leftover cold butter; it melts down during baking and adds depth. Now, you tackle the top. Do you want a solid lid, or are you feeling artistic with a lattice? Either way, roll out that second disk. If you’re going with a full top crust for that classic Double Crust Berry Pie look, lay it over and then it’s time to seal the deal.
Tips for Rolling and Sealing the Berry Pie Dough
Sealing is so important because if there’s a gap, your gorgeous filling will leak out and burn onto the bottom of your oven—and nobody wants that cleanup! Take the excess dough from the bottom crust and the top crust and gently press them together around the rim, maybe giving it a little crimp with your fingers or a fork. Think of it like sealing a big envelope.
Once sealed, you **must** vent the top. If you used a full crust, cut at least four slits right across the center. These are those essential escape routes for steam. If steam can’t get out, it builds pressure and blows your crust apart, or worse, turns the top edge soggy. Remember, this pie is packed with moisture, so give it somewhere to breathe!
Baking Your Berry Pie to Golden Perfection
We’ve done all the hard work: the butter is cold, the berries are coated, and that gorgeous top crust is sealed tight. Now comes the transformation! Baking a show-stopping berry pie is all about managing heat. You need high heat at the beginning to ‘set’ that beautiful, flaky crust so it doesn’t shrink or get soggy, and then lower heat for the long, slow cook to make sure the interior gets cooked through without burning the edges.
Start by setting your oven temperature pretty high—we’re talking 400°F (200°C). Pop that pie onto a baking sheet first; this is a pro-tip I learned from a baker in Oregon. It catches any inevitable filling overflow, saving you from scrubbing burnt sugar off the bottom of your oven, and it helps the bottom crust bake evenly. Bake it hot for just 20 minutes.
Once you see the edges of the crust starting to lightly brown and puff up, it’s time to turn things down. Lower the thermostat to 375°F (190°C). This reduction in temperature allows the inside of that beautiful mixed berry filling to heat up slowly, giving the cornstarch time to do its thickening magic. You’ll continue baking for another 35 to 45 minutes at this lower temp.
How do you know when it’s definitively done? Don’t just rely on the color of the crust! You are looking for visual proof that the filling is set. You want to see the juices bubbling—but here’s the detail: the bubbles should be thick, slow, and gloopy, not thin and watery. If you see that thick, syrupy bubbling coming eagerly through those steam vents, you’ve hit the jackpot. That means your cornstarch has activated, and you absolutely have achieved that promise of a No Runny Berry Pie Filling Secrets success!
The Crucial Cooling Phase for a Sliceable Berry Pie
Listen to me closely now, because this step is where most home bakers fail their beautiful berry pie. You’ve pulled that golden wonder out of the oven, the filling is bubbling dramatically, and it smells absolutely incredible. Your instinct? Slice it immediately! Please, resist that urge with all your might. This is the most important moment for guaranteeing a Perfectly Set Fruit Filling Pie.
If you cut into a piping hot fruit pie, that filling is still in a liquid state, even with the cornstarch working overtime. It’s just too hot to hold its structure. When you slice it, everything spreads out, and you get that watery puddle we worked so hard to avoid. I learned this the hard way making my first batch of Summer Berry Desserts!
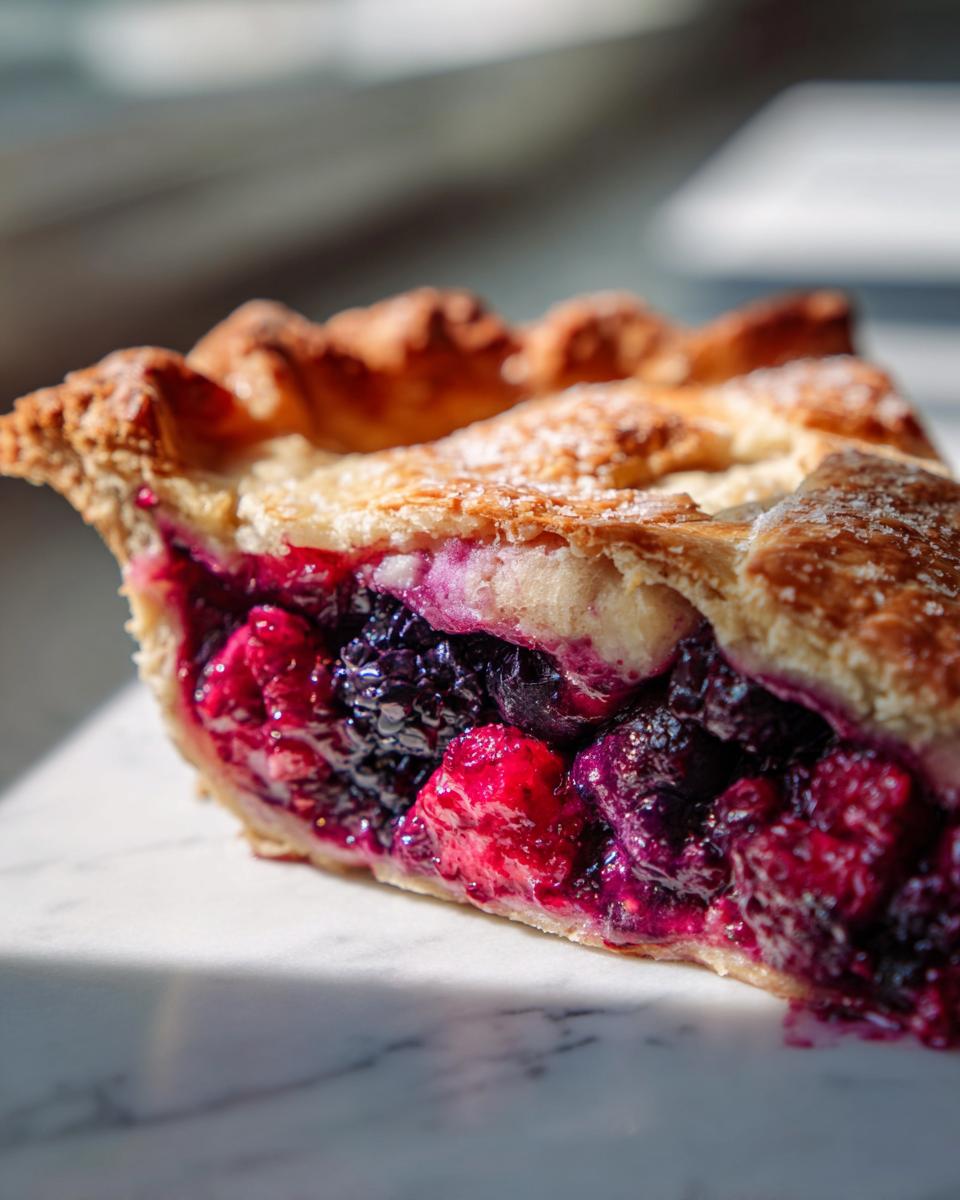
Once it’s out of the oven, the pie needs to sit on a wire rack. Do not cover it! Let it just breathe and cool down naturally. I’m telling you, you must aim for a minimum of four hours of cooling time. Four hours! Seriously, if you can wait that long, the cornstarch granules will fully hydrate, tighten up, and trap all that wonderful berry juice into a beautiful, cohesive gel. When you finally slice into that pie after four hours, you will get clean, sharp slices that show off that gorgeous interior filling.
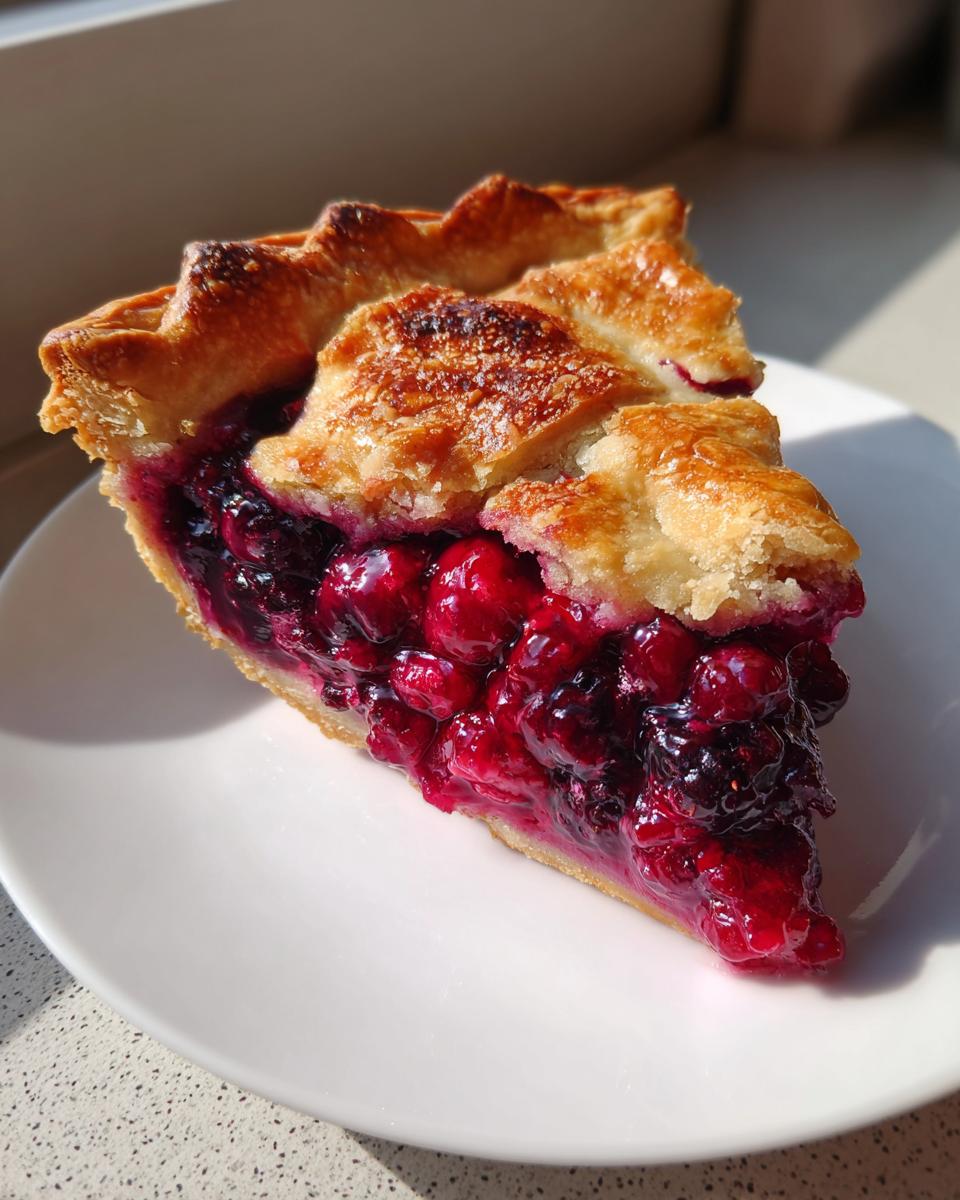
This waiting period is tough, I know—it’s the last hurdle before the payoff. But trust me, patience here turns a good berry pie into one of those remarkable desserts you see in bakery windows. A slightly warm slice is fine, but let it cool significantly first. You’ll thank me when you see that perfect slice!
Ingredient Notes and Variations for Your Berry Pie
I always try to give people the flexibility they need in the kitchen. Baking shouldn’t feel like a rigid chemistry exam, even when we’re focused on technique! The beauty of this specific mixed berry pie is that it’s forgiving enough to handle what you have on hand, whether it’s a freezer haul or a sudden desire to skip the top crust entirely. As I discovered while traveling and relying on local produce, adapting is key to making the seasonal fruit pie recipes work for you.
Adapting Your Berry Pie with Frozen Berries
One question I get asked constantly is about using berries from the freezer. Can you do it? Yes, absolutely! In fact, sometimes frozen berries are even better because they were picked at peak ripeness. The absolute golden rule here is: Do not thaw them first! If you thaw them, you’ll just end up with a bowl full of berry-colored water, and that defeats the purpose of our cornstarch thickening strategy. Toss those frozen beauties in with the dry ingredients straight from the freezer.
Because frozen berries start colder than fresh ones, they take a bit longer to reach the necessary internal temperature for the filling to set properly. So, if you use them, just be prepared to leave your berry pie in the oven for an extra five to ten minutes. Keep watching for that thick, slow bubbling through the vents. That visual cue is always more reliable than the clock!
Switching the Topping: Crumble vs. Double Crust Berry Pie
While this recipe shines as a classic Double Crust Berry Pie, sometimes you just don’t have the energy for rolling out that second disk of dough, and that’s perfectly fine! If you want a change of pace and a wonderful textural contrast to the juicy interior, lean into a crumble topping. This is what I often do when I’m making a quick Summer Berry Dessert.
To make a simple crumble—which makes this into a delightful Berry Pie with Crumble Topping—you create a streusel. Just mix together about a cup of flour, half a cup of regular sugar, a quarter cup of brown sugar, a half cup of rolled oats (if you have them!), and half a cup of very cold butter cut into small bits. Use your hands or a fork to mash everything together until you have coarse, buttery crumbs. Sprinkle this evenly over the berry filling instead of the top crust. It bakes up wonderfully golden and crunchy!
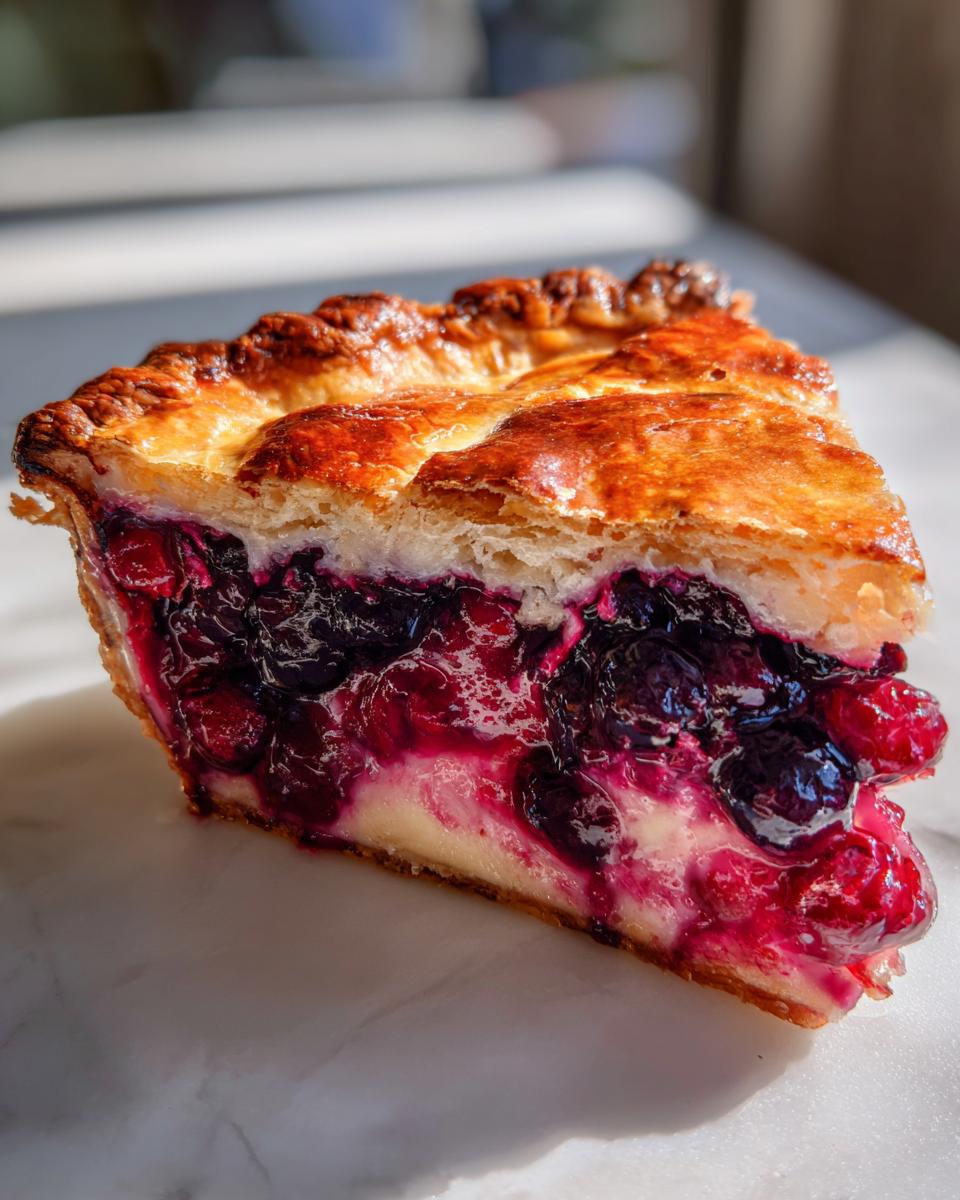
Serving Suggestions for This Classic American Berry Pie
We’ve done the hard work, and your ultimate mixed berry pie is cooling perfectly. Now, we elevate it from fantastic homemade baking to an absolutely unforgettable dessert experience! Since this pie is so intensely flavorful and rich with those buttery crust crumbs, it pairs beautifully with something cool and simple.
When I first started making these pies during my culinary explorations, they were always served à la mode. It’s a classic for a reason! A generous scoop of high-quality vanilla bean ice cream melting slowly over that warm (but not too hot!) filling creates this beautiful, unplanned sauce on your plate. It’s pure comfort food magic.
If you want something a little lighter, skip the ice cream and opt for a dollop of freshly whipped heavy cream. You can sweeten the cream lightly with powdered sugar and a tiny splash of vanilla extract. The lightness of the whipped cream cuts through the richness of the pastry and highlights the tartness of the berries perfectly. It’s truly the standard way to present these magnificent Summer Berry Desserts.
For a truly decadent experience, try pairing a slice with a tiny drizzle of balsamic glaze. Yes, balsamic! A high-quality, thick balsamic paired with ripe berries brings out an incredible depth of flavor you won’t expect. It’s a little unexpected, just like that delicious shrimp creole that started my whole journey!
If you’ve managed to save any of your beautiful pie for breakfast the next day—and I commend you if you did—grab a hot cup of coffee. There is simply no better start to the day than cold berry pie and dark roast. You can see some other amazing inspiration for fruity desserts over at The Liffey!
Frequently Asked Questions About Making Berry Pie
Even when you follow a recipe perfectly, questions always pop up when you’re working with delicate fruit and pastry. I’ve gathered the ones I hear most often since I started experimenting with fruit desserts. Getting these little technical details right is what elevates your bake from good to truly gourmet!
What is the best sugar to use in a berry pie?
For my Ultimate Mixed berry pie, I almost always default to granulated sugar. Why? Because it offers predictable sweetness and dissolves nicely without drastically changing the overall texture of the filling. However, if you’re making a more rustic dessert and want notes of deep caramel—especially if you’re using blackberries—feel free to swap about a quarter of your sugar for dark brown sugar. Just be aware that brown sugar adds a little more moisture, so you might need to add just a tiny extra pinch of cornstarch if you do that substitution.
How do I prevent the bottom crust from getting soggy in my berry pie?
Soggy bottoms are a nightmare, aren’t they? They ruin that beautiful flaky texture we worked so hard for! The first defense, as we covered, is baking the pie on a hot sheet pan, which transfers a lot of heat quickly to the bottom crust. But here’s an extra layer of insurance: once your bottom crust is in the plate and trimmed (before you add any filling!), brush the entire inside surface with a lightly beaten egg white. Let that egg white dry for just five minutes. That creates a slight, waterproof barrier that stops the juices from soaking into the pastry during those first crucial baking minutes. It sounds simple, but it works wonders!
Can I use only one type of berry, like a Triple Berry Pie recipe?
Absolutely! You can certainly make a dedicated strawberry pie or blueberry pie if that’s what your heart desires. If you’re wondering How to Make Triple Berry Pie using just one type, remember that different berries release different amounts of liquid. Strawberries and raspberries are usually thirstier than blueberries. If you are using only one wetter berry, like raspberries, you might want to slightly increase that cornstarch from 1/4 cup to maybe 5 tablespoons, just to make sure you still get that nice, clean slice at the end. But generally, the recipe is very adaptable!
Sharing Your Gourmet Gaze Berry Pie Creations
Now that you have wrestled that flaky crust into submission and achieved a perfectly set berry pie filling, I genuinely want to see what you created! Remember how I said cooking is about sharing stories? This recipe is waiting for *your* story to be added to it.
When you bake this ultimate mixed berry pie, please do me a favor: come back here and leave a rating. Five stars are lovely, of course, but honestly, I want to know the details! Did your crust shatter exactly how mine does? More importantly, tell me how that filling held up the next day. Did you manage to wait the full four hours before slicing? Those little notes you leave help the next person who is staring down their own pastry fearfully build their confidence.
If you snap a photo—and knowing how much we eat with our eyes first, I bet you did—tag me on social media! Seeing those golden edges and that jewel-toned interior filling makes my day. It reminds me why I ditched my old marketing job; it was all leading to moments like these, sharing truly satisfying food with people like you.
If you have any lingering questions or need troubleshooting help about making the perfect fruit pie, don’t hesitate to reach out through the contact page. Let’s keep the conversation going and move on to making our next culinary masterpiece together!
PrintUltimate Mixed Berry Pie with Flaky Crust and Foolproof Filling
Make the best berry pie you have ever tasted. This recipe delivers a truly flaky, all-butter crust and a perfectly set mixed berry filling that never runs, working well with both fresh and frozen berries.
- Prep Time: 35 min
- Cook Time: 60 min
- Total Time: 105 min
- Yield: 8 servings 1x
- Category: Dessert
- Method: Baking
- Cuisine: American
- Diet: Vegetarian
Ingredients
- 2 1/2 cups all-purpose flour
- 1 teaspoon salt
- 1 cup (2 sticks) cold unsalted butter, cut into cubes
- 1/2 cup ice water, plus more if needed
- 6 cups mixed berries (strawberries, blueberries, raspberries, blackberries)
- 1 1/2 cups granulated sugar (adjust based on berry sweetness)
- 1/4 cup cornstarch (for thickening)
- 1 tablespoon lemon juice
- 1/4 teaspoon ground cinnamon
- 1 large egg, beaten with 1 teaspoon water (for egg wash)
- 1 tablespoon coarse sugar for sprinkling
Instructions
- Prepare the Flaky Pie Crust: In a large bowl, whisk together the flour and salt. Cut in the cold butter using a pastry blender or your fingertips until the mixture resembles coarse crumbs with some pea-sized pieces of butter remaining. Gradually add the ice water, one tablespoon at a time, mixing until the dough just comes together. Do not overmix. Divide the dough in half, flatten each half into a disk, wrap in plastic, and chill for at least 1 hour.
- Prepare the Berry Filling: In a separate bowl, gently combine the mixed berries, granulated sugar, cornstarch, lemon juice, and cinnamon. Toss lightly until the berries are evenly coated. The cornstarch is key to achieving a perfectly set fruit filling. Let the mixture sit for 15 minutes while you roll out the dough.
- Assemble the Pie: Preheat your oven to 400°F (200°C). On a lightly floured surface, roll out one dough disk into a 12-inch circle. Carefully transfer the dough to a 9-inch pie plate. Trim the edges, leaving a 1-inch overhang.
- Fill the Pie: Pour the berry mixture into the bottom crust. Dot the top of the filling with a few small pieces of leftover butter if desired for richness.
- Top the Pie: Roll out the second dough disk. You can create a full top crust or cut strips to make a lattice top for a beautiful presentation. Place the top crust over the filling. Crimp the edges to seal the top and bottom crusts together. Cut several slits in the top crust to allow steam to escape.
- Bake: Brush the top crust lightly with the egg wash and sprinkle with coarse sugar. Place the pie on a baking sheet (to catch drips). Bake at 400°F (200°C) for 20 minutes. Then, reduce the oven temperature to 375°F (190°C) and continue baking for another 35 to 45 minutes, or until the crust is golden brown and the filling is visibly bubbling thickly.
- Cool Completely: This step is crucial for a no runny berry pie filling. Let the berry pie cool on a wire rack for at least 4 hours before slicing. This allows the cornstarch to fully set the juices.
Notes
- If using frozen berries, do not thaw them first. You may need to add 5-10 minutes to the total baking time.
- For an extra flaky pie crust tutorial, ensure your butter remains very cold throughout the mixing process.
- This recipe works well as a classic double crust berry pie or you can substitute the top crust with a crumble topping made from oats, flour, butter, and brown sugar.
Nutrition
- Serving Size: 1 slice
- Calories: 450
- Sugar: 35g
- Sodium: 250mg
- Fat: 25g
- Saturated Fat: 15g
- Unsaturated Fat: 10g
- Trans Fat: 0g
- Carbohydrates: 58g
- Fiber: 4g
- Protein: 5g
- Cholesterol: 60mg