
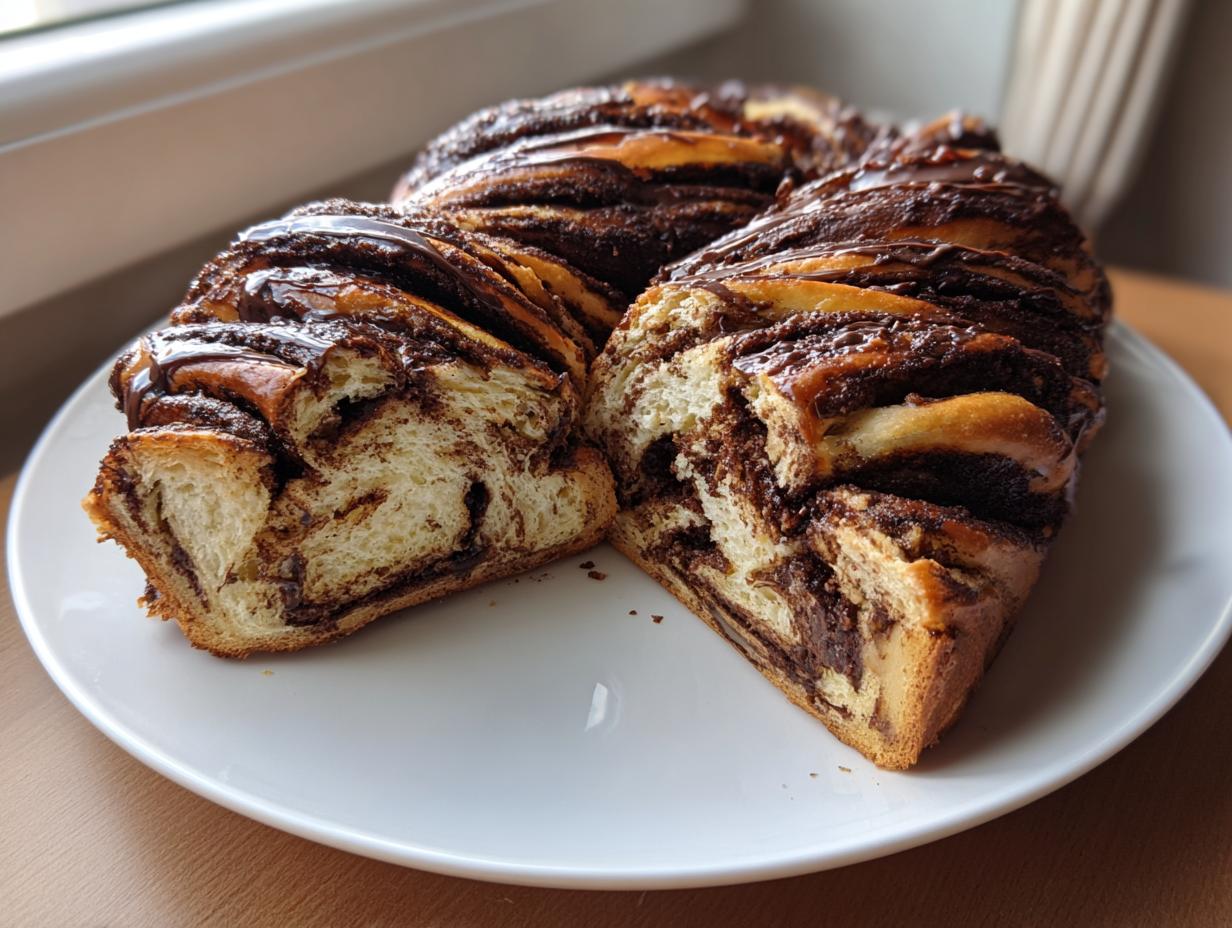

When I was still chasing deadlines instead of dough, the idea of producing bakery-quality pastries at home felt utterly impossible. If you’ve ever stared longingly at those perfectly laminated spirals in a display case, I get it. But trust me, you absolutely *can* recreate that magic right on your kitchen counter. That’s why I spent countless hours perfecting the Best Homemade Chocolate Babka Recipe you see here. Forget those dry, underwhelming versions you find pre-packaged. This recipe is my answer to creating a truly decadent chocolate babka with a texture so tender and swirls so pronounced, it’ll change how you think about yeast bread desserts forever.
- Why This Homemade Chocolate Babka Recipe Delivers Showstopping Results
- Gathering Ingredients for Your Decadent Chocolate Babka Loaf
- Step-by-Step Instructions for the Best Homemade Chocolate Babka Recipe
- Tips for Success with Your Chocolate Babka Baking
- Serving Suggestions for This Rich Chocolate Swirl Bread
- Storage and Reheating Instructions for Tender Crumb Babka
- Frequently Asked Questions About Making Chocolate Babka
- Nutritional Estimate for Your Homemade Chocolate Babka
- Share Your Showstopping Dessert Bread Experience
Why This Homemade Chocolate Babka Recipe Delivers Showstopping Results
When I finally nailed this recipe, I immediately thought, “This is why I left spreadsheets behind.” You see, most store-bought loaves are dense, dry hockey pucks. This chocolate babka is different. It’s built right—from the ingredients up—to guarantee an incredible eating experience every single time you pull it out of the oven. Trust me, this is the Best Chocolate Babka Recipe you’ll be using for years.
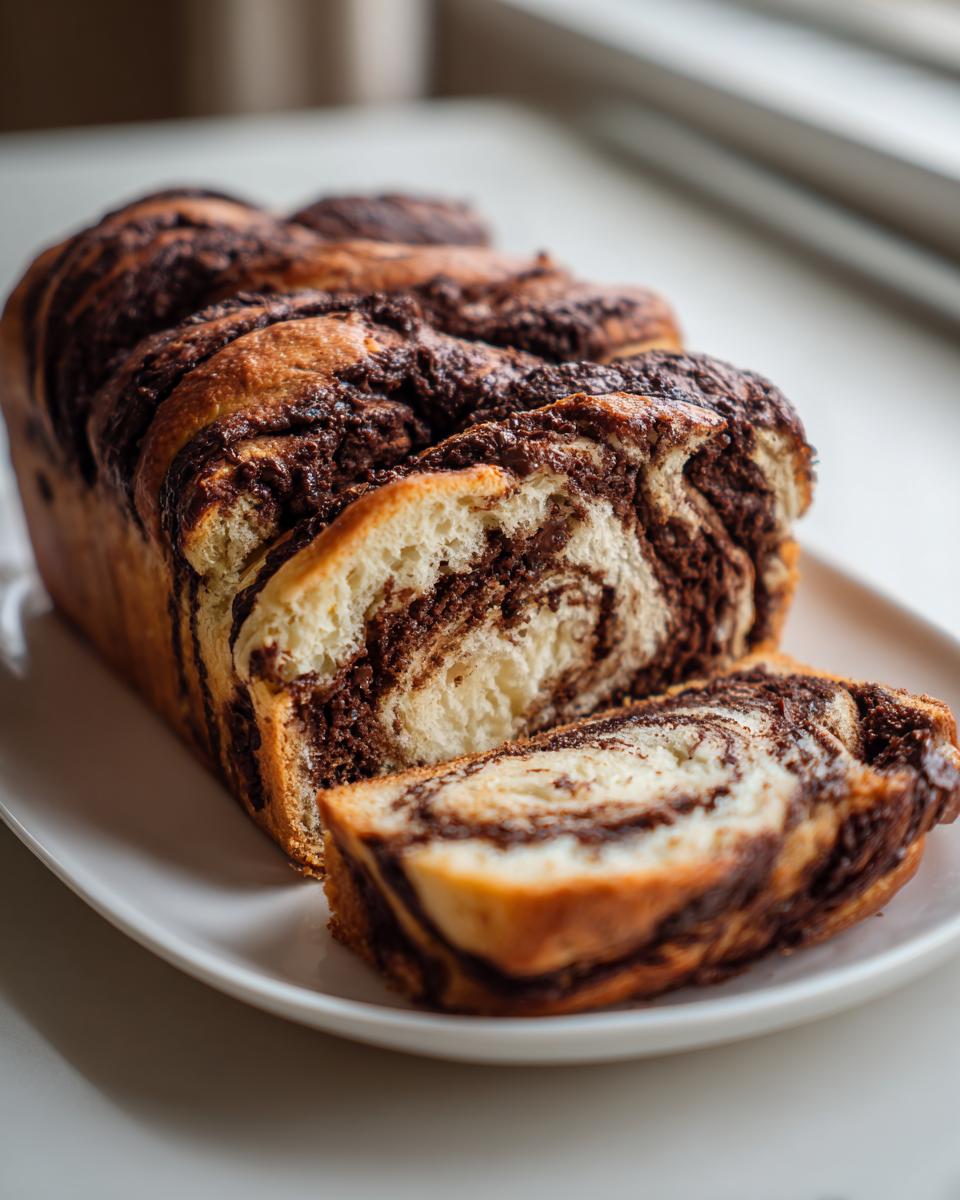
- This decadent delight is easier than you think when you follow these detailed steps.
- It rivals any high-end bakery item, giving you that incredible feeling of accomplishment as a showstopping dessert bread creator.
The Rich Chocolate Brioche Dough
We aren’t messing around with a standard white bread dough here. This recipe calls for a brioche-style dough, which means **more** butter and **more** eggs. That extra richness is the structural secret to achieving a truly soft and fluffy babka that melts in your mouth. It has that luxurious chew without being heavy.
Achieving the Perfect Babka Swirl Technique
This is where the magic happens, and honestly, it’s less scary than it looks! I’ll walk you through the exact way to roll, layer, and twist the dough so you get those gorgeous, visible stripes. We are aiming for that highly sought-after rich chocolate swirl bread look that makes every slice postcard-perfect. That beautiful contrast between the pale dough and the dark filling is the signature of a great chocolate babka.
Moist Chocolate Bread Guaranteed with a Simple Syrup
Bakers, listen up: the final step makes all the difference. We aren’t just letting it cool; we are hitting it straight out of the oven with a simple sugar syrup. This instantly creates that signature sheen, resulting in a glossy glazed babka that stays unbelievably tender for days. It locks in the moisture, transforming your chocolate babka into the perfect moist chocolate bread.
Gathering Ingredients for Your Decadent Chocolate Babka Loaf
You know how I always say that a great result starts with great prep? Well, that couldn’t be truer for a tender, rich chocolate babka. Before we even think about activating the yeast, we need to gather our players. Remember, precision matters here—especially with butter temperatures! When you’re ready to bake this amazing chocolate filled sweet bread, make sure you have everything measured out. Getting organized first is the key to having a smooth weekend baking project!
You can find links to fantastic pantry staples for all your breakfast and brunch baking needs right here on the site.
For the Rich Chocolate Brioche Dough
This is the foundation of your super soft loaf! When you pull out the eggs, make sure they’ve been sitting on the counter for a good 30 minutes. Room temperature eggs emulsify much better into the dough, giving us that flawless texture we are aiming for.
- 1 cup whole milk, warmed to 110°F (That’s warm to the touch, but not hot enough to burn you!)
- 2 1/4 teaspoons active dry yeast
- 1/2 cup granulated sugar
- 3 large eggs, room temperature
- 1 teaspoon vanilla extract
- 4 cups all-purpose flour, plus more for dusting
- 1 teaspoon salt
- 1/2 cup (1 stick) unsalted butter, softened and cut into pieces (Make sure it’s soft!)
For the Decadent Chocolate Filling
This is the star of the chocolate swirls! The butter here absolutely *must* be perfectly soft—like peanut butter consistency. If it’s too cold, you’ll get lumps, and if it’s melted, it will soak right into the dough, and we won’t get those beautiful layers.
- 1 cup (2 sticks) unsalted butter, softened
- 1 cup packed light brown sugar
- 3/4 cup unsweetened cocoa powder
- 1 teaspoon vanilla extract
- 1/2 teaspoon salt
- 1 cup bittersweet chocolate, finely chopped (Please chop it small! This helps it spread evenly.)
For the Glossy Syrup Glaze
Don’t skip this step! This simple sugar wash is what makes your chocolate babka shine like it just came from the oven.
- 1/2 cup granulated sugar
- 1/2 cup water
Step-by-Step Instructions for the Best Homemade Chocolate Babka Recipe
Alright, deep breaths! This is the stage where we take those gorgeous ingredients and turn them into the showstopper chocolate babka you’ve been dreaming of making. Baking with yeast can feel intimidating—I certainly had a few flat, dense bricks when I started—but following these steps precisely will unlock that beautiful, tender crumb. We’re moving from simple ingredients to your very own bakery style pastry at home!
Preparing the Chocolate Brioche Dough
First up, we wake up the yeast. That fizzing action tells you it’s alive and ready to work its magic on our brioche dough. Combine that foamy mixture with the sugar, eggs, and vanilla in your stand mixer. Then, we add the flour and salt to make a shaggy mass. Now comes the slow part: the butter. Add it in pieces while the mixer runs on low speed. I cannot stress this enough: be patient here! You need that butter incorporated slowly so the dough doesn’t break.
Once all the butter is in, crank the speed up slightly and let that dough hook work for a solid 8 to 10 minutes. If you stop too soon? You’ll end up with a tough, dense loaf, and nobody wants that! You are looking for a dough that snaps back when you poke it. This slow knead builds the structure for that amazing texture.
First Rise and Filling Preparation
Once your dough is elastic and smooth—truly beautiful—get it into an oiled bowl, cover it up, and let it rest somewhere warm for 1.5 to 2 hours. It needs to double in size. While the dough is puffing up, it’s the perfect time to whip up that filling. You can browse more behind-the-scenes techniques over on the Gourmet Gaze blog!
For the filling, you want your butter perfectly softened—again, no shortcuts! Beat that butter with the brown sugar until it’s light and creamy. Then beat in the cocoa, vanilla, and salt. When you stir in that final, finely chopped bittersweet chocolate, it should be a thick, spreadable paste. If it seems too loose, pop the bowl in the fridge for 15 minutes. We want it cohesive for rolling!
Mastering the Perfect Babka Swirl Technique
This technique is what separates good chocolate babka from *great* chocolate babka. Gently punch the air out of your risen dough and turn it onto a lightly floured surface. Roll it into a large, thin rectangle—aim for about 12 by 18 inches. Don’t worry if it’s a little uneven; we hide those bumps later!
Spread that glorious filling evenly across the dough, but stop about a half-inch short on one of the long sides; this is our seal. Now, starting from the long edge *opposite* that empty boundary, roll it up *tightly* into a log. Pinch that seam closed hard! When you’re happy with the seal, take a long, sharp knife and slice that log straight down the middle, splitting the dough so you see all those beautiful chocolate layers.
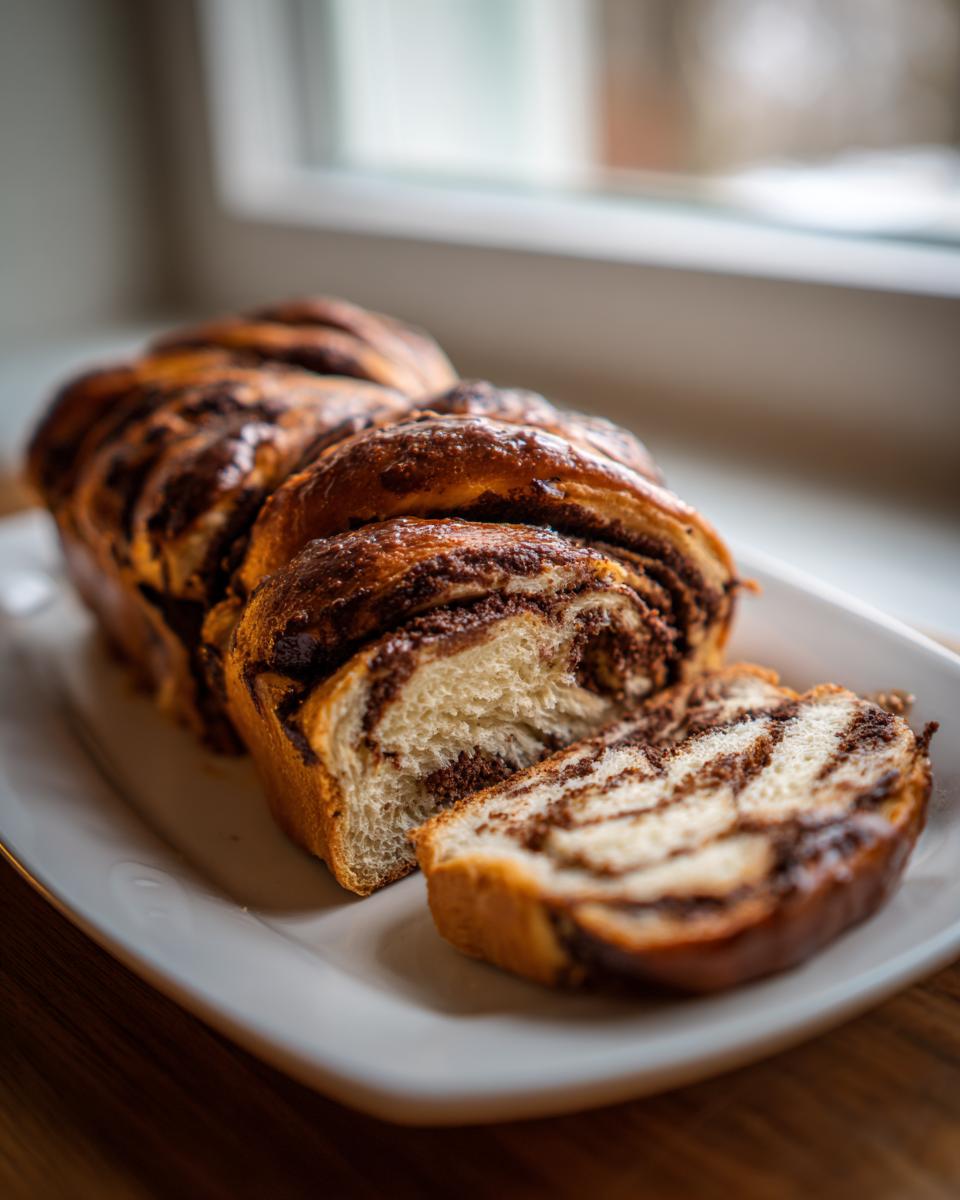
Lay the two halves side-by-side with the cut sides facing up to the sky. Now, gently twist them around each other, making sure those beautiful ribbons stay visible on top the entire time. Pinch the ends together securely and carefully transfer that twisted beauty into your greased 9×5 inch loaf pan. Cover it loosely and let it sit for 45 to 60 minutes for its final puff.
Second Rise and Baking the Chocolate Babka
About 15 minutes before the second rise is up, fire up your oven to 350°F (175°C). When the dough looks puffy and feels pillowy, it’s ready for its heat bath. Bake it for 35 to 45 minutes. If you notice the top is getting too dark before the center is cooked—and this happens because of all that sugar—just drape a piece of aluminum foil loosely over the top to shield it.
How do you know if your chocolate babka is done? We rely on temperature, not just guesswork! You want the internal temperature to hit 200°F (93°C). If it’s under that, give it five more minutes and check again.
Finishing Touches: Syrup Glaze Application
While your loaf is busy baking, let’s make that shiny finish. Combine the water and sugar in a small saucepan over medium heat. Just bring it to a boil until the sugar dissolves completely—no need to cook it long! As soon as you pull that hot chocolate babka out of the oven, grab a pastry brush and immediately brush that warm syrup all over the top and sides. Don’t be shy with it! The heat of the bread will soak up that syrup instantly, locking in moisture and giving you that incredible, glossy look that makes this homemade chocolate babka so memorable.
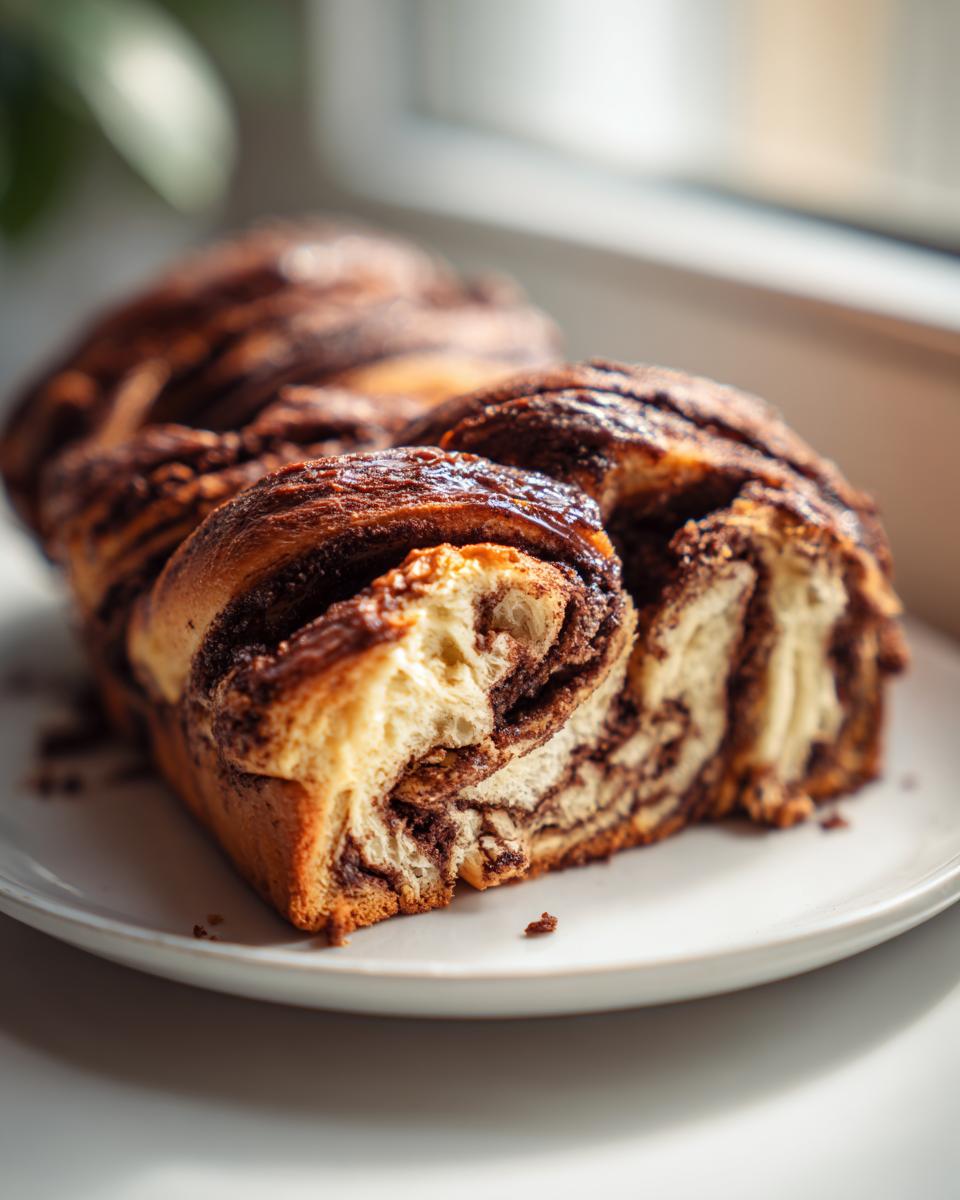
Let it sit in the pan for about 15 minutes to firm up slightly before turning it out onto a wire rack to cool completely. If you cut it hot, you’ll squash the tender crumb we worked so hard for!
Tips for Success with Your Chocolate Babka Baking
Even with the best recipe, sometimes a little extra insight can make the difference between a good bake and a jaw-dropping one. I’ve learned a few things through trial and (of course) error while trying to nail that perfect swirl every time. These tips are the shortcuts I wish someone had told me when I was first trying to master the **chocolate babka** process.
If you’re looking for other amazing yeast recipes that challenge you just a bit, you should check out my guide on how to make perfect cinnamon rolls. The dough handling is very similar!
Dough Temperature Control
I talked about keeping your filling at the right temperature earlier, but let’s revisit that because it’s so critical for the visual payoff. When you roll out your dough and spread that thick chocolate filling, you want the filling to be cool—not rock hard, but definitely firm. If the filling is too warm, it melts immediately when it hits the dough; it just absorbs right in, and when you roll it up, you get a dull brown log instead of distinct, gorgeous layers.
A cooler filling gives you the structure you need to perform that beautiful long slice and twist. It allows the chocolate to hold its shape just long enough for you to manipulate the dough before it warms up too much from the friction! Trust me, chilled filling equals defined swirls.
Making the Chocolate Filled Sweet Bread Ahead of Time
This is a lifesaver if you are planning this for a holiday brunch or just want to break up the work over two days. You can absolutely make the dough a day in advance! Once the dough has finished its first rise—when it’s doubled and puffy—give it a gentle punch down, wrap it tightly in plastic wrap, and stick it right into the refrigerator. Overnight chilling gives the flavor a chance to deepen, which is fantastic for a chocolate filled sweet bread.
Here’s the essential part of the make-ahead trick: You can’t roll out ice-cold dough! Take it out of the fridge about 60 to 90 minutes before you plan to roll it. You want it pliable—soft enough that it stretches without fighting you back—but still slightly cool. If you leave it out too long, it will start to ferment too much, and you lose that tight structure we need for the best swirl. You can find a few other excellent tips for making decadent pastries like this over at Topp Kitchen.
And here’s my bonus expert tip for beginners: When slicing the dough lengthwise for the braid, use floss or dental string instead of a knife! Seriously! A knife tends to drag and compress the soft dough layers. Thin, unwaxed dental floss, pulled tautly beneath the dough log and sawed gently through the center, gives you the cleanest possible cut, showcasing those beautiful layers perfectly!
Serving Suggestions for This Rich Chocolate Swirl Bread
I know you’re looking at that loaf cooling on the rack and wondering the best way to serve this masterpiece. Frankly, any excuse to eat this bread is a good one, but I have a few favorite ways to serve my finished loaf—especially when I’ve spent half a weekend perfecting that dough!
It truly shines as a spectacular centerpiece for a holiday brunch recipe. Slice it thick and arrange it dramatically on a tiered platter. The glossy glaze catches the light beautifully, making it look exactly like those stunning shots you see online. If you have guests coming over, I highly recommend making my dark, velvety French Hot Chocolate to serve alongside it. The deep bitterness of the cocoa is the perfect counterpoint to the sweet brioche structure.
But honestly? My favorite use is for a quiet morning. Slice a piece, warm it gently in a toaster oven for just 30 seconds until it’s soft again, and enjoy it with a strong cup of black coffee. It’s the ultimate coffee date treat enjoyed right here in my kitchen. Sometimes, the best way to enjoy a showstopping dessert bread is simply a quiet moment with yourself!
If you’re looking for other decadent options that call for a little bit of that special effort, check out what the folks at CookTune suggest for pairing their chocolate treats!
Storage and Reheating Instructions for Tender Crumb Babka
Okay, this is the part where we protect our hard work! We put so much effort into making sure this chocolate babka has that amazing moist chocolate bread quality, so we definitely don’t want it going stale overnight. Luckily, because we used that amazing sugar syrup glaze, this loaf is better at staying fresh than most sweet breads. But you still need to treat it right!
For short-term storage—say, the next two or three days—I recommend keeping it right on the counter, but you have to cover it well. Just leave it in the pan, cover the entire thing loosely with plastic wrap, and then cover that with foil. This traps some of that moisture in without making the crust soggy. Don’t refrigerate it unless you absolutely have to, because the cold air dries out the brioche dough way too fast.
If you made two loaves (because who only makes one batch of chocolate babka?), or if you know you won’t finish your decadent babka loaf within three days, you must freeze it. Make sure the bread is completely cool first. Wrap a single loaf tightly first in plastic wrap, then wrap it again in a layer of aluminum foil. This double-layer protection is crucial against freezer burn. It keeps beautifully for up to three months!
When you’re ready to enjoy that frozen slice of heaven, don’t just let it sit on the counter for hours. Take it out, unwrap it from the foil but leave the plastic wrap on for about an hour. Then, you can gently reheat a slice. I actually recommend wrapping the slice in a slightly damp paper towel—don’t make it soak—and microwaving it for about 15 to 20 seconds. It brings that moisture right back to the soft, tender crumb. If you need more ideas on storing baked goods, check out my tips in my article on Easy Apple Crumble Recipe; the same principles of tight wrapping apply!
Frequently Asked Questions About Making Chocolate Babka
I know you might hit a snag or have a question pop up when you’re wrestling with a yeasted dough for the first time. Don’t stress! That’s exactly why I put this section together. We’re talking common curveballs that come up when making this spectacular chocolate babka, from yeast troubles to choosing the right chocolate. Getting these little details right turns a good bake into that fantastic bakery style pastry at home you’ve been wanting!
Can I use instant yeast instead of active dry yeast in this chocolate babka recipe?
Yes, absolutely! Instant yeast is fantastic because it saves a step, which I know we all appreciate when tackling a big weekend baking project. The substitution is simple: you can use 1-to-1 for the active dry yeast measurement listed. The main difference? You skip the initial step where you mix the yeast into the warm milk and wait for it to get foamy.
Here’s what you do instead: Go straight to the mixing bowl! Add the instant yeast right in with your flour and salt, whisk it around to mix it evenly, and then proceed with the recipe as written. Since instant yeast doesn’t need to be woken up, it hydrates and starts working its magic once the liquid hits the flour during mixing. It still takes that full 8-10 minutes of kneading to develop the strength, so don’t skimp on the machine time!
What is the best chocolate to use for the filling in a bakery style pastry at home?
This is the secret to cutting through all that buttery richness! If you use milk chocolate, the filling will be far too sweet and runny, and it won’t give you that deep, almost bitter counterpoint that makes a true chocolate brioche recipe sing. I am very strict about this: stick to semi-sweet or bittersweet chocolate chips or a chopped chocolate bar. I personally lean toward 60% to 70% cacao content.
Why? Because as you know from the recipe, we use brown sugar in the filling too. Using bittersweet chocolate ensures that when it melts during the bake, you get that complex, deep cocoa flavor that balances the sweetness of the dough and the final syrup glaze. It produces that stunning, deep-colored ribbon we look for in a perfect chocolate swirl bread.
My dough didn’t rise well. What went wrong with this yeast bread dessert?
It’s frustrating when your yeast bread dessert falls flat, but 99% of the time, it’s one of two things. First, check your milk temperature. If the milk was too hot (over 130°F), it killed the yeast instantly, and it never stood a chance. If it was too cold, the yeast was just sluggish and took forever, or it didn’t activate enough to do the job. Aim for that sweet spot: 105°F to 115°F. It should feel pleasantly warm, not hot, on your wrist.
Second, check the age of your yeast! If that initial cup of milk didn’t foam up after 10 minutes, your yeast was likely dead. It happens to the best of us. Don’t try to save it by putting it in a hotter spot; just dump it and start over with fresh yeast. For future reference, you can get great advice on ingredient freshness over at Simple Plat, which has tested many common baking issues!
If you are ever having trouble reaching me about a recipe or just want to share your baking wins, remember you can always reach out via my contact page!
Nutritional Estimate for Your Homemade Chocolate Babka
Now, I know that when you are pulling apart a slice of this buttery, sweet bread, you aren’t exactly thinking about the macros, and that’s okay! This is a celebratory, soul-nourishing bake, not a light snack. But because we believe in transparency here at Gourmet Gaze, I wanted to provide a general nutritional guideline for a single slice of this incredible decadent babka loaf.
Please keep in mind that these are just estimates, based on standard US measuring cups and mid-range ingredient brands. Your final totals might shift slightly depending on exactly what type of bittersweet chocolate you chop up or how much syrup you brush on top. But this gives you a solid baseline!
- Serving Size: 1 slice
- Calories: 450
- Sugar: 35g
- Sodium: 250mg
- Fat: 28g
- Saturated Fat: 17g
- Unsaturated Fat: 11g
- Trans Fat: 0.5g
- Carbohydrates: 45g
- Fiber: 3g
- Protein: 7g
- Cholesterol: 90mg
We use this data to help educate ourselves, but remember what I learned on that road trip: food is about nourishment for the soul, too! We earn the sweet stuff, and this loaf is worth every bit of effort. If you want to read more about how we handle data and privacy here on the site, you can review our Privacy Policy anytime.
Share Your Showstopping Dessert Bread Experience
Now that you have conquered the complex art of the swirl and have your own magnificent chocolate babka cooling on the rack, I truly hope you feel proud! This isn’t just bread; it’s a culinary accomplishment. When you manage to pull apart that first slice and see those perfect, rich ribbons, that’s the moment I live for. That is the definition of a feast for the soul!
I built Gourmet Gaze because I want us to share these moments. I’d be absolutely thrilled if you took a photo of your finished homemade chocolate babka—show off those gorgeous layers! Tag me on social media so I can see how your bake turned out. And if the recipe truly delivered that bakery-quality result you were hoping for, please do me a huge favor: leave a star rating right down below where the comments are.
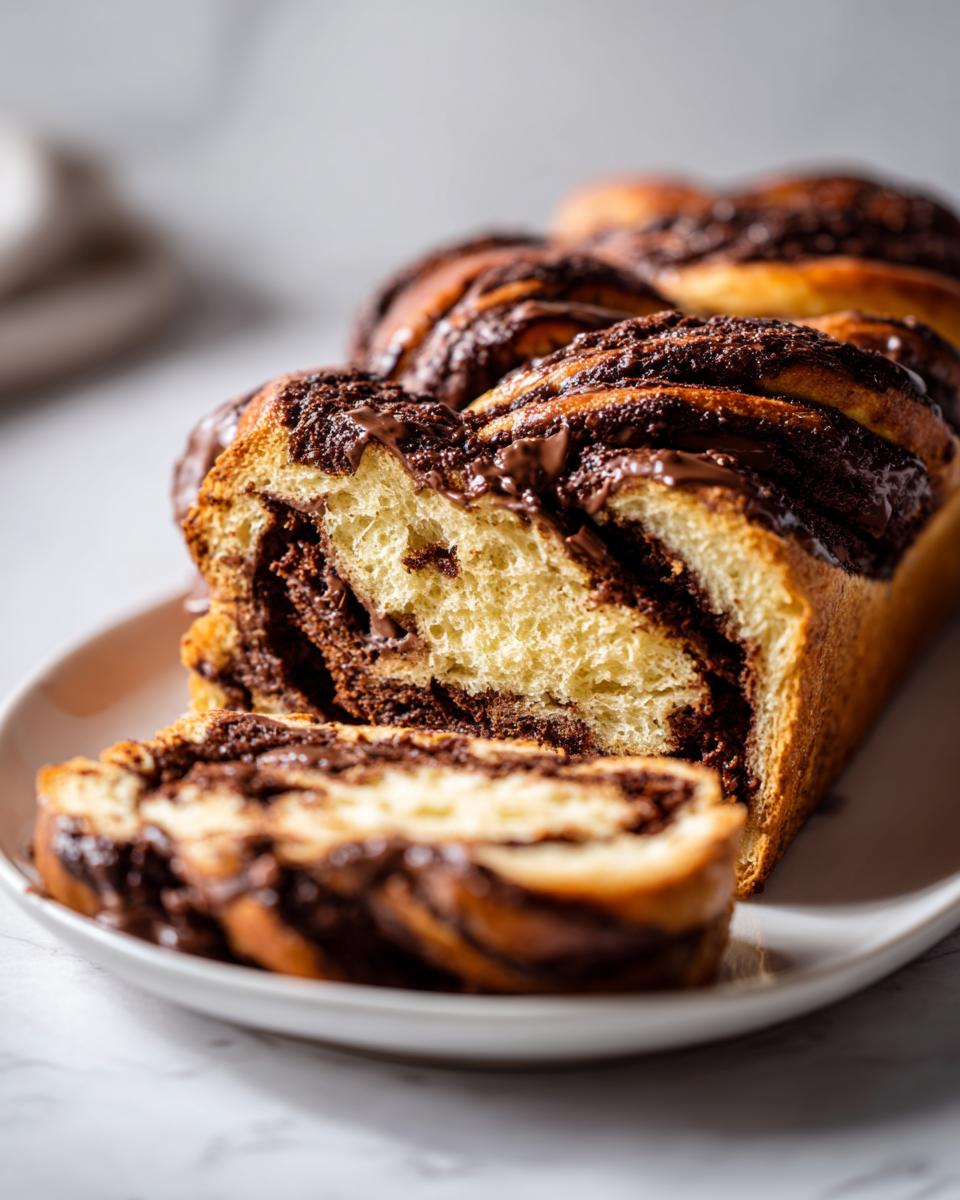
Your feedback not only makes my day, but it also helps other cooks gain the confidence to tackle this magnificent decadent babka loaf. I read every single comment and review, and I’m always here if you have quick follow-up questions via the contact page. Thank you so much for letting me guide you through making what I promise is the best chocolate babka you’ll ever bake at home!
PrintThe Best Homemade Chocolate Babka Recipe for Perfect Swirls
Bake a show-stopping chocolate babka with a rich brioche dough and decadent filling. This detailed tutorial guides you through achieving beautiful, tender layers and a glossy finish, making it better than store-bought versions.
- Prep Time: 45 min
- Cook Time: 45 min
- Total Time: 3 hours 45 min
- Yield: 1 loaf (about 10 servings)
- Category: Dessert
- Method: Baking
- Cuisine: Jewish/Eastern European
- Diet: Vegetarian
Ingredients
- For the Dough: 1 cup whole milk, warmed to 110°F; 2 1/4 teaspoons active dry yeast; 1/2 cup granulated sugar; 3 large eggs, room temperature; 1 teaspoon vanilla extract; 4 cups all-purpose flour, plus more for dusting; 1 teaspoon salt; 1/2 cup (1 stick) unsalted butter, softened and cut into pieces.
- For the Filling: 1 cup (2 sticks) unsalted butter, softened; 1 cup packed light brown sugar; 3/4 cup unsweetened cocoa powder; 1 teaspoon vanilla extract; 1/2 teaspoon salt; 1 cup bittersweet chocolate, finely chopped.
- For the Syrup: 1/2 cup granulated sugar; 1/2 cup water.
Instructions
- Activate the Yeast: In a small bowl, combine the warm milk and yeast. Let it sit for 5 to 10 minutes until foamy.
- Make the Dough: In the bowl of a stand mixer fitted with the dough hook, combine the sugar, eggs, and vanilla. Mix briefly. Add the flour and salt. Mix on low speed until a shaggy dough forms.
- Incorporate Butter: With the mixer running on low, add the softened butter, one piece at a time, waiting about 30 seconds between additions. Increase the speed to medium-low and knead for 8 to 10 minutes until the dough is smooth and elastic.
- First Rise: Place the dough in a lightly oiled bowl, turning to coat. Cover and let it rise in a warm place for 1.5 to 2 hours, or until doubled in size.
- Prepare Filling: While the dough rises, beat the softened butter, brown sugar, cocoa powder, vanilla, and salt together until smooth and creamy. Stir in the chopped chocolate.
- Shape the Dough: Gently punch down the risen dough. Turn it out onto a lightly floured surface. Roll the dough into a large rectangle, about 12×18 inches.
- Spread Filling: Spread the chocolate filling evenly over the entire surface of the dough, leaving a small 1/2-inch border on one long edge.
- Roll and Slice: Starting from the long edge opposite the border, tightly roll the dough into a log. Pinch the seam closed. Using a sharp knife, slice the log lengthwise down the middle, exposing the layers.
- Braid: Turn the cut sides up. Twist the two halves around each other, keeping the cut sides facing up to show the swirls. Pinch the ends together.
- Second Rise: Carefully transfer the twisted dough to a greased 9×5 inch loaf pan. Cover loosely and let it rise again for 45 to 60 minutes, or until puffy. Preheat your oven to 350°F (175°C) during the last 15 minutes of the rise.
- Bake: Bake for 35 to 45 minutes. If the top browns too quickly, loosely tent it with foil. The internal temperature should reach 200°F (93°C).
- Make Syrup: While the babka bakes, combine the sugar and water in a small saucepan. Bring to a boil, stirring until the sugar dissolves. Remove from heat.
- Glaze: As soon as the babka comes out of the oven, brush the hot syrup evenly over the top and sides. Let the babka cool in the pan for 15 minutes before transferring it to a wire rack to cool completely.
Notes
- For the best swirl technique, use a very cold filling. This prevents it from soaking into the dough too much during rolling.
- You can make the dough a day ahead. After the first rise, punch it down, wrap it tightly, and refrigerate overnight. Let it warm up slightly before rolling.
- This recipe works well as a weekend baking project or a holiday brunch centerpiece.
Nutrition
- Serving Size: 1 slice
- Calories: 450
- Sugar: 35g
- Sodium: 250mg
- Fat: 28g
- Saturated Fat: 17g
- Unsaturated Fat: 11g
- Trans Fat: 0.5g
- Carbohydrates: 45g
- Fiber: 3g
- Protein: 7g
- Cholesterol: 90mg