
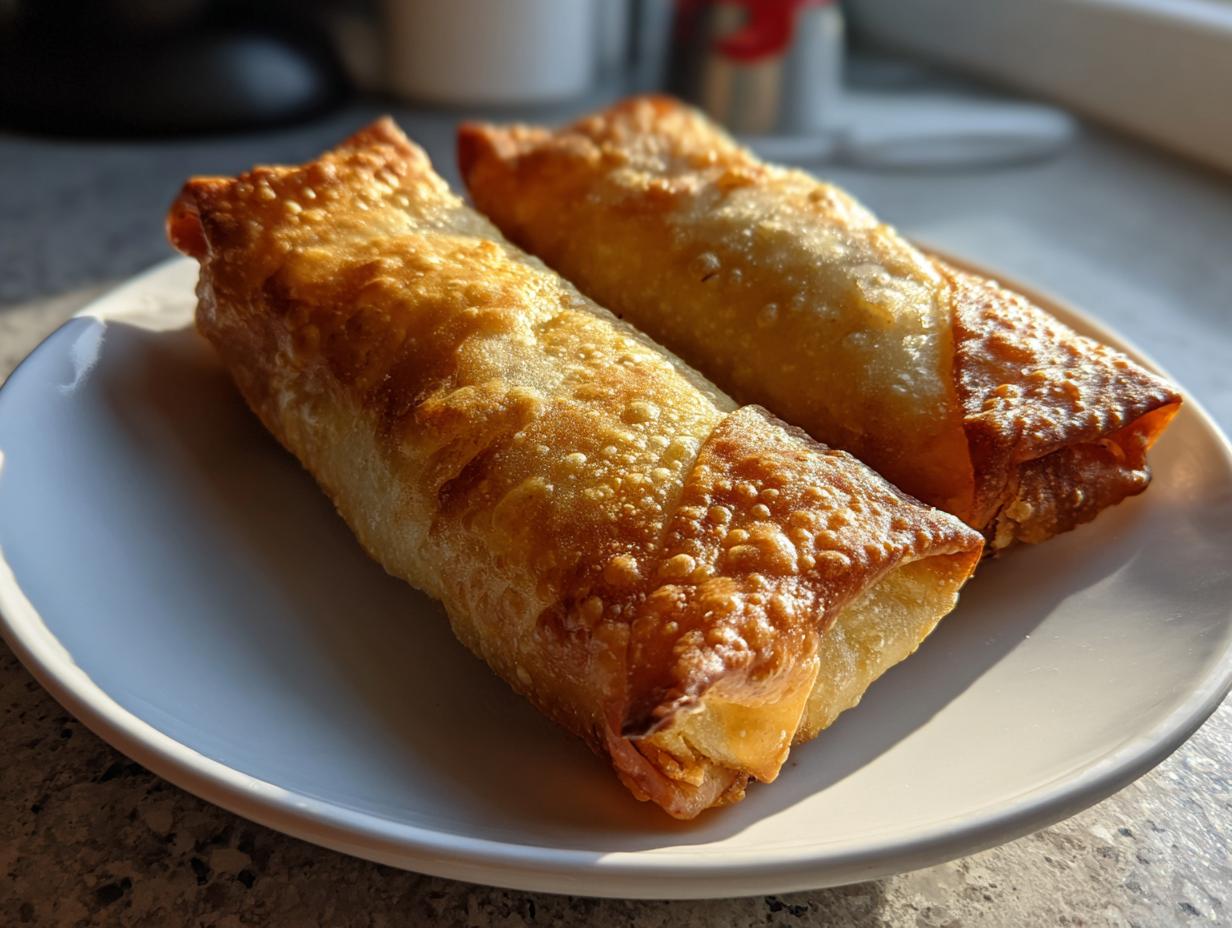

If you’re like me, you crave that deeply satisfying crunch of a truly great chimichanga, but the thought of deep-frying on a Tuesday night sends you straight back to the delivery apps. I spent ages—and I mean ages—perfecting a technique to get those shells golden and shatteringly crisp without drowning them in oil. I’m thrilled to tell you that we finally nailed it with these Baked Chicken Chimichangas. This recipe isn’t just about skipping the mess; it’s about building incredible flavor with zesty chicken filling so you have a hearty, family-friendly, truly satisfying Tex-Mex meal ready in under 45 minutes. This is the result of my commitment here at Gourmet Gaze: making restaurant magic approachable for your home kitchen.
- Why You Need This Easy Crispy Baked Chicken Chimichangas Recipe
- Essential Ingredients for Restaurant Style Baked Chicken Chimichangas
- The Secret to Crispy Oven Chimichangas: Step-by-Step Instructions
- Tips for Success with Your Baked Chicken Chimichangas
- Make-Ahead and Storage for Easy Chicken Chimichanga Recipe
- Variations: Making Your Baked Chicken Chimichangas Your Own
- Serving Suggestions for Lightened Up Mexican Comfort Food
- Frequently Asked Questions About Baked Chicken Chimichangas
- Nutritional Estimate for Guilt-Free Tex Mex
Why You Need This Easy Crispy Baked Chicken Chimichangas Recipe
Look, I get it. You want the flavor explosion of your favorite Tex-Mex spot, but you don’t want the grease hangover or the hour-long cleanup. I developed this recipe specifically to eliminate those compromises. When I was moving away from corporate life, I desperately needed quick meals that felt indulgent but weren’t heavy, and these fit the bill perfectly.
Here is exactly what this recipe delivers right to your table:
- The Crunch Factor: We figured out the trick—it’s all about that spray technique—to get a truly golden, almost “oven-fried” shell. You won’t miss the fryer, trust me.
- Speed Demon: Seriously, this is an Under 45 Minute Dinner. Cleanup is a breeze, which means more time for relaxing after dinner, not scrubbing oil.
- Flavor Without the Guilt: We load the filling with assertive spices and just enough cheese—it’s hearty, comforting, and feels like true indulgence, but it’s much lighter than the deep-fried version.
- Family Approved: It’s easy to serve with simple toppings that let everyone customize theirs. It’s a definite weeknight win for even the pickiest eaters!
If you’re looking for a way to make Healthy Baked Mexican Food that your whole family will cheer for, this is that recipe. It’s comfort food elevated.
Essential Ingredients for Restaurant Style Baked Chicken Chimichangas
Getting that authentic, restaurant-quality flavor—that slightly tangy, beautifully browned crust we all know and love from Chi-Chi’s—comes down to the quality and combination of your ingredients. Don’t skimp here, especially on the spices! When you mix your own seasoning for this filling, you control the zest, which is crucial for cutting through the creaminess of the cheese. A flat spice blend equals a flat chimichanga, and we are aiming high!
I always have these components ready to go because the prep flies by, making this a perfect weekday staple.
For the Filling and Assembly
You’ll notice we use two distinct cheeses; that blend is what gives us the perfect meltiness without becoming oily. And remember, the cooking spray isn’t optional—it’s our secret weapon for achieving that crisp, golden finish without frying!
- 2 cups cooked, shredded chicken (Rotisserie chicken works wonders to save time!)
- 1 tablespoon olive oil
- 1 teaspoon chili powder
- 1 teaspoon ground cumin
- 1/2 teaspoon garlic powder
- 1/2 teaspoon onion powder
- 1/4 teaspoon salt
- 1/4 teaspoon black pepper
- 1 (10 ounce) can mild red enchilada sauce
- 1 cup shredded Monterey Jack cheese
- 1 cup shredded cheddar cheese
- 8 large flour tortillas (These must be the burrito size so they roll up nicely!)
- Cooking spray (I use the olive oil variety for extra flavor, but any will work to get that crisping magic going)
Optional Toppings for Your Baked Chicken Chimichangas
This is where you can really make it a feast! Serve these piping hot with a selection of fresh, cooling toppings to balance the richness of the baked chicken filling.
- Salsa
- Sour cream (or plain Greek yogurt for a lighter option)
- Guacamole (Homemade is best!)
The Secret to Crispy Oven Chimichangas: Step-by-Step Instructions
Alright, this is where the magic happens! We are turning standard tortillas into the star of our Baked Chicken Chimichangas. Remember, we aren’t frying these, so we have to trick the oven into giving us that gorgeous, crunchy texture. The flavor profile is pure restaurant copycat, but the technique? It’s all about maximizing contact and using a little bit of oil spray correctly. Follow these steps closely, and you’ll see why this is rapidly becoming my go-to weeknight chicken dinner idea.
Preparing the Zesty Chicken Filling
First things first, let’s get that oven hot and ready to go. You want it set to 400°F (200°C) so it’s nice and toasty when the chimichangas go in. Lightly grease your baking sheet or use a nice coat of cooking spray—we’ll be using more later, but this is just to keep the bottom from sticking.
In a medium bowl, grab your shredded chicken. Now, dump in all those lovely spices: the chili powder, cumin, garlic powder, onion powder, salt, and pepper. I always make sure to toss this aggressively with a fork *before* adding anything wet. Expert Tip: If your spices are fresh and aromatic, your filling will taste ten times better. Mix until every shred of chicken is coated in that delicious hue.
Once seasoned, stir in the mild red enchilada sauce and exactly half of your shredded cheese blend. You want just enough moisture to bind it all together without making it sloppy. You’re aiming for a thick, flavorful mixture that holds its shape when scooped.
Rolling and Preparing for the Oven
Tortillas need a little encouragement to roll without cracking, especially when they’re not being submerged in hot oil! Five to ten seconds in the microwave is all you need to warm them up and make them wonderfully pliable. Don’t overdo it, or they get gummy!
Now, dole out about 1/3 cup of that zesty chicken filling right into the center of each warm tortilla. Then, sprinkle just a tiny pinch of the remaining cheese right on top of the filling. This cheese acts like glue later! Now, fold in the sides—the short ends—over the filling first, and then roll it up tightly, just like you would a burrito. The tighter you roll, the less likely it is to unravel during the bake. Place them seam-side down on that prepared baking sheet. This crucial positioning keeps them sealed while they bake. Repeat until all eight are snug on the pan.
Achieving Golden Perfection with Baked Chicken Chimichangas
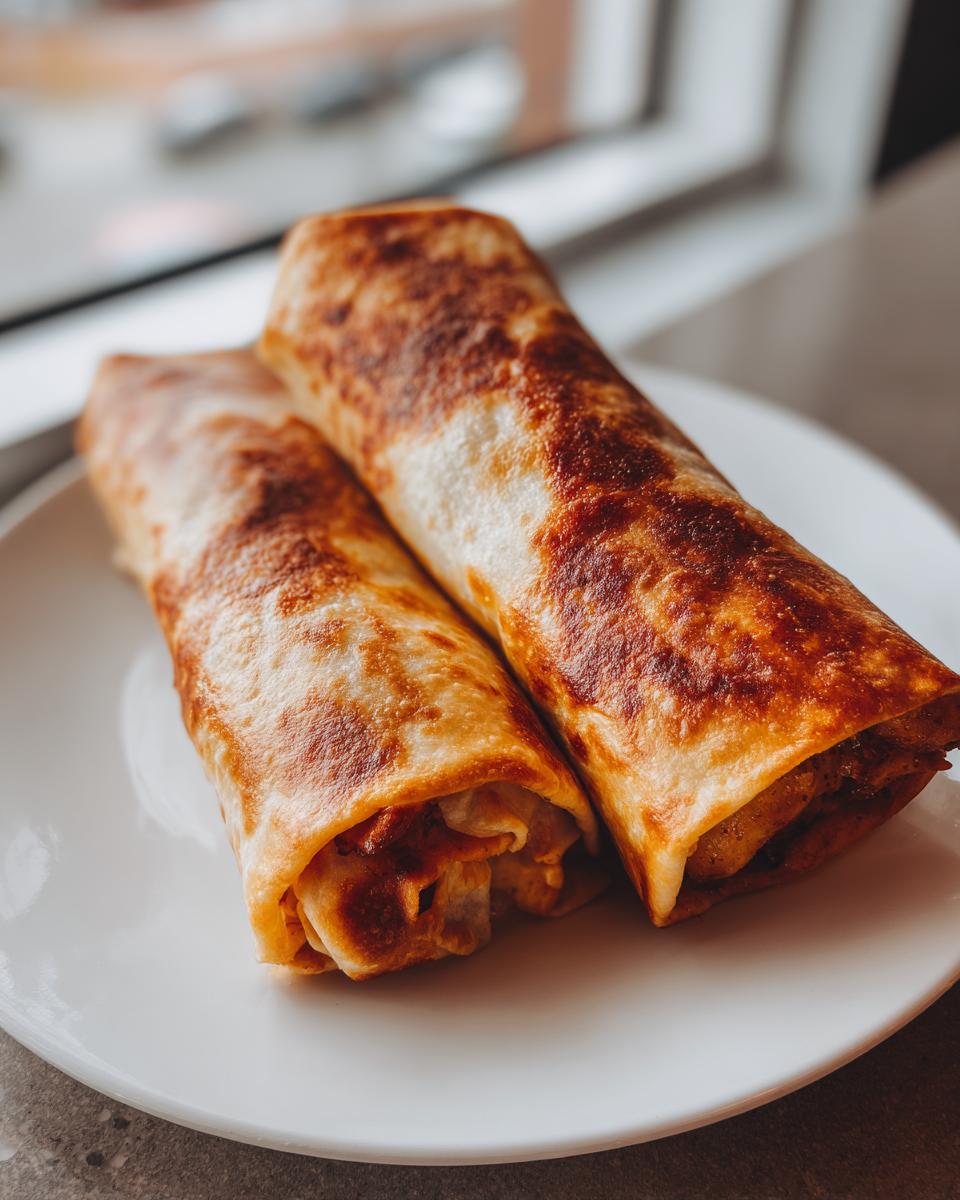
This is the step that separates a soggy wrap from a triumph! To get that **Oven Fried Chimichangas Secret** texture, you need to spray the tops and sides of those rolled chimichangas liberally with cooking spray. I mean it—give them a good, even coating. This high-heat oil coating is what crisps the tortilla edges and turns them that beautiful golden color. You can find more tips on how to achieve this texture without frying at this handy resource.
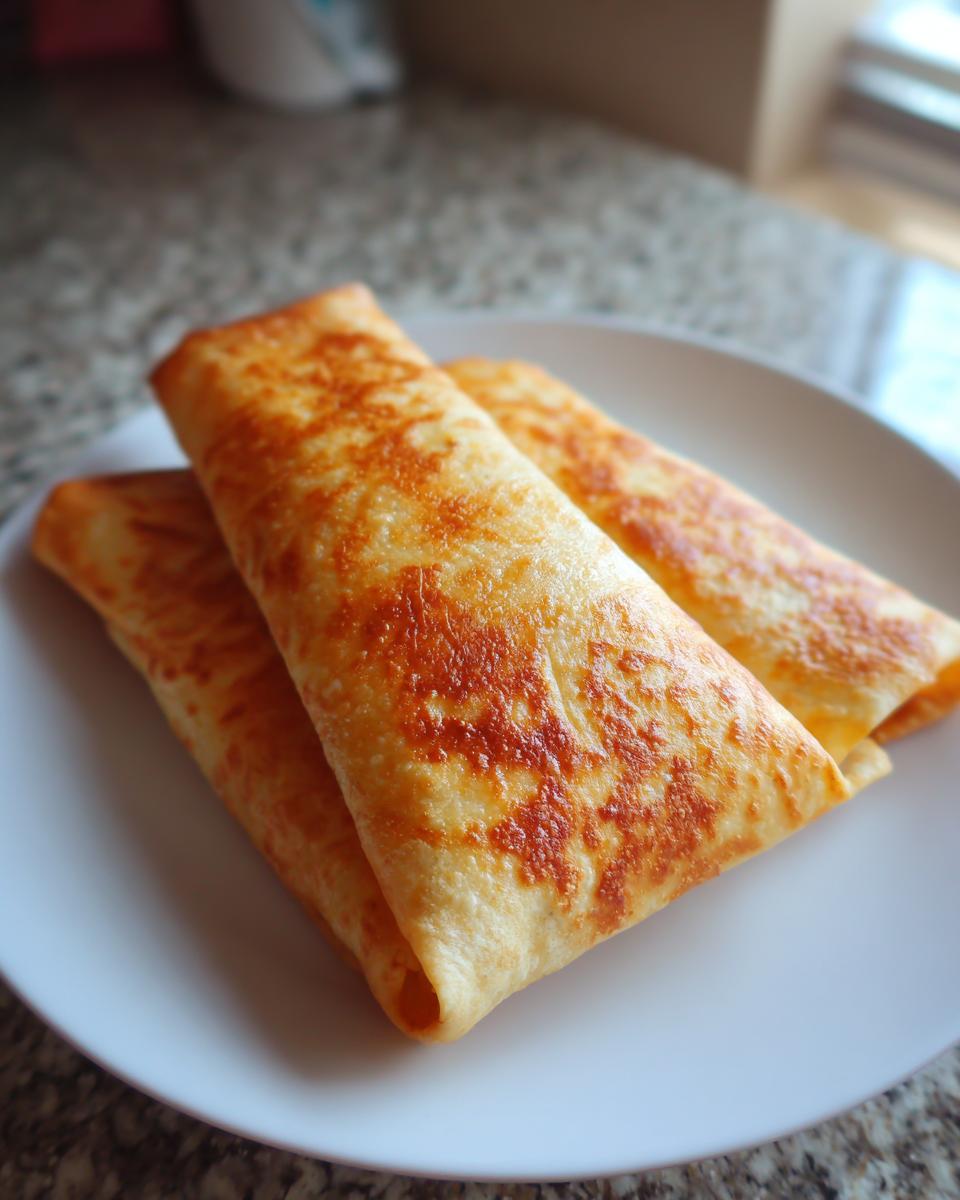
Pop them into that 400°F oven for about 15 to 20 minutes. Crucially, about halfway through—say, at the 8-minute mark—take them out and carefully flip each one over so they crisp evenly on all sides. When they look deeply golden and feel firm when lightly tapped, they are done. For that final restaurant touch, pull them out, sprinkle the rest of that cheese on top, and let them sit for two minutes while the residual heat melts it beautifully. Serve immediately with your favorite cooling toppings. You can check out my full recipe post if you want to review these steps!
Tips for Success with Your Baked Chicken Chimichangas
Even with a solid recipe, taking a few extra measures ensures you get that perfect texture every single time. Since developing this as a go-to Weeknight Chicken Dinner Idea, I’ve learned a few tricks to streamline the process and boost flavor.
Here are the things I swear by when I make these:
- Embrace the Rotisserie Chicken: Seriously, this is my number one time-saver. Buying a pre-cooked rotisserie chicken means your prep time drops dramatically. You get tender, already seasoned meat ready for shredding in minutes. It’s a game-changer for those super busy nights.
- Don’t Skip the Spice Mix Test: Before you add any sauce or cheese, taste your seasoned chicken mixture. Does it taste a little *too* seasoned? Good! It needs that assertive flavor because the tortilla, cheese, and toppings will mellow it out. If it tastes bland now, it will be invisible after baking.
- Roll Them Tight, Seal Them Down: When you’re rolling, pull the tortilla snug against the filling before tucking the sides in. You want a dense log. Placing the chimichanga seam-side down on the baking sheet keeps the filling locked inside and helps the bottom crisp up instead of bursting open.
- The Spray is NOT a Light Dusting: I cannot stress this enough for getting that great crunch. Think of it like you are “painting” the surface of the tortilla with a fine layer of oil. If you see dry spots, hit them again! This is your shortcut to getting that crunch without frying, as explained by many who master these easy chicken chimichangas recipes.
Make-Ahead and Storage for Easy Chicken Chimichanga Recipe
One of the absolute best parts of this recipe, in my opinion, is how wonderfully it lends itself to meal prep. Honestly, my freezer is stocked with these little golden logs for days when I know I won’t even have time to boil water! Since our goal is always to make your life easier, let’s talk about prepping these ahead of time, both for baking later or for freezing.
For us busy folks, planning ahead is the key to enjoying Lightened Up Mexican Comfort Food without the weekday stress.
Assembling Ahead of Time (The Unbaked Method)
If you want to do all the work on Sunday so you can just pop them in the oven on Wednesday, listen up. After you’ve made the filling and rolled the chimichangas tightly (Step 6 in the instructions), here’s your move:
- Line a regular baking sheet with parchment paper.
- Place the assembled, unbaked chimichangas seam-side down, making sure they aren’t touching.
- Flash freeze them for about 30 minutes. This prevents them from sticking together when you bag them up!
- Once they are solid little logs, transfer them into a large, heavy-duty freezer bag. Squeeze out as much air as you can and seal it up. They keep perfectly for up to three months this way.
When you’re ready to bake straight from the freezer, just add about 5 to 8 extra minutes to your baking time, and make sure you still spray them liberally with cooking spray before they go in. They reheat beautifully—no oil needed!
Storing Leftovers (The Baked Method)
If you manage to have any leftover—which is rare in my house, trust me—storage is simple. Let them cool completely on a rack first. Cooling them speeds up the process before they get stored.
Once cool, place them in an airtight container or freezer bag. They will hold up well in the refrigerator for about three days. When you reheat them, you have a couple of great options that maintain the crunch we worked so hard to achieve. Skip the microwave if you want to keep them crispy! Instead, reheat them in a 350°F oven or an air fryer for about 8 to 10 minutes until they are warmed through and the exterior is crisp again. It brings them right back to life! If you are interested in other easy ways to make chicken, check out my recipe for Creamy Chicken and Pearl Couscous Soup for a completely different kind of comfort.
Variations: Making Your Baked Chicken Chimichangas Your Own
While this recipe is designed to taste exactly like that satisfying, restaurant-style version—and is totally family-friendly as is—I absolutely love encouraging people to make recipes their own. Cooking should be fun, not a rigid set of rules! Messing around with the filling ingredients is a fantastic way to use up odds and ends in your fridge or cater to different taste preferences.
Here are a couple of easy swaps that keep the spirit of the recipe alive while giving you something new for your next Tex-Mex night:
- Spice It Up (or Cool It Down): If your family loves heat, swap out half a teaspoon of the chili powder for smoked paprika and a quarter teaspoon of cayenne pepper. For a completely different vibe, try replacing the chili powder and cumin mix with 2 teaspoons of my favorite zesty recipe for Honey Garlic Chicken Skewers seasoning—yes, you can use it here! It gives the chicken a slightly sweeter, deeper flavor that plays wonderfully against the mild enchilada sauce.
- Add Veggie Power: To boost the nutrition profile for a quick dinner, you can easily bulk up the filling. I often fold in about half a cup of rinsed, drained black beans or even a few tablespoons of finely diced green chiles along with the enchilada sauce. Just be careful not to overstuff your tortillas; that’s the enemy of a tight roll!
- Cheese Swap: While the Jack and Cheddar combo gives you that beautiful texture, feel free to experiment if you have something else kicking around. Pepper Jack is amazing if you crave a bit more kick, or sometimes I’ll swap out the cheddar for a smoky Gouda to give the interior a deeper, nuttier flavor profile. Remember to still use about 2 cups total, though!
These little tweaks mean you never have to get bored making these incredible Family Friendly Chimichanga Recipe favorites!
Serving Suggestions for Lightened Up Mexican Comfort Food
We’ve made these Baked Chicken Chimichangas lighter by skipping the deep fryer, so let’s keep that theme going with our side dishes! The goal here is to balance the rich, cheesy, savory flavor of the chimichanga with something bright, fresh, or satisfyingly light. You want a spread that makes the whole meal feel less heavy but still totally comforting—that’s the essence of Guilt-Free Tex Mex, in my book.
When I serve these for dinner, I usually set up a small toppings bar on the counter so everyone can customize their plate. Here are some of my go-to pairings that complete the meal without weighing you down, many of which are incredibly easy to whip up!
Fresh and Tangy Sides
Counterbalancing richness with acidity is always my preferred approach. A sharp, fresh side cuts right through the cheese and makes you ready for the next bite of chimichanga.
- Tangy Marinated Salad: You absolutely must give my Quick Tangy Marinated Cucumber and Tomato Salad a try. It’s bright, vinegar-based, and takes about five minutes. It’s the perfect cool companion to the hot, spicy filling.
- Simple Lime-Cilantro Rice: Forget heavy, oily Mexican rice. Cook white or brown rice according to package directions, and right at the end, stir in the juice of one lime, a handful of chopped fresh cilantro, and a pinch of salt. It adds incredible fresh flavor without the extra heaviness.
- Black Bean and Corn Salsa: Combine canned black beans (rinsed well!) and fire-roasted corn kernels. Mix with diced red onion, a little chopped jalapeño, and a heavy splash of lime juice. It’s chunky, colorful, and packed with fiber.
Classic Tex-Mex Companions
Sometimes you just need the classics, but we still want them leaning toward the lighter side. These sides are always a hit when I serve these Baked Chicken Chimichangas for a family meal.
- Refried Beans Done Right: If you are making refried beans from scratch, use chicken broth instead of lard or heavy oil. If using canned, look for brands that specifically denote low-fat preparation.
- Fresh Pico de Gallo: This is non-negotiable for me! Diced tomatoes, white onion, cilantro, serrano pepper (if you dare!), and lime. It adds moisture and a necessary punch of freshness when spooned right over the top, especially if you skip the sour cream.
- Simple Greek Yogurt Dollop: Instead of heavily flavored sour cream, I mix plain Greek yogurt with a squeeze of lime and a tiny dash of salt. It provides the same creamy texture you want on top, but gives you a nice protein boost instead of just fat.
When you load up your plate with these lighter accompaniments, you feel like you’ve had a massive, satisfying restaurant feast, but you’ve kept it genuinely balanced and enjoyable for a weeknight!
Frequently Asked Questions About Baked Chicken Chimichangas
I know you might have a couple of questions floating around when you’re trying a “baked” version of a usually fried classic. That’s totally fair! We all want that guarantee of a great texture and maximum flavor boost. I’ve gathered the questions I hear most often about these Restaurant Style Baked Chimichangas recipes, and I’m happy to share my hard-won kitchen knowledge! If you’re looking for more inspiration on versatile chicken recipes, you must check out my Chicken Piccata recipe.
How do I make these Baked Chicken Chimichangas truly crispy?
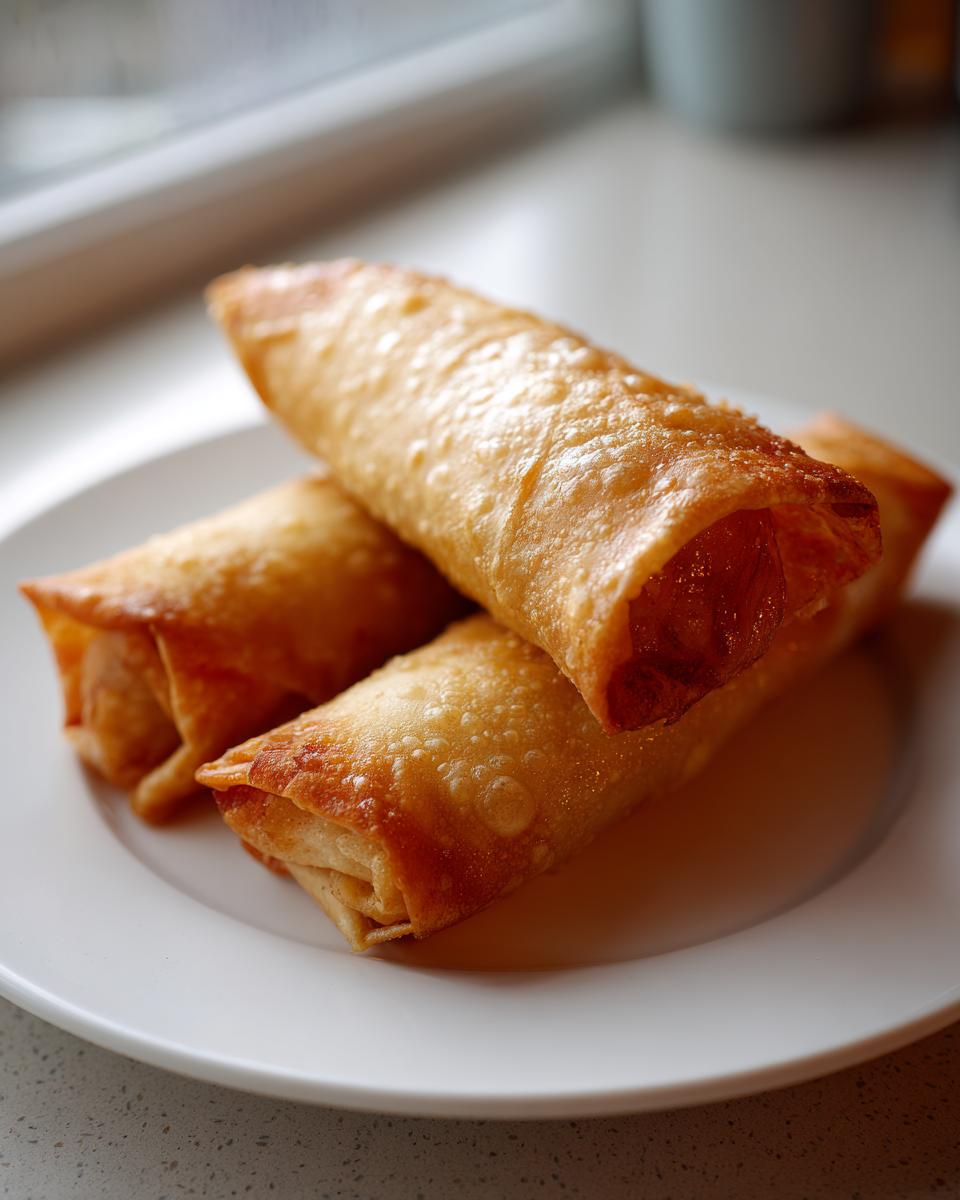
Oh, the crispy question! This is the most important one, isn’t it? We hate the thought of a floppy, sad chimichanga. The secret really hinges on two things that we covered in the instructions. First, you need a scorching hot oven—400°F is essential because you want that immediate blast of heat. Second, and most important: you have to use cooking spray generously. Don’t just mist them lightly; you need to coat the entire exposed surface of the tortilla until it looks slightly damp. This oil is what mimics the effects of deep-frying! If you want a deep dive, check out this article on how to make crispy chimichangas without frying. Mastering the spray is truly learning How To Make Crispy Chimichangas Without Frying successfully.
Can I use corn tortillas instead of flour for this Easy Chicken Chimichanga Recipe?
That’s a tricky one. Technically, you can use corn tortillas, but I wouldn’t recommend it for this specific recipe if you are aiming for that classic “chimichanga” structure. Corn tortillas are generally more delicate and tend to get brittle or break easily when rolled tightly and baked, especially when filled. Flour tortillas have that extra elasticity and structure that allows them to hold the filling securely while transforming into that satisfyingly crispy shell. If you try corn, you have to microwave them for a little longer to make them soft, but be prepared for possible cracking around the ends.
What is the best way to shred the chicken quickly?
If you’re tackling this recipe on a busy night, speed matters! I already mentioned using a store-bought rotisserie chicken, which is my absolute favorite shortcut for these Quick Chicken Tortilla Wraps. But if you have cooked chicken breasts already on hand, here is my favorite Expert Tip: place the warm chicken into the bowl of your stand mixer. Use the paddle attachment (not the whisk!) and let it run on low speed for about 30 seconds. The paddle attachment will shred that chicken perfectly evenly in seconds. It’s much faster and less messy than using two forks!
Is this recipe suitable for meal prepping ahead of time?
Absolutely! This is one of the beauties of making this Family Friendly Chimichanga Recipe. I actually highly recommend preparing them completely the day before—filling them, rolling them tight, and placing them seam-side down on parchment paper on a baking sheet. Cover them tightly and refrigerate them overnight. You just need to add about 5 minutes to the baking time when you pull them straight from the fridge into your hot oven. For longer storage, you can freeze them unbaked as outlined in the previous section, which is perfect for stocking up on easy dinners!
Can I substitute the mild enchilada sauce?
You certainly can play with the sauce! The mild red enchilada sauce in the recipe offers a slight tang and helps bind the filling, but if you want to lean into different flavors while keeping it easy, you have options. For a richer interior, you could use about 1/2 cup of green enchilada sauce instead of red—it adds a lovely earthy depth. If you’re looking for an Easy Chicken Burrito Filling that’s less tomato-forward, you could even skip the enchilada sauce entirely and instead mix the spices into the chicken with about half a cup of Mexican crema or softened cream cheese to bind it up before baking. Just remember that using a binder might mean you rely even more heavily on that cooking spray for the exterior crisp!
Nutritional Estimate for Guilt-Free Tex Mex
When we talk about enjoying Tex-Mex food without the guilt, numbers matter! It’s important to know that by choosing to bake these chimichangas instead of frying them, we cut out a significant amount of unnecessary oil and fat, making this a genuinely satisfying, more balanced meal. As I always say here at Gourmet Gaze, transparency is key to trust, so I want to be upfront about these estimates.
The nutritional data below is calculated using standard ingredient brands and serving sizes listed in the recipe for one serving (which equals two chimichangas). Remember, because brand choices regarding cheese, tortillas, and especially the sodium level in the enchilada sauce can vary wildly, these figures are a helpful guide, not a guaranteed analysis. You can always lower the sodium or fat content slightly by using lower-sodium sauce or lighter cheese blends!
For any home cook looking to maintain consistency in their recipe tracking, I always suggest using an online calculator if you swap out major ingredients. Otherwise, this gives you a great benchmark for enjoying this delicious comfort food!
- Serving Size: 2 chimichangas
- Calories: 450
- Fat: 18g (Saturated Fat: 8g)
- Cholesterol: 75mg
- Sodium: 650mg
- Carbohydrates: 45g (Fiber: 3g, Sugar: 3g)
- Protein: 30g
See? A powerful protein punch with far less of the heavy saturated fat you’d expect from a restaurant-style favorite. That’s what I call a win for your weeknight dinner rotation!
Print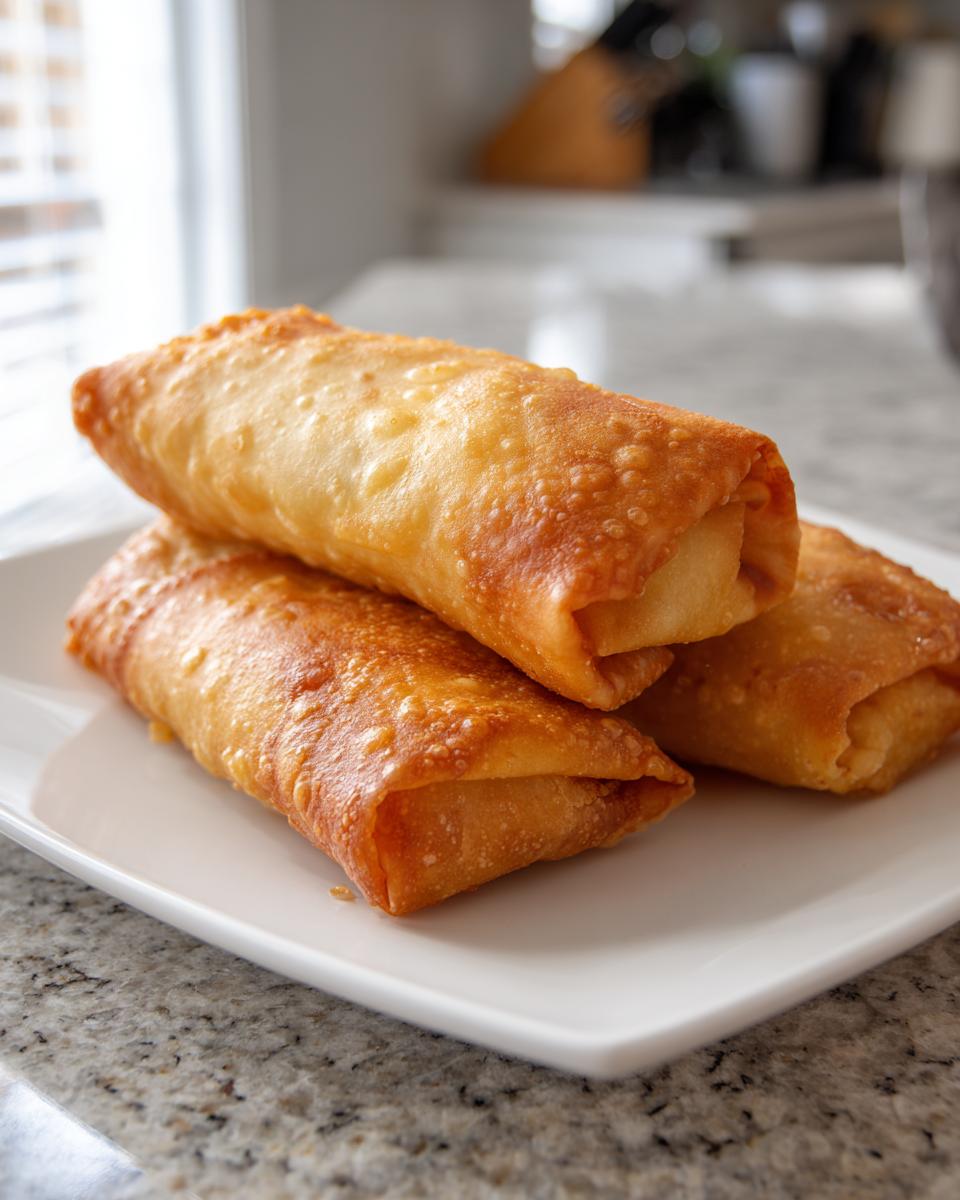
Easy Crispy Baked Chicken Chimichangas (Restaurant Style)
You can make Chi-Chi’s Baked Chicken Chimichangas at home. This easy recipe delivers all the flavor of a fried favorite with a satisfyingly crispy, golden shell, using baking for a lighter, weeknight-friendly meal.
- Prep Time: 15 min
- Cook Time: 20 min
- Total Time: 35 min
- Yield: 4 servings 1x
- Category: Dinner
- Method: Baking
- Cuisine: Tex-Mex
- Diet: Vegetarian
Ingredients
- 2 cups cooked, shredded chicken
- 1 tablespoon olive oil
- 1 teaspoon chili powder
- 1 teaspoon ground cumin
- 1/2 teaspoon garlic powder
- 1/2 teaspoon onion powder
- 1/4 teaspoon salt
- 1/4 teaspoon black pepper
- 1 (10 ounce) can mild red enchilada sauce
- 1 cup shredded Monterey Jack cheese
- 1 cup shredded cheddar cheese
- 8 large flour tortillas (burrito size)
- Cooking spray (for crisping)
- Optional toppings: Salsa, sour cream, guacamole
Instructions
- Preheat your oven to 400°F (200°C). Lightly grease a baking sheet or coat it with cooking spray.
- In a medium bowl, combine the shredded chicken, olive oil, chili powder, cumin, garlic powder, onion powder, salt, and pepper. Mix well until the chicken is evenly coated with the spices.
- Stir in the enchilada sauce and half of the shredded cheese mixture into the chicken filling until combined.
- Warm the tortillas briefly in the microwave for about 15 seconds to make them pliable.
- Place about 1/3 cup of the chicken filling in the center of each tortilla. Sprinkle a small amount of the remaining cheese over the filling.
- Fold the sides of the tortilla inward over the filling, then tightly roll the tortilla up like a burrito. Place the chimichanga seam-side down on the prepared baking sheet. Repeat with the remaining tortillas and filling.
- Lightly spray the tops and sides of the rolled chimichangas generously with cooking spray. This step is key for achieving that golden, oven-fried texture.
- Bake for 15 to 20 minutes, flipping halfway through, until the tortillas are golden brown and crispy.
- Remove from the oven. Top with the remaining cheese if desired and allow it to melt for 2 minutes, or serve immediately with your favorite toppings.
Notes
- To get the crispiest texture without frying, make sure you spray the tortillas thoroughly with cooking spray before baking.
- You can prepare the chicken filling ahead of time and store it in the refrigerator for up to three days.
- For a restaurant-style flavor, use store-bought rotisserie chicken for quick, tender shredded meat.
Nutrition
- Serving Size: 2 chimichangas
- Calories: 450
- Sugar: 3
- Sodium: 650
- Fat: 18
- Saturated Fat: 8
- Unsaturated Fat: 10
- Trans Fat: 0
- Carbohydrates: 45
- Fiber: 3
- Protein: 30
- Cholesterol: 75