
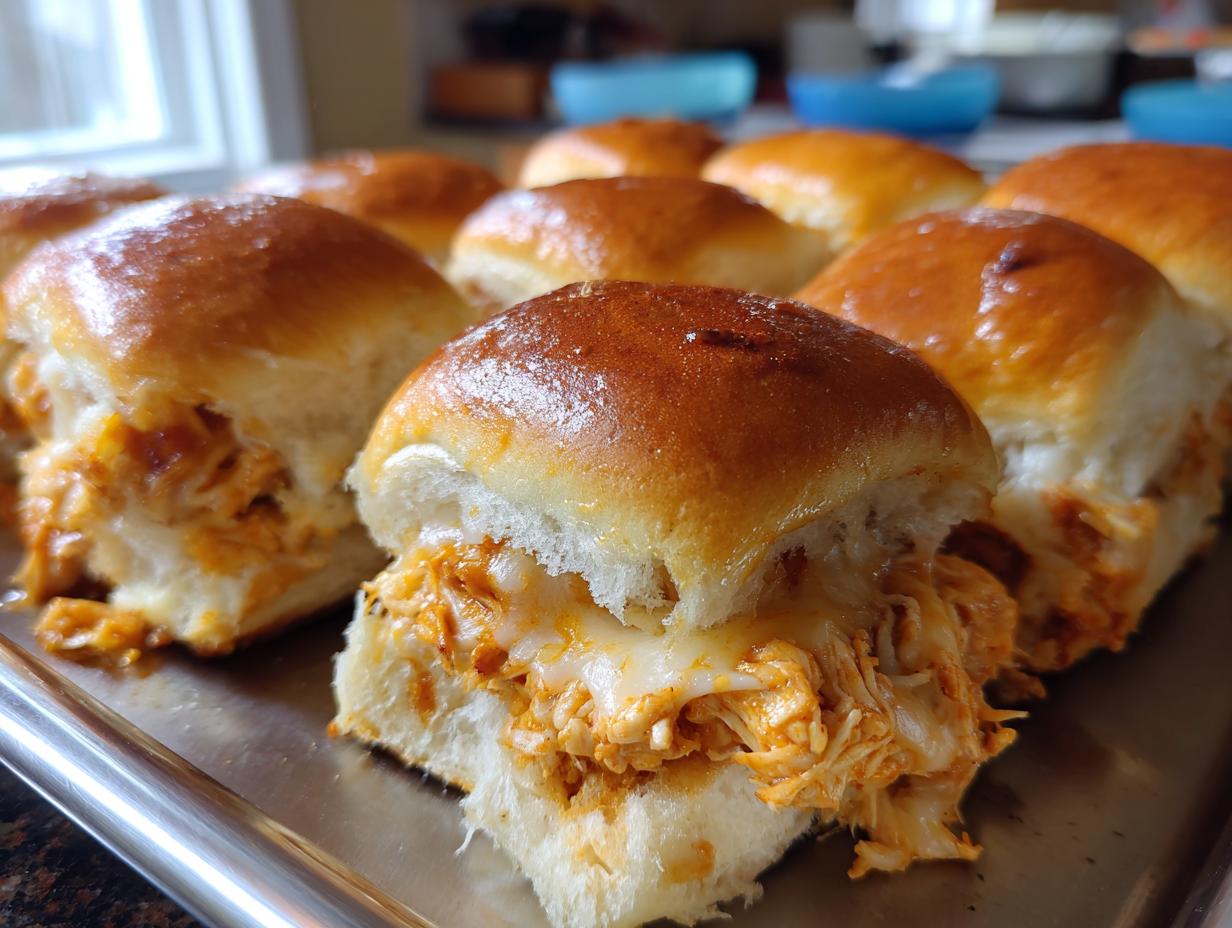

I remember staring at my overflowing inbox, realizing that my whole life looked exactly like my desk: organized chaos that served no real purpose other than keeping me busy. Cooking felt like one more performance I couldn’t manage. But since I discovered the pure joy of creating something real—something satisfyingly edible—I’ve dedicated myself to finding recipes that deliver massive flavor without demanding your entire evening. And let me tell you, these BBQ chicken sliders are the absolute pinnacle of that philosophy. They are saucy, cheesy, undeniably craveable, and they prove that the best food doesn’t have to be complicated. This baked assembly means you get maximum payoff for minimal cleanup, turning every night into a small celebration.
- Why These Easy Baked bbq chicken sliders Are a Must-Make
- Gathering Your Ingredients for Cheesy bbq chicken sliders
- Step-by-Step Instructions for Baked bbq chicken sliders
- Tips for Success with Your bbq chicken sliders
- Customizing Your bbq chicken sliders: Variations and Add-ins
- Serving Suggestions for these Crowd Pleasing Appetizers
- Storage and Reheating Instructions for Leftover bbq chicken sliders
- Frequently Asked Questions About bbq chicken sliders
- Nutritional Estimate for These Party Snack Recipes
- Share Your Experience Making These bbq chicken sliders
Why These Easy Baked bbq chicken sliders Are a Must-Make
I’m not joking when I say this is my most saved recipe for unexpected company. When you need something that looks like you spent all afternoon fussing over it but actually took ten minutes to assemble, this is your answer. For me, finding reliable easy slider recipes like this is the key to actually enjoying hosting.
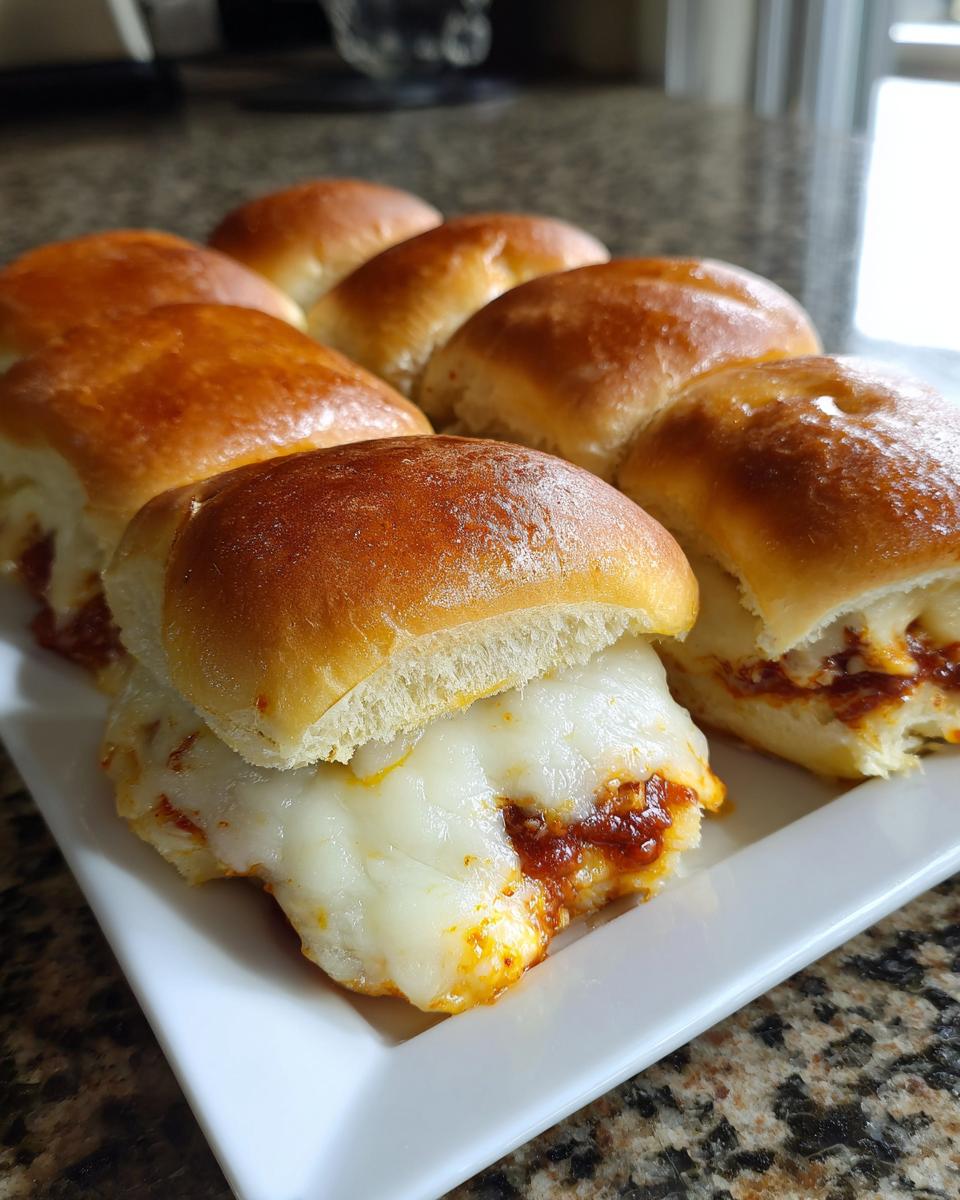
- They are the ultimate, no-fuss assembly. We just pile everything onto the rolls and let the oven do the heavy lifting.
- The combination of sweet bread, savory meat, and melted cheese is pure comfort food magic.
- You can scale this up or down so easily—it’s designed to be flexible for any kind of crowd.
Perfect for Game Day Food Ideas and Parties
Seriously, if you’re throwing together any kind of viewing party, forget the fussy dips. These go straight onto the platter, and they vanish! Because they bake all together, you pull out one perfect sheet of mini sandwiches ready to slice and serve. Nothing says superior crowd pleasing appetizers like warm, cheesy bread and BBQ chicken melting together.
Quick Weeknight Dinners with Minimal Cleanup
If I’m being honest, I make these on Tuesday nights too! Because it’s an oven bake, you aren’t standing over a stovetop stirring pulled chicken forever. That savory butter mixture you brush on top creates this incredible crust. Throwing together these bbq chicken sliders means you get a spectacular, hearty meal on the table fast. Minimal dishes means I can actually relax after dinner!
Gathering Your Ingredients for Cheesy bbq chicken sliders
Okay, the beauty of these Hawaiian roll recipes is that they rely on assembly rather than a long cooking process, meaning the ingredient quality really shines through. We need good cooked, shredded chicken—rotisserie chicken is your best friend here! You’ll want about two cups, drenched in your favorite BBQ sauce. When it comes to cheese, don’t hold back. I strongly suggest Gouda if you want that creamy melt, or Pepper Jack if you like a little spicy kick with your sweet rolls. Everything else we are using is just to boost that buttery flavor on top.
The Secret to the Garlic-Herb Butter Topping
This topping is what separates a good slider from a truly great one, and it’s pure Leo Maxwell ingenuity! It’s ridiculously simple, but it transforms the bread from soft to perfectly crispy and savory. You’ll just melt down four tablespoons of good unsalted butter. Then, whisk in one teaspoon each of garlic powder, onion powder, and dried parsley. That’s it! This mixture gets brushed over the tops of the rolls *before* baking, infusing that entire top layer with flavor while everything heats through. Don’t skip this step; it’s essential for that golden finish.
Step-by-Step Instructions for Baked bbq chicken sliders
This is where the magic happens, and trust me, it is faster than figuring out what else to make for dinner! First things first: get that oven preheated to 350°F (175°C) and grease up a standard 9×13 inch baking dish. We are using the whole sheet of rolls, bottom and top separated carefully. This method ensures even baking for all twelve of your amazing baked sliders.
Assembling the Layers of Flavor
Take the bottom half of those sweet rolls and set them snugly in your prepared dish. Now, grab that bowl of BBQ chicken mixture—make sure it’s well combined—and spread it out evenly across the bread. You want that saucy goodness across every square inch! Next, sprinkle your shredded cheese generously over the chicken. Then, put the top half of the rolls right back on. This layering is critical for making sure every resulting sandwich has that perfect sweet, savory, cheesy balance.
Baking Time and Achieving Golden Perfection
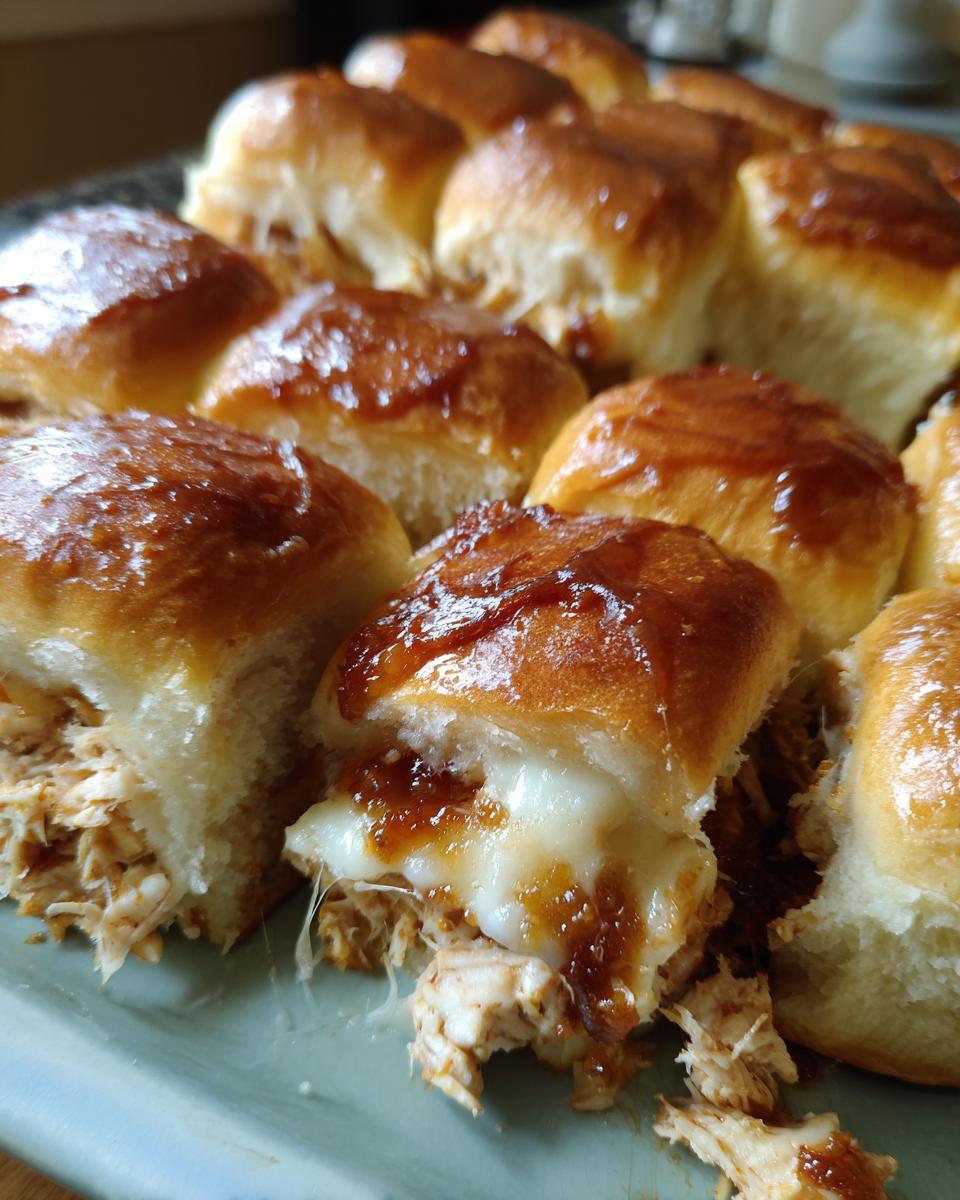
We aren’t done with cooking yet, but we are done with *working*! Brush the entire surface of the top buns generously with that garlic-herb butter mixture we talked about earlier. Cover the dish tightly with foil—this traps the steam, gets the cheese gooey, and warms everything through. Bake it like that for 15 minutes. Then, pull that foil off! Let the bbq chicken sliders go back in for another five to ten minutes, uncovered, until those tops look beautifully golden brown and slightly crispy. Serve them hot; they won’t last long on the plate!
Tips for Success with Your bbq chicken sliders
Even though these go from prep to plate in under 40 minutes, a few little tricks make a huge difference in the final presentation of these amazing bbq chicken sliders. My biggest piece of advice, directly from my notes, is realizing you don’t have to use your oven for the initial cook! If you want truly tender meat without using store-bought, try setting up your slow cooker. I tell people to cook about a pound and a half of chicken breasts in a cup of broth on low for four hours until it just falls apart. That shredded filling can then be used in the slider assembly.
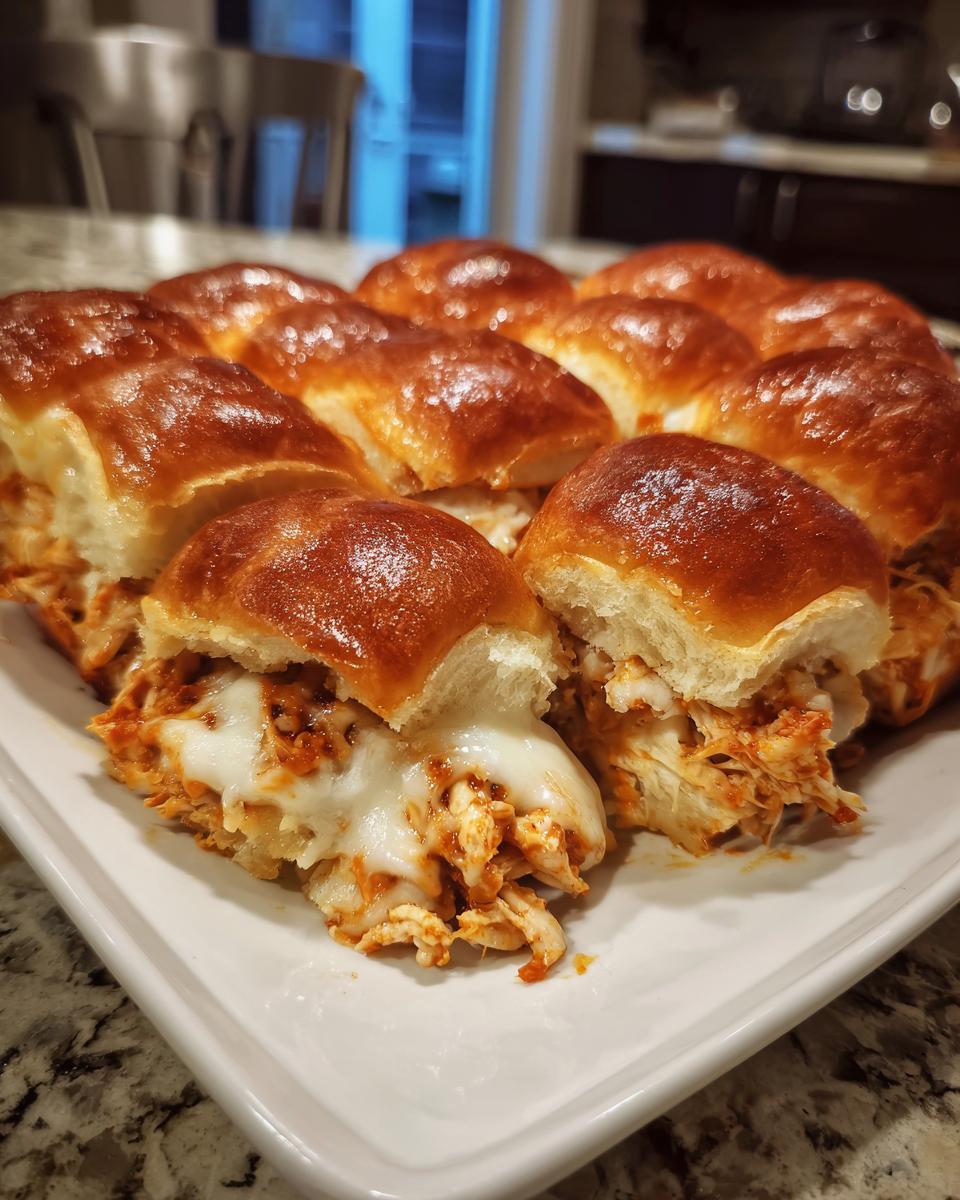
Once it’s shredded, mix it with your BBQ sauce. These become incredible slow cooker chicken sliders! Also, don’t be afraid to jazz these up a bit before the final 10 minutes of baking. A thin drizzle of ranch dressing right over the chicken and cheese layer before you put the top buns on adds a fantastic creamy tang. If you want to check out other methods for handling pulled meats, I’ve got a great one for savory pork over on my recipe for slow cooker BBQ pulled pork, which uses a similar low-and-slow principle. Remember, the goal here is maximum flavor payoff with minimal fuss, and these little secrets help us reach that peak every time.
Customizing Your bbq chicken sliders: Variations and Add-ins
While the basic recipe for these saucy bbq chicken sliders is a true classic, I wholeheartedly believe that food should always reflect the cook’s personality! That’s why I love seeing what people add to elevate this foundational dish. If you’re looking to take these beyond the basic bake, I have a few ideas that really just *sing* with the sweet and savory profile.
First, let’s talk crunch. Adding very thin slices of raw red onion—maybe just one or two rings per slider—before you bake provides a sharp contrast to the rich sauce and cheese. If you want to lean into that smoky, savory direction, crumble up some cooked bacon bits right on top of the cheese layer. Trust me, bacon makes everything better, even these great chicken recipes!
Also, don’t be afraid of that ranch drizzle I mentioned before! A light swirl of ranch over the chicken before topping it with the second half of the buns adds a wonderful herbal creaminess. You can even swap out that Pepper Jack for a sharp white cheddar; it melts beautifully and offers a more tangy bite to cut through the sweetness of the Hawaiian rolls. The best part about these sliders is how versatile they are for any last-minute craving!
Serving Suggestions for these Crowd Pleasing Appetizers
When you pull these beauties out of the oven, they just demand something cool and crisp next to them to balance out all that rich, cheesy goodness. That’s why I always treat these sliders like a full meal setup, not just an appetizer!
Since these cheesy chicken sliders are so sweet and savory, a sharp, vinegary side cuts right through the richness perfectly. My first thought is always coleslaw. You can go classic creamy, but honestly, a vinegar-based slaw with a little crisp carrot and cabbage is my favorite pairing; it just cleanses the palate between bites.
If you are serving these for a true game day feast, you need something sturdy. Try making a batch of my classic creamy macaroni salad—it’s the ultimate nostalgic comfort food side dish that just screams party food. I’ve shared my secret for the best sauce over on that recipe for my classic creamy BBQ side dish!
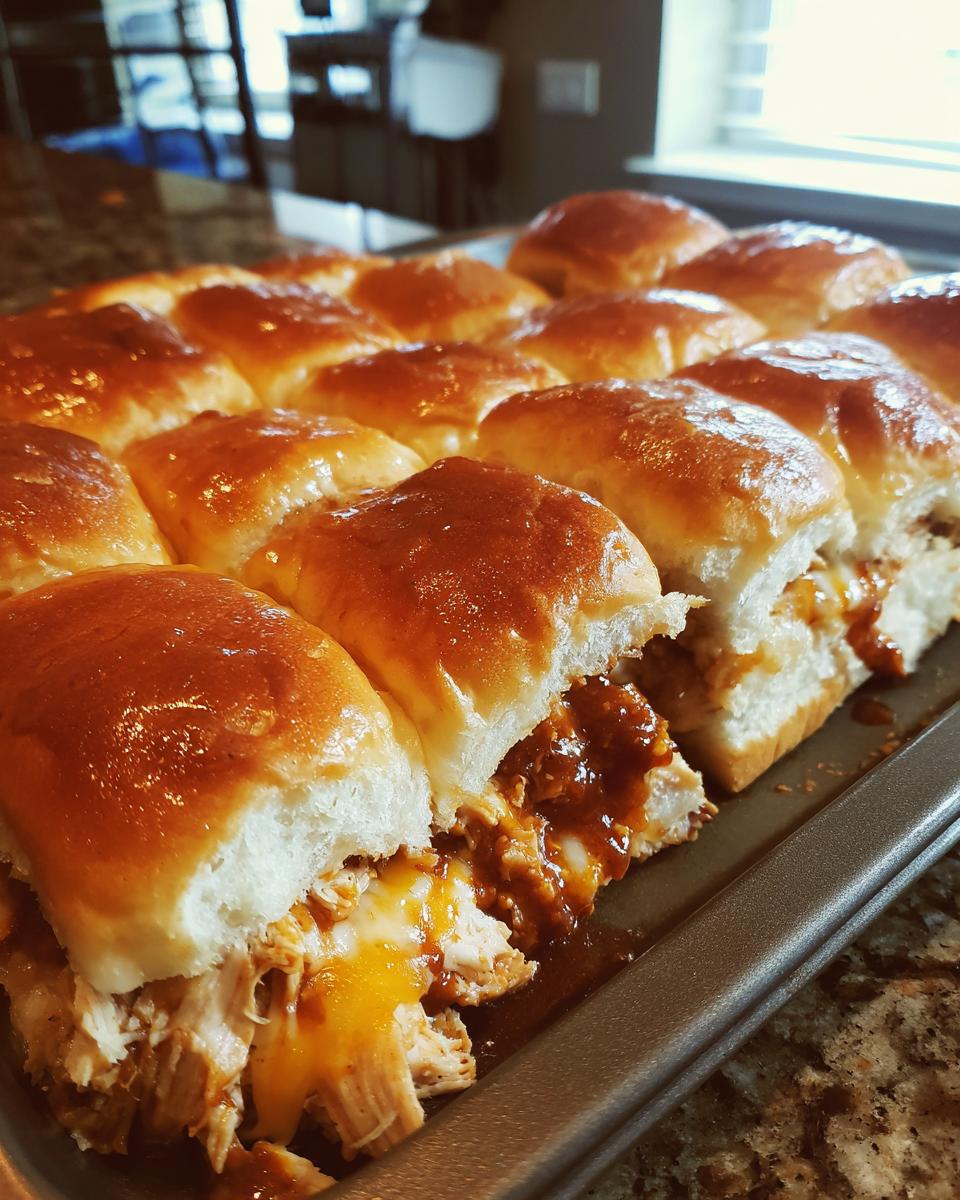
For toppings right on the slider, if you didn’t add them beforehand, a quick pickle spear is great for adding that necessary salty tang. A few crunchy potato chips laid right next to them on the plate also works wonders if you’re aiming for pure indulgence. It’s all about balance, even when eating comfort food!
Storage and Reheating Instructions for Leftover bbq chicken sliders
Even though these incredible bbq chicken sliders disappear fast, sometimes you end up with a few leftover, and naturally, you want to save them! The key is moisture retention. Let them cool completely, then store them snugly in an airtight container. Honestly, the microwave isn’t your friend here; it turns the delicious Hawaiian rolls a little sad, very fast.
For the best experience when reheating, place the leftovers on a small baking sheet. Cover them loosely with foil and pop them back into a 325°F oven for about 10 to 12 minutes. This allows the cheese to melt again and warms the chicken without drying everything out. If you need a quick fix, a few seconds in the microwave wrapped in a damp paper towel can work in a pinch, but promise me you’ll try the oven first for that superior texture. If you’re looking at other leftovers down the road, I cover keeping my famous chicken cheese steak sandwiches moist in the fridge, which uses similar logic!
Frequently Asked Questions About bbq chicken sliders
I know when I first started making these, I had a million little questions about optimization and timing. These bbq chicken sliders are so forgiving, but a few insider tips can turn them from great to legendary, especially when you’re planning for big gatherings. I’ve put together the most common things folks ask me about making these easy slider recipes.
What is the best way to shred the chicken?
If you’re using pre-cooked chicken, the best way to shred it perfectly is using your stand mixer! Seriously, put the cooked chicken breasts or thighs into the bowl with the paddle attachment. Mix it on low speed for about 30 seconds, and boom—perfectly shredded chicken that avoids all that hard work with two forks. This saves so much time when I’m rushing to put together game day food ideas!
Can I make these ahead of time?
Yes, you absolutely can make part of this ahead! I would strongly recommend mixing up your BBQ chicken filling (the shredded chicken and the sauce) and keeping it covered in the fridge up to two days in advance. When you’re ready to assemble, just take it out while you slice the rolls. However, I wouldn’t assemble the whole thing—chicken, cheese, and top bun—until about an hour before baking. Keeping those rolls dry *before* you brush them with the herb butter helps them crisp up beautifully during the final 25 minutes. You want those cheesy chicken sliders fresh out of that oven!
For more tips on nailing the bun selection, check out my guide to the best slider buns for holding sauces!
Nutritional Estimate for These Party Snack Recipes
I always try to keep things transparent here at Gourmet Gaze, even if these savory, cheesy little bites are definitely more about flavor than counting almonds! Here’s a general estimate for one of these amazing party snack recipes, based on the ingredients listed:
- Calories: Around 310
- Protein: About 19g
- Fat: 12g (with 6g saturated)
- Carbohydrates: 32g
Now, please remember, this is just a guide! If you swap out plain BBQ sauce for a super sugary honey BBQ sauce, or decide to use Pepper Jack instead of Gouda, those numbers will shift a little. It’s all about enjoying the process, and these are a perfect indulgence when you’re serving up great finger foods for parties. Enjoy!
Share Your Experience Making These bbq chicken sliders
I truly hope these bbq chicken sliders bring as much joy to your table as they do to mine! Seriously, I live to hear from you. Did you try the Pepper Jack or stick with Gouda? Snap a photo and tag me—I love seeing your beautiful presentations! If you have any lingering questions about making the ultimate party snack, please drop them in the comments below. You can always reach out to me directly via my contact page if you need anything else. Now go enjoy that feast!
PrintEasy Baked BBQ Chicken Sliders with Hawaiian Rolls
Make your next gathering a hit with these easy baked BBQ chicken sliders. They use sweet Hawaiian rolls, savory shredded chicken, and melted cheese for a guaranteed crowd-pleasing appetizer or quick weeknight dinner.
- Prep Time: 10 min
- Cook Time: 25 min
- Total Time: 35 min
- Yield: 12 sliders 1x
- Category: Appetizer
- Method: Baking
- Cuisine: American
- Diet: Vegetarian
Ingredients
- 1 (12 count) package slider rolls (Hawaiian rolls recommended)
- 2 cups cooked, shredded chicken
- 1 cup barbecue sauce (your favorite flavor)
- 1 cup shredded cheese (Gouda or Pepper Jack recommended)
- 4 tablespoons unsalted butter, melted
- 1 teaspoon garlic powder
- 1 teaspoon dried onion powder
- 1 teaspoon dried parsley
Instructions
- Preheat your oven to 350°F (175°C). Lightly grease a 9×13 inch baking dish.
- In a medium bowl, combine the shredded chicken and barbecue sauce. Mix until the chicken is fully coated.
- Slice the entire package of slider rolls horizontally, keeping the rolls connected in one piece. Place the bottom half of the rolls into the prepared baking dish.
- Distribute the BBQ chicken mixture evenly over the bottom layer of rolls.
- Sprinkle the shredded cheese evenly over the chicken mixture.
- Place the top half of the rolls over the cheese layer.
- In a small bowl, whisk together the melted butter, garlic powder, onion powder, and dried parsley. Brush this butter mixture evenly over the top of the slider buns.
- Cover the baking dish tightly with aluminum foil. Bake for 15 minutes.
- Remove the foil and bake for an additional 5 to 10 minutes, or until the cheese is fully melted and the tops of the rolls are golden brown.
- Slice the sliders apart carefully using a serrated knife and serve immediately as a party snack recipe or easy dinner solution.
Notes
- For a slow cooker chicken sliders variation, cook 1.5 lbs of chicken breasts in the slow cooker with 1 cup of broth on low for 4 hours, shred, then mix with 1 cup of BBQ sauce before assembling the sliders.
- Consider adding thin slices of red onion or a drizzle of ranch dressing before baking for extra flavor.
- These sliders are excellent for game day food ideas and tailgating food inspiration.
Nutrition
- Serving Size: 1 slider
- Calories: 310
- Sugar: 15
- Sodium: 650
- Fat: 12
- Saturated Fat: 6
- Unsaturated Fat: 6
- Trans Fat: 0.2
- Carbohydrates: 32
- Fiber: 1
- Protein: 19
- Cholesterol: 45