


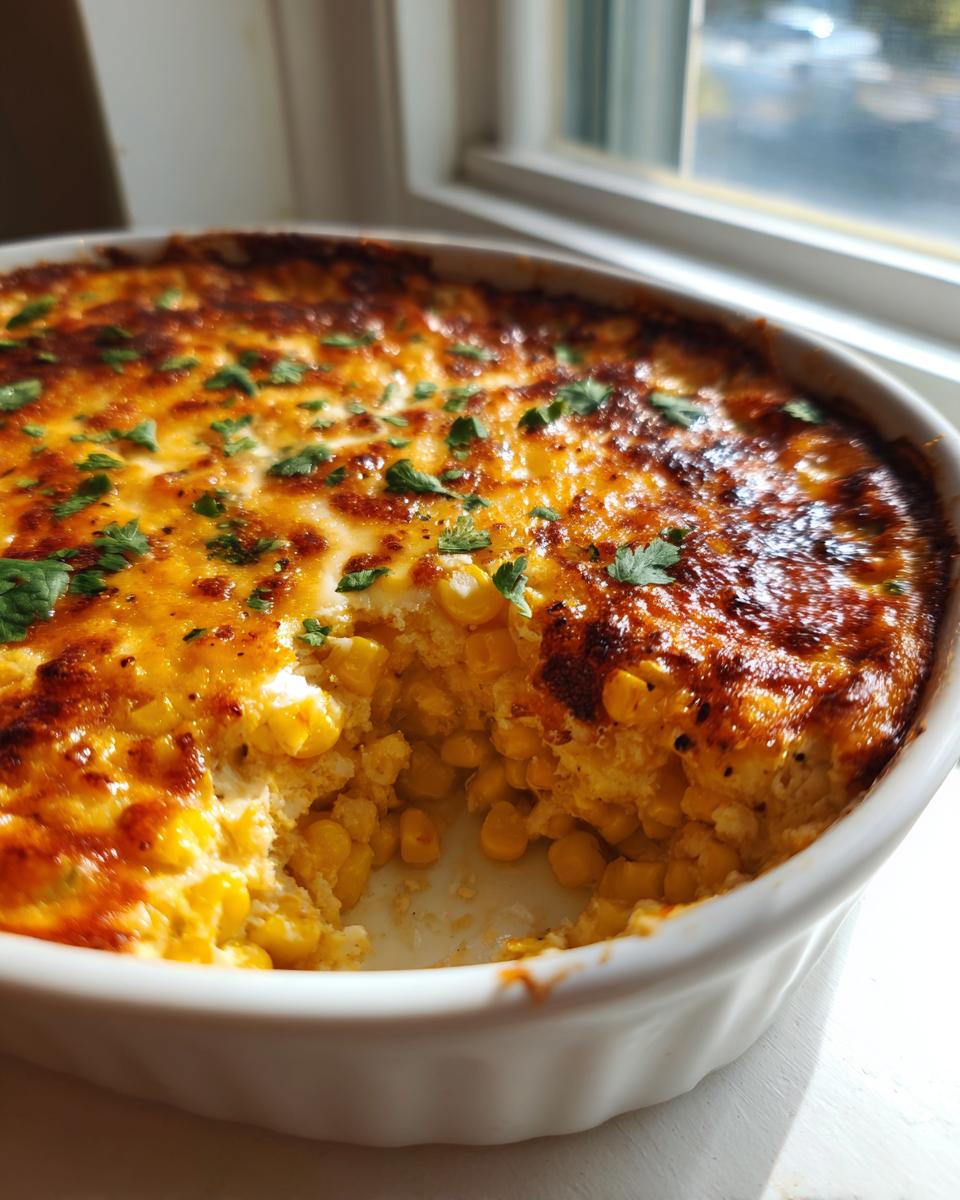
Forget the sad, tired veggie tray. When it comes to game day or any time friends gather, you need a dip that commands attention—something utterly decadent, unbelievably cheesy, and packed with the vibrant punch of Mexican street food. That, my friends, is exactly what we have here with this Easy Baked Mexican Street Corn Dip. Trust me, after years of chasing flawless gatherings, I finally landed on the recipe that truly delivers that bold, zesty flavor people crave in a street corn dip, but scaled down for an incredible appetizer. It’s warm, it’s scoopable, and honestly, it disappears faster than you can say “¡Fuego!”
- Why This Easy Street Corn Dip is the Ultimate Crowd Pleaser Dip
- Gathering Ingredients for Your Mexican Street Corn Dip
- Step-by-Step Instructions for the Best Corn Dip
- Tips for Success with Your Zesty Corn Dip
- Variations: Cold Street Corn Dip and Crockpot Corn Dip Options
- Serving Suggestions for This Mexican Flavored Dip
- Storage and Reheating Instructions for Leftover Street Corn Dip
- Frequently Asked Questions About Elote Dip Recipe
- Estimated Nutritional Data for Your Cheesy Corn Dip
Why This Easy Street Corn Dip is the Ultimate Crowd Pleaser Dip
I’ve learned through trial and error—usually error when hosting!—that the best appetizer recipes for parties are the ones that require minimal fuss but deliver maximum flavor impact. This baked corn dip is my secret weapon because it checks every single box you could possibly have for entertaining.
Here’s why I know you’ll love this becoming your new staple:
- Incredible Texture: Thanks to the blend of cream cheese and sour cream, this isn’t just a dip; it’s a luscious, Creamy Party Dip that clings perfectly to any chip you throw at it.
- Bold Flavor Profile: We aren’t holding back on the Mexican spices. The mix of chili powder, lime, and onion delivers that authentic, smoky, zesty kick that mimics real elote.
- Set It and Forget It: Once you’ve stirred everything together, it goes right into the oven. This means less time hovering over the stovetop and more time actually enjoying your guests!
- Guaranteed Hit: Truly, this is the definition of a Crowd Pleaser Dip. If you bring this to a gathering, I guarantee people will be tracking down the recipe before the first game starts.
Gathering Ingredients for Your Mexican Street Corn Dip
Okay, getting ready for this dip is half the fun! Before we even think about firing up the oven, we need to pull our players onto the counter. The beauty of this recipe is that most of this stuff is hanging out in your fridge or pantry already. But listen closely, because the small details here make a huge difference in transforming a basic cheesy dip into a real Mexican Street Corn Dip experience.
First thing’s first: your dairy base. Make sure that 8 ounces of cream cheese is actually softened. I mean softened, not melted! If you try to mash hard cream cheese into the sour cream, you’ll end up with lumps that refuse to blend, and we want silky smooth luxury here. Same rule applies to the sour cream—let it warm up on the counter for 15 minutes while you gather the rest.
Now, let’s talk cheese. We are layering flavors, so we’re using three different kinds! You’ll need 1 cup of Monterey Jack cheese that you’re mixing right into the base, plus an extra half cup to sprinkle on top later for that beautiful golden crust. Don’t skip the Parmesan, either; it adds a salty depth. The real secret weapon, though, is the Cotija cheese. It’s a crumbly, salty Mexican cheese that just screams authentic Elote Dip Recipe flavor. If you absolutely cannot find Cotija, use a little extra Parmesan, but Cotija is worth searching for, I promise!
Make sure your corn and Rotel (those diced tomatoes and peppers) are thoroughly drained. If you skip draining them, you’ll end up with a soupy mess rather than a thick appetizer. We’re going for texture here! Grab your fresh cilantro and red onion too; these fresh additions really cut through all that richness and keep the dip tasting bright and zesty.
Step-by-Step Instructions for the Best Corn Dip
Alright, we’ve got the beautiful ingredients laid out, and now it’s time to transform them into the legendary street corn dip everyone waits for! This baking method creates that perfect, piping-hot, Warm Dip Recipe consistency that is just unbeatable. Trust me, after years perfecting approachable recipes, I know this is the simplest way to nail that authentic flavor. Don’t worry if you’re new to making dips—this is so straightforward, you’ll feel like a total pro. The whole process moves quickly, so make sure you have your chips ready, or maybe grab some of my Cheese Crunch Bites recipe to alternate dipping!
Preheating and Preparing the Baking Dish
First order of business: get that oven working! We need it set to 375°F (190°C). Grab an 8×8 inch baking dish—a square glass dish works wonderfully, or even an oven-safe skillet if you want fewer dishes to clean, which I always prefer! Just give it a quick light grease so nothing decides to cling on for dear life later. That’s it for prep!
Mixing the Creamy Party Dip Base
Now for the big mix! Grab your largest bowl. Start by combining all your wet components: the drained corn, the drained Rotel (we don’t want soup!), that softened cream cheese, sour cream, and mayo. Use a sturdy spatula or hand mixer if you want to be extra sure—you’re aiming for something completely smooth, no cream cheese lumps allowed in this Creamy Party Dip! Once it looks like velvety deliciousness, fold in all your cheeses (all but that final half cup of Jack!), your fresh cilantro, onion, and all those brilliant spices: chili powder, paprika, cumin, and cayenne if you’re feeling the heat. Finally, squeeze in that amazing lime juice. This is my biggest pro tip: taste it right here! Does it need more zest? More spice? Adjust it now before it bakes—it’s your dip, make it sing for *you*.
Baking Your Hot Street Corn Dip to Perfection
Once you’ve tasted and adjusted, scoop that thick mixture into your prepared dish. Now, take that reserved half cup of Monterey Jack and sprinkle it generously right over the top. We aren’t done yet! This needs to bake for about 20 to 25 minutes. You’re looking for the edges to be bubbling merrily and the top cheese layer to be fully melted and just starting to turn that lovely golden brown. When it comes out, resist the urge to dive in immediately! Let it sit on the counter for about five minutes. This short rest helps it set up slightly so your freshly baked Hot Street Corn Dip doesn’t immediately collapse when you take the first scoop.

Tips for Success with Your Zesty Corn Dip
Even though this is one of the easiest dips I’ve ever developed—perfect for someone like me who spent years ordering takeout!—a few little pointers can take it from great to legendary. Since I want your party to be a massive success, here are the tricks I learned while testing this recipe over and over until it became my go-to party food staple.
First, let’s revisit that corn. The recipe calls for canned, drained sweet corn because it’s fast, but if you have an extra 10 minutes, you absolutely must try roasting it. Toss the kernels in a dry, hot skillet—no oil needed!—and cook until some of the edges get a little black char on them. That roasting process mimics the char you get from grilling fresh corn, deepening the flavor profile immensely. It turns a standard canned item into something truly special for your Zesty Corn Dip.
Second point: The power of the lime juice cannot be overstated. Seriously, don’t substitute bottled lime juice if you can help it. I use the juice of one whole lime, and I mean really squeeze it until it’s dry. That acidic pop is what cuts through the richness of all that cream cheese and sour cream. Without it, the dip feels heavy. With it, it sings! It is essential for achieving that true, tangy Mexican flavor. This small detail elevates the entire experience.
Finally, think about the serving vessel. While you bake it in an 8×8 pan, if you’re looking for that “wow” factor and want to keep it hot longer, transfer the finished dip into a small, heavy cast-iron skillet right before serving. It looks rustic, it holds the heat beautifully, and frankly, it just looks amazing on a buffet table, inviting everyone over for a scoop.
Variations: Cold Street Corn Dip and Crockpot Corn Dip Options
I absolutely love that this recipe is so flexible! While I personally think the baked version, this Hot Street Corn Dip, is undeniably the best because it gets that lovely golden crust, sometimes life just calls for a different cooking vessel, or maybe you just forgot to turn the oven on (we’ve all been there!). The beauty of having so much cream cheese and sour cream in the base means you don’t even need heat for it to taste incredible. This is where using the rich ingredients we talked about really pays off.
If you are looking for a super Quick Party Food option where you can literally mix it all up 20 minutes before people arrive, you can turn this into a fantastic cold dip. For the cold version, simply mix everything together—all the corn, cheeses, spices, and the dairy base—just exactly as we did in the mixing instructions. Then, cover it tightly and slide it into the fridge. You need at least two hours for the flavors to really marry together and develop that deep, authentic taste of a true Mexican Street Corn Dip, but honestly, overnight is even better.
Now, for the game day champion: the slow cooker! This is fantastic if you are making a huge batch or if you need to keep your oven free for something else, like maybe those amazing cranberry appetizers I shared last fall. For a Crockpot Corn Dip, you just dump everything—all ingredients except the final cheese topping—into your slow cooker. Set it on low for about 2 to 3 hours, or if you’re in a massive hurry, put it on high for just one hour. Once it’s hot, sprinkle that last bit of Monterey Jack on top and let it sit with the lid off until it melts. I love keeping mine on the ‘Warm’ setting throughout the party. This saves you from having to transfer it, which means less cleanup, which is just music to my ears! You can find a bit more about relying on classic dairy bases in my piece on cream cheese recipes.
Serving Suggestions for This Mexican Flavored Dip
You’ve got this unbelievably rich, cheesy, and vibrant Mexican Flavored Dip ready to go, but what do you serve it with? Listen, while any standard tortilla chip will do in a pinch, using the right delivery system can make your party feel instantly elevated. Because this dip is so thick and flavorful—especially when it’s piping hot from the oven—you want something sturdy enough to handle the weight.
My go-to choice, hands down, is a simple, high-quality scoopable tortilla chip. Look for the thicker, restaurant-style ones; the flimsy, airier chips break too easily under the pressure of this heavy dip. If you’re trying to keep things a little lighter, absolutely go for sturdy fresh vegetables! Bell pepper strips, celery sticks, or thick slices of cucumber hold up beautifully.

But here is where you can really lean into that bold flavor profile: consider what you can scoop onto the dip. A little dollop of fresh pico de gallo right in the center adds a cool, watery crunch that contrasts nicely with the heat. And if you’ve tried my recipe for pickled red onions, you already know a few of those sharp, sweet rings on top of a scoop cuts through all that richness perfectly. It just makes everything taste brighter and more complete. This dip is ready to shine, no matter what you pair it with!
Storage and Reheating Instructions for Leftover Street Corn Dip
So, you managed to have leftovers! Honestly, that’s a miracle because this dip usually vanishes when I make it, but I’m always thrilled when I have a small container left for a late-night snack the next day. Being able to store and reheat this street corn dip properly is key to keeping that luxurious, creamy texture intact. You don’t want to ruin the magic we just created with a bad reheat!
The best way to store any leftovers is in an airtight container. The density of the cream cheese and mayonnaise base helps it keep beautifully. I find that this dip stays perfectly good in the refrigerator for about three to four days. Any longer than that, and while it won’t necessarily be unsafe, the texture can start to separate a bit, or the vegetables might get too soft for my liking.
When it comes to bringing it back to life, you have two main paths, and the oven is definitely the winner here. You want that bubbly, hot goodness back, right?
Reheating in the Oven for Best Results
For the best experience, transfer any leftovers into a small, oven-safe dish—I usually use a small ramekin or an individual ceramic baker if I only saved a small amount. Preheat your oven to around 350°F (175°C). Tent the dish loosely with aluminum foil. The foil is super important because it prevents the top layer, especially if you had extra cheese, from burning before the center heats through. Heat it for about 15 to 20 minutes, checking around the halfway mark. You’re done when it’s hot all the way through and you see those soft, gentle bubbles forming on the surface again. This method preserves the richness we worked so hard to build.

The Microwave Caution
Look, sometimes you need dip right now. If you’re desperate, you can use the microwave, but I have to warn you: be gentle. Microwave heating can sometimes cause the fats and liquids in the dip to separate, making it look a little oily or grainy. If you must go this route, use short bursts—30 seconds at a time—and stir well between each burst. I also recommend adding a tiny splash of milk or sour cream before microwaving the leftovers. Stirring it in helps emulsify everything again as it heats up. It won’t look quite as perfect as the oven version, but hey, it still tastes like Elote Dip Recipe heaven!
Frequently Asked Questions About Elote Dip Recipe
I get asked so many great questions about this recipe—and honestly, I love it! It means you guys are getting in your kitchens and making this glorious thing. Dealing with an exceptional Elote Dip Recipe involves knowing a few key details, especially when it comes to flavor customizing. Take a look at some of the most common things people ask when they are about to make this the centerpiece of their party spread.
Can I make the entire street corn dip ahead of time?
This is a fantastic question, especially if you’re planning a massive party! The great news is yes, you absolutely can assemble the entire base mixture—everything except the final layer of cheese you put on top before baking. Mix everything together in the bowl, cover it tightly, and place it in the fridge. It actually holds up incredibly well! I usually recommend making it no more than 24 hours in advance. When you’re ready to serve, transfer it to your baking dish, top everything with that final sprinkle of Monterey Jack, and follow the baking instructions as written. It just might need an extra 5 minutes in the oven since it’s starting out chilled.
How spicy is this dip naturally, and how can I control the heat?
When I wrote this recipe, I designed it to be flavorful and zesty, not face-meltingly hot. If you use the jalapeños called for (which are typically pickled ones that are milder), you will get a pleasant, warm kick. If you are sensitive to spice, simply omit the jalapeños entirely! If you are like me and believe heat equals flavor, you can easily turn this into a serious Spicy Corn Dip. I suggest doubling the cayenne pepper, or even better, substituting the pickled jalapeños with some finely diced, seeded fresh serrano peppers. Serrano peppers bring a real punch of clean heat that works wonderfully against the sweetness of the corn!
What exactly is Cotija cheese, and can I skip it?
Cotija cheese is what truly separates a generic cheesy corn dip from a superb Mexican Street Corn Dip. It’s a firm, crumbly Mexican cheese made from cow’s milk, and it tastes salty, almost like a drier, more robust Parmesan cheese. It doesn’t melt much; instead, it stays slightly crumbly when heated, giving you those salty little pops of flavor throughout the dip. Can you skip it? Sure. But I highly recommend substituting it with extra Parmesan cheese if you can’t find it. Just know that the deep authenticity comes from that Cotija!
Does this recipe work if I substitute the cream cheese?
That creamy texture is vital; it’s why this is such a satisfying Dip With Cream Cheese! The cream cheese here acts as a critical binder, providing structure and that necessary richness without making the dip greasy. I really advise sticking to full-fat cream cheese for the best results. If you were determined to try a lower-fat version, you might increase the sour cream slightly, but I cannot guarantee the texture will hold up the same way when baked. For party food that needs to stay perfect for an hour or two under a heat lamp (or just sitting on the counter), the full-fat dairy is your friend!
What’s the best way to keep this dip warm for serving?
Keeping a Warm Dip Recipe hot throughout a long party is always a challenge! If you don’t want to keep sticking it back in the oven, the best method is transferring it to a small, heavy cast-iron skillet after baking. Cast iron holds heat beautifully. You can place that skillet on a small warming plate or even directly on a trivet on a warming tray. If you’re serving it slow cooker style, just keep the heat set to the ‘Warm’ setting, checking occasionally to stir the bottom layer so it doesn’t crust over too much.
Estimated Nutritional Data for Your Cheesy Corn Dip
Now, I know that when we are diving into a dip this rich, loaded with cheese and creamy goodness, we aren’t exactly looking for air fare, right? But I believe in transparency, even for a glorious, melt-in-your-mouth feast like this! Since I want you to be fully informed when serving up this incredible party favorite, I’ve worked up the estimated nutritional breakdown below.
Please remember, this is just an estimate based on the exact ingredients listed in the recipe, and it assumes a serving size of 1/6th of the total dip. If you eat the entire thing yourself (no judgment here—this Cheesy Corn Dip is dangerous!), you’ll obviously need to multiply these numbers!
Think of this as a helpful guide for your next big gathering. It lets people know they are getting a satisfying, hearty appetizer that truly delivers on flavor!
- Serving Size: 1/6 of dip
- Calories: Approximately 410 per serving
- Total Fat: About 38g (with 15g being saturated fat—we aren’t skimping on the richness!)
- Carbohydrates: Roughly 12g
- Protein: A solid 10g to keep everyone satisfied
- Sugar: Very low, around 5g, since most of the sweetness comes naturally from the corn
Since we are using full-fat dairy and rich cheese blends, the sodium and fat content is higher, which is exactly what makes this Mexican Street Corn Dip taste so undeniably good. It’s worth every single calorie when you see everyone lining up for seconds. Enjoy the feast!
PrintEasy Baked Mexican Street Corn Dip: The Ultimate Creamy Elote Dip

This **Best Mexican Street Corn Dip** recipe transforms the bold flavors of elote into a creamy, cheesy, scoopable appetizer perfect for game day or any party. It is a **Crowd Pleaser Dip** that bakes up hot and irresistible.
- Prep Time: 15 min
- Cook Time: 25 min
- Total Time: 40 min
- Yield: 6 servings 1x
- Category: Appetizer
- Method: Baking
- Cuisine: Mexican
- Diet: Vegetarian
Ingredients
- 1 (15 ounce) can sweet corn, drained
- 1 (10 ounce) can Rotel, drained
- 8 ounces cream cheese, softened
- 1 cup sour cream
- 1 cup mayonnaise
- 1 cup shredded Monterey Jack cheese, plus 1/2 cup for topping
- 1/2 cup grated Parmesan cheese
- 1/2 cup crumbled cotija cheese (or extra Parmesan)
- 1/2 cup fresh cilantro, chopped
- 1/2 cup finely chopped red onion
- 1/2 cup pickled jalapeños, drained and chopped (optional, for **Spicy Corn Dip**)
- 1 teaspoon chili powder
- 1 teaspoon smoked paprika
- 1/2 teaspoon cumin
- 1/4 teaspoon cayenne pepper (optional)
- Juice of 1 lime
- Salt and black pepper to taste
- Tortilla chips or vegetable sticks for serving
Instructions
- Preheat your oven to 375°F (190°C). Lightly grease an 8×8 inch baking dish or a similar-sized oven-safe skillet.
- In a large bowl, combine the drained corn, drained Rotel, softened cream cheese, sour cream, and mayonnaise. Mix until smooth.
- Stir in the 1 cup of Monterey Jack cheese, Parmesan cheese, cilantro, red onion, jalapeños (if using), chili powder, smoked paprika, cumin, and cayenne pepper. Mix well to combine all ingredients.
- Squeeze in the lime juice and season with salt and pepper. Taste the mixture and adjust spices as needed for your preferred level of zest or spice.
- Transfer the mixture to your prepared baking dish. Sprinkle the remaining 1/2 cup of Monterey Jack cheese evenly over the top.
- Bake for 20 to 25 minutes, or until the dip is hot throughout and the cheese topping is melted and lightly golden brown.
- Remove from the oven and let it cool for 5 minutes before serving. Garnish with extra cotija cheese or a sprinkle of chili powder if desired.
- Serve this **Warm Dip Recipe** immediately with your favorite tortilla chips or fresh vegetables.
Notes
- For a **Crockpot Corn Dip** variation, combine all ingredients (except the topping cheese) in a slow cooker. Cook on low for 2-3 hours or high for 1 hour. Top with cheese and cook until melted.
- To achieve a richer flavor, roast the corn kernels in a dry skillet over medium-high heat until lightly charred before mixing them into the dip base.
- If you prefer a **Cold Street Corn Dip**, skip the baking step. Chill the mixed dip for at least 2 hours to allow the flavors to meld before serving.
Nutrition
- Serving Size: 1/6 of dip
- Calories: 410
- Sugar: 5
- Sodium: 650
- Fat: 38
- Saturated Fat: 15
- Unsaturated Fat: 23
- Trans Fat: 0.5
- Carbohydrates: 12
- Fiber: 2
- Protein: 10
- Cholesterol: 65