
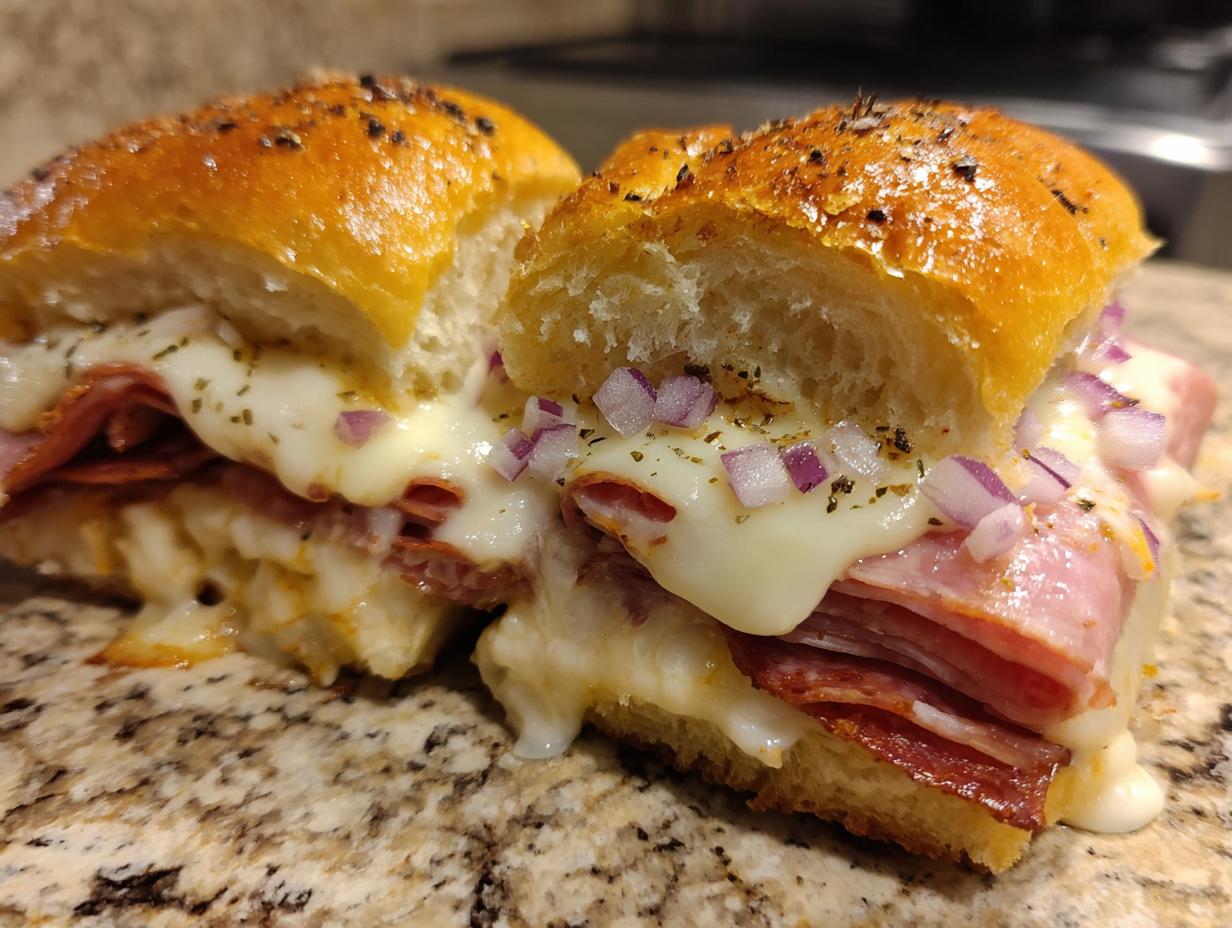

You know that feeling when you crave the punchy, savory flavors of a classic Italian deli sandwich, but you just don’t have the time or the patience for assembly-line construction? I get it. My life used to be all spreadsheets and rush, so finding food that delivers huge flavor without demanding hours of my time is core to the Gourmet Gaze philosophy. That’s why I perfected these grinder sliders. We take all that incredible flavor—salami, ham, melty cheese—and layer it onto pillowy soft Hawaiian rolls, finish it with the most amazing savory glaze, and bake it until golden. They turn out perfectly portable, incredibly satisfying, and an absolute dream for game days or weeknight dinners. They are quickly becoming one of my favorite appetizers and snacks here on the site. Trust me, these are the easy, reliable comfort food you’ve been looking for.
- Why These Italian Grinder Sliders Are Your New Favorite Party Appetizer Sliders
- Ingredients for Perfect Grinder Sliders
- Assembling Your Baked Sliders Recipe: Step-by-Step
- Expert Tips for Making the Best Grinder Sliders
- Ingredient Notes and Substitutions for Deli Meat Sliders
- Serving Suggestions for Your Crowd Pleasing Appetizers
- Storage and Reheating Instructions for Leftover Grinder Sliders
- Frequently Asked Questions About Grinder Sliders
- Nutritional Estimates for These Easy Slider Recipes
- Nutritional Estimates for These Easy Slider Recipes
Why These Italian Grinder Sliders Are Your New Favorite Party Appetizer Sliders
When I develop a recipe for Gourmet Gaze, it has to tick a few major boxes: great taste, beautiful presentation, and maximum return on effort. These Italian Sliders check every single box. They take the heavy lifting out of making individual mini Italian sandwiches and turn it into one easy pan bake. They are seriously the ultimate cheese crunch bites competitor!
- They are the definition of Crowd Pleasing Appetizers. Everyone grabs one (or three!) right out of the pan.
- The savory garlic butter glaze seals in moisture, making them incredible the moment they come out of the oven.
- They transition perfectly from a casual dinner option to stellar Game Day Sandwiches—no complicated serving setup required!
- The sweetness of the Hawaiian rolls beautifully balances the salty, tangy profile of the Italian meats and cheese.
If you need quick, substantial appetizers that people rave about, you’ve found them. Move over, boring party dips!
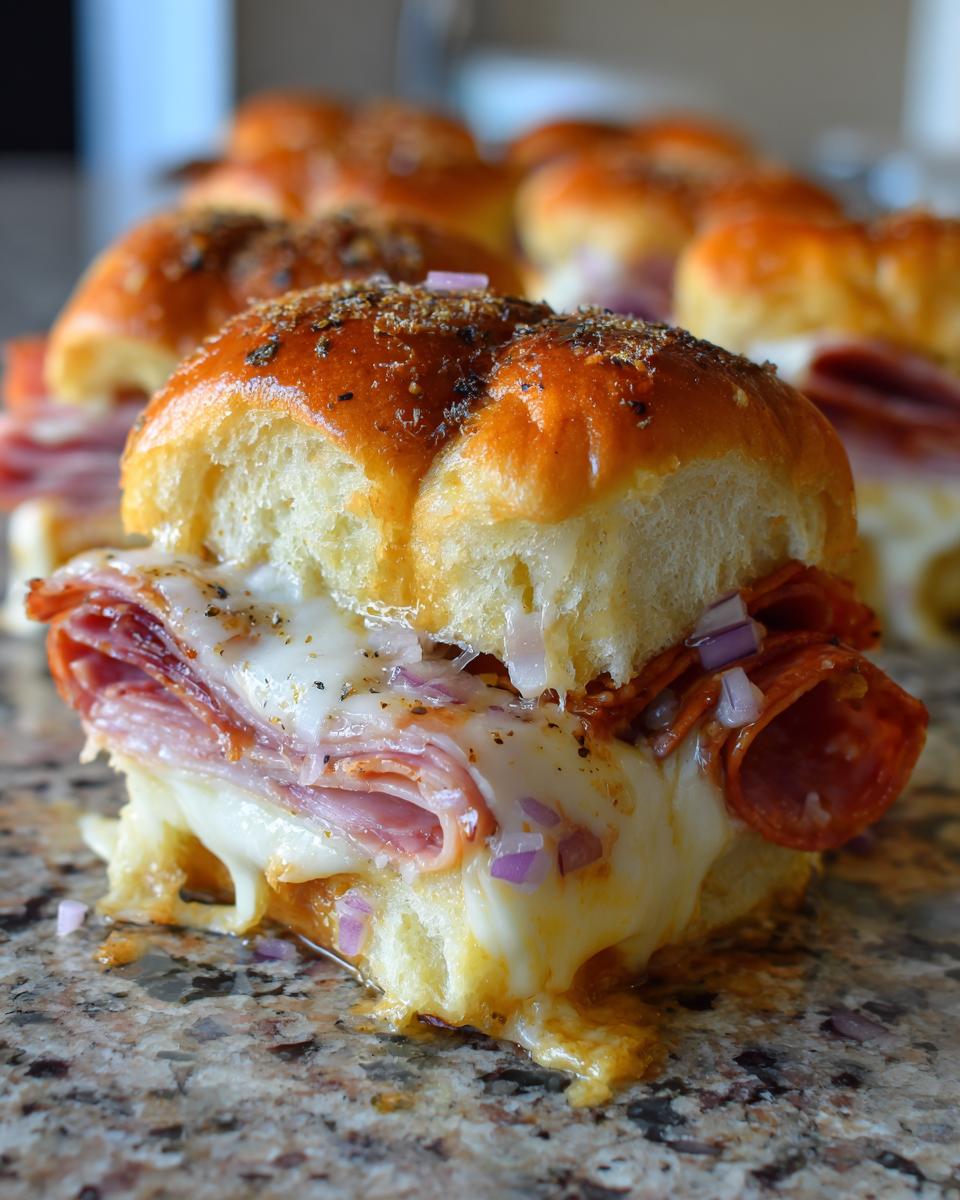
Ingredients for Perfect Grinder Sliders
Okay, let’s get down to what actually makes these grinder sliders sing. Because this recipe is so straightforward, ingredient quality really matters. We’re relying on that soft texture of the bread to hold up against the meat and the rich glaze we’ll make next. Don’t skimp on the rolls; the sweetness of the whole dinner rolls is essential for balancing the saltiness.
Here is exactly what you need for 12 incredible sliders:
- One (12 count) package sweet Hawaiian rolls—the whole package!
- About a half-pound each of thinly sliced ham, salami, and pepperoni.
- Eight slices of provolone cheese and four slices of Swiss cheese.
- For the flavor bomb glaze: one full stick (1/2 cup) of unsalted butter, melted down.
- Two tablespoons of Dijon mustard—don’t use the yellow stuff, trust me.
- One tablespoon of dried Italian seasoning.
- One teaspoon of garlic powder and a half teaspoon of onion powder.
- Just a pinch of black pepper.
- Optional, but nice for color: a quarter cup of finely chopped red onion for the top.
Assembling Your Baked Sliders Recipe: Step-by-Step
Alright, this is where the magic happens! Making these grinder sliders is super fun because it’s all about assembly, not intricate cooking. The beauty of using the whole slab of rolls is that your structure stays solid until the very end. We want that beautiful, gooey melt, not a pile of separated sandwiches, right? Remember to have your oven at 350 degrees Fahrenheit before you even start layering. I always grease my 9×13 dish with a little cooking spray first—just a habit.
Preparing the Rolls and Layers for the Grinder Sliders
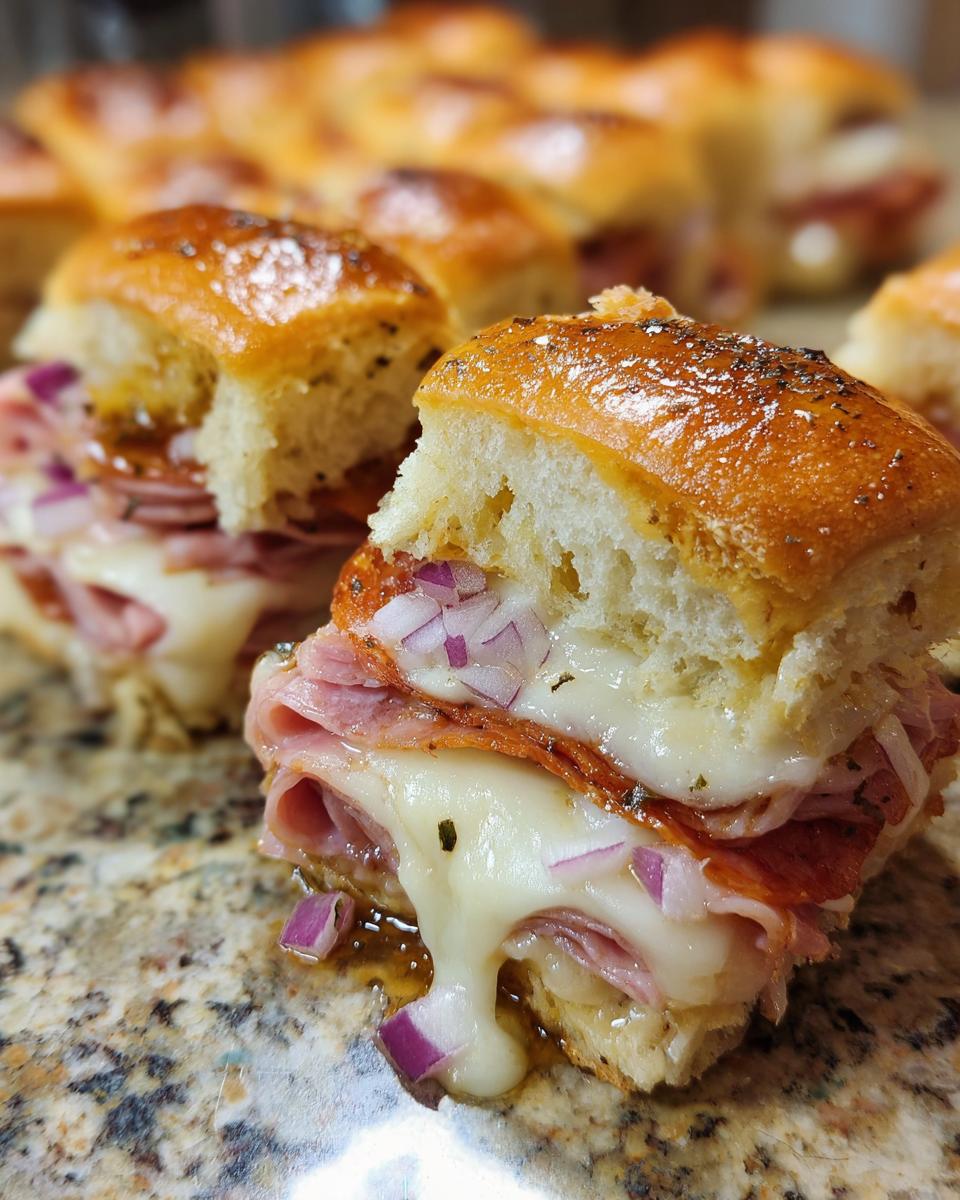
The very first thing Leo does is take that entire package of Hawaiian rolls and slice them horizontally, keeping them stuck together as one big unit. That’s important for structural integrity! Put the bottom half, cut-side up, right into your prepared dish. Now, layer your cold cuts carefully onto that bottom half. Here’s a little tip from my test kitchen: I always alternate the meat slightly—ham, then salami, then pepperoni—instead of just piling one on top of the other. This ensures every single slider gets a little bit of every flavor profile when you finally cut them.
Top that magnificent meat layer with all your cheese slices, making sure to cover the entire surface area. Then, gently place the top half of the rolls right back on. See? So easy! Recipes using good bread, like these small batch dinner rolls we featured last month, really rely on gentle handling during assembly.
Creating the Savory Glaze for Hot Italian Sliders
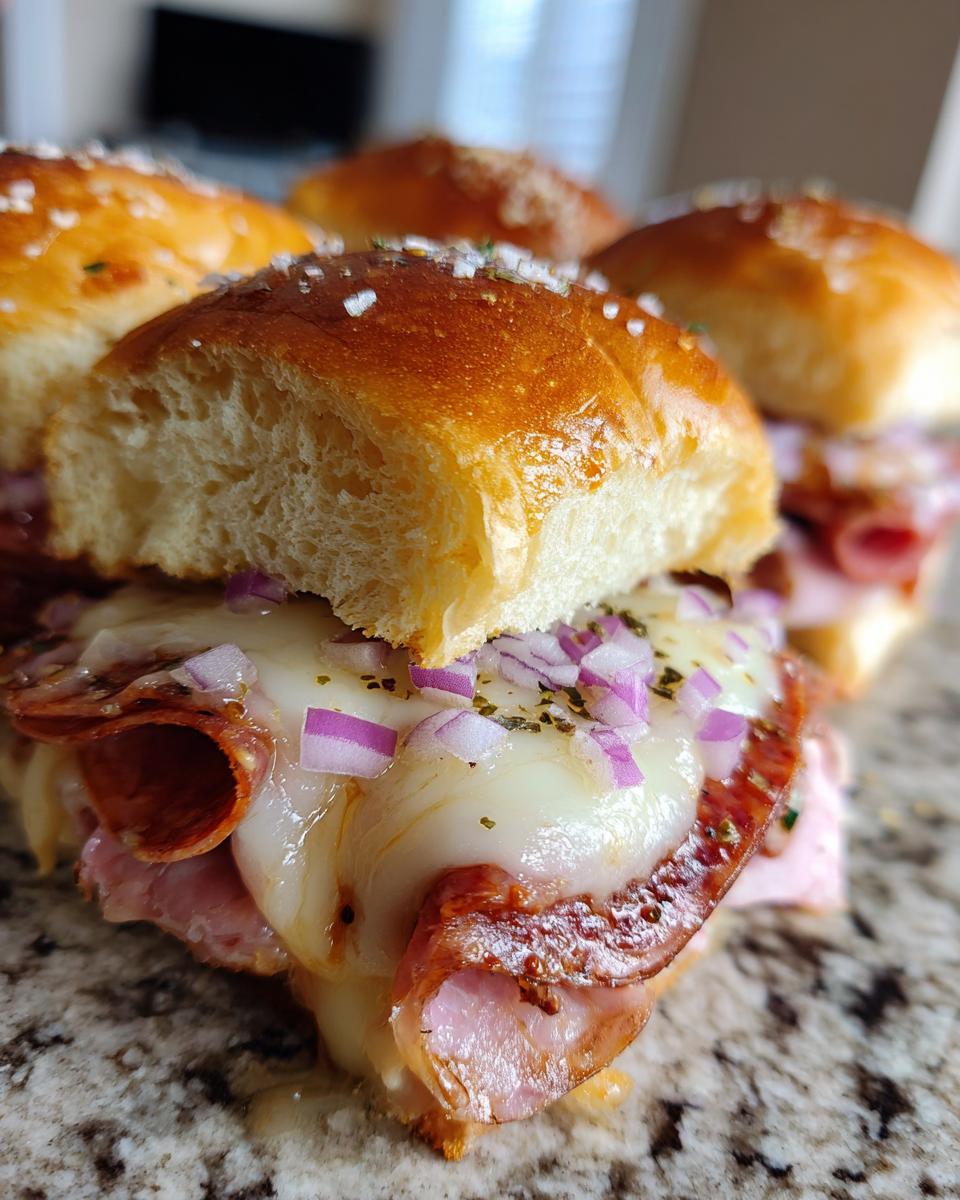
While the meat and cheese are waiting patiently, whisk together your glaze ingredients in a small bowl. We’ve got melted butter, that smooth Dijon mustard, Italian seasoning, garlic powder, onion powder, and pepper. Whisk it until it looks perfectly combined. Before you brush it on, give it a little taste test! This savory glaze is what keeps them moist and gives them that distinctive flavor that sets these Hot Italian Sliders apart from boring baked sandwiches. Adjust the salt or pepper if you think they need a little extra punch.
Baking and Finishing Your Grinder Sliders
Take that wonderful glaze and brush it evenly over the very top of the assembled rolls. If you’re using those optional red onions, sprinkle them on now. Now, cover the dish tightly with aluminum foil—this steams them perfectly so the rolls soften up. Bake them covered for 15 minutes. After that initial bake, pull off the foil and let them go for another 5 to 10 minutes until the cheese is bubbling hot and the tops get that beautiful, irresistible golden-brown color. This uncovered time is key!
Crucially, don’t slice them right away! Pull them out and let them rest for five minutes. This lets the juices settle back into the bread. Then, use a serrated knife to carefully cut them along the natural roll seams. Enjoy immediately!
Expert Tips for Making the Best Grinder Sliders
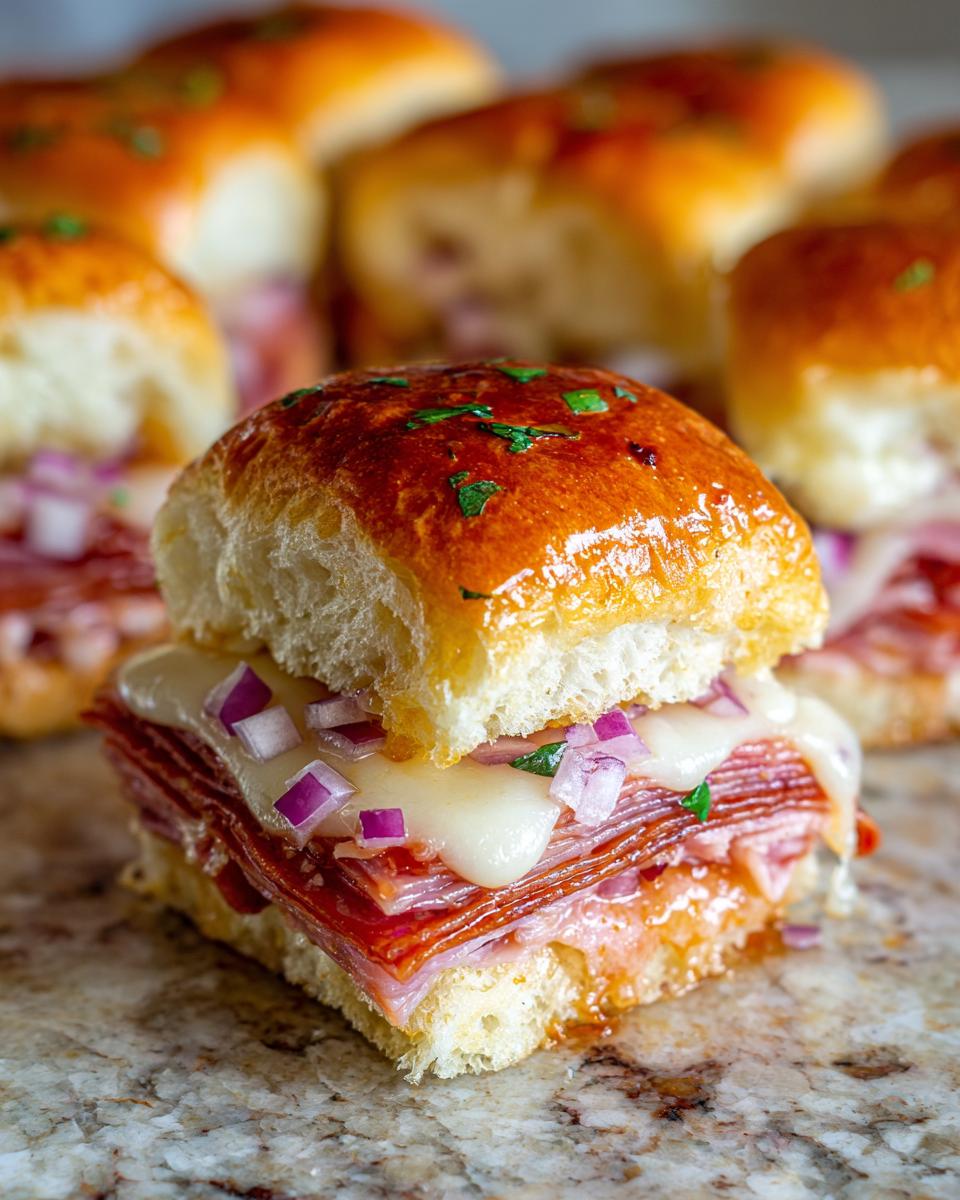
Even though these grinder sliders are famously easy, those little details can take them from good to absolutely unforgettable. I’ve included a few special notes here that my readers—and I—swear by. Remember, the little flavor hacks are what separate a good recipe from a legendary one, which is always the goal here at Gourmet Gaze.
My first piece of advice is about moisture and tang. For serious flavor, try adding a thin swipe of mayonnaise or even some zesty Italian dressing onto the bottom half of the rolls *before* you stack the amazing mountain of meat and cheese. It really amplifies that classic Italian vibe! Also, if you like a little kick—and I usually do—toss in some sliced pepperoncini peppers once you add the cheese. They bake down perfectly and offer a wonderful, spicy counterpoint to the rich meats and the buttery glaze.
One final must-know: these make fantastic easy make ahead appetizers! You can assemble the whole thing, cover it, and keep it refrigerated for several hours. Just add 5 extra minutes to the initial covered baking time if they go into the oven cold. See? Effortless entertaining!
Ingredient Notes and Substitutions for Deli Meat Sliders
Sometimes you’re at the store, and they are totally out of Swiss, or maybe you just prefer a little more sharpness in your sandwich profile. Since these are fundamentally Deli Meat Sliders built around Italian flavor, substitutions are pretty easy! The important thing is keeping that balance of salty meat and meltable cheese.
If you don’t have Swiss cheese on hand, go ahead and swap it out for an equal amount of whole-milk mozzarella. Mozzarella melts beautifully and will still catch that savory glaze perfectly. If you want something with more zest, Provolone is usually the next best bet! If you are running low on Salami or Pepperoni, feel free to bring in other cured meats you love. I always recommend adding a layer of Capicola if you can find it—it brings the heat up just enough to make these Hot Italian Sliders really pop.
And listen, about the rolls: If you cannot find Hawaiian rolls—and oh, you’ll miss that sweetness—any soft, sweet dinner roll will work. Just make sure they are tightly packed together in the pan. Do not use hoagie rolls or crusty French bread; these sliders rely on that soft, spongy texture to absorb the garlic butter glaze. That absorption is what keeps them feeling like tender comfort food sliders instead of dry leftovers!
Serving Suggestions for Your Crowd Pleasing Appetizers
So, you’ve got this incredible pan of glistening, cheesy, savory Party Appetizer Sliders. Amazing! But what goes on the side? Because these are so rich—all that meat, cheese, and that glorious butter glaze—I find that what you serve alongside them should be lighter and perhaps a little acidic to cut through the richness. They stand up perfectly well on their own, of course, but a few simple additions make for a complete party spread.
For game day, skip the heavy chili and go for something bright. A simple, crisp slaw is always a winner. The crunch and slight tanginess of cabbage and vinegar contrast beautifully with the warm, soft rolls. If I’m serving these earlier in the day, I love pairing them with something fresh, like this fantastic Strawberry Chicken Salad I made—it offers a nice sweet/savory counterpoint without feeling too heavy.
If you absolutely must have a dip, keep it simple. Think about a jar of high-quality mixed olives or some pickled peppers on the side for people to add directly onto their slider after slicing. A creamy dip like ranch might weigh everything down too much. Remember, the goal is easy grazing!
These pair wonderfully with almost any dip or side that offers a little acidity or fresh crunch, ensuring your guests keep coming back for more without feeling overwhelmed by heavy flavors!
Storage and Reheating Instructions for Leftover Grinder Sliders
Look, I’ll be honest with you, these grinder sliders rarely make it to the next day! They are best devoured piping hot right out of the oven. However, if you managed to save a few—which, good for you for having self-control—storage is pretty straightforward. Since that beautiful savory glaze soaks right into the soft Hawaiian rolls, we need to be careful when reheating so we don’t turn them into mushy messes.
For short-term storage, keep any leftovers tightly sealed in an airtight container right on the counter for up to a day. If you need them to last longer, toss them in the fridge for up to three days. This is why they are fantastic easy make ahead appetizers; you can prep them completely before a party and just pop them in the fridge!
The Best Way to Reheat Your Sliders
Forget the microwave for these! The microwave is the arch-nemesis of crispy-on-top, soft-inside baked goods. It just steams everything into submission, and you lose that textural contrast we worked so hard for.
For the absolute best results—meaning that hot, cheesy, slightly crisp top—you must use the oven. Preheat your oven or toaster oven to about 325 degrees Fahrenheit. Place the few remaining sliders on a small baking sheet. If they look dry, you can brush them *very* lightly with a few drops of extra melted butter, but don’t overdo it! Bake them uncovered for about 8 to 10 minutes. This gentle heat warms them through, melts the cheese again, and helps refresh that golden-brown top layer.
Can I Freeze These Deli Meat Sliders?
You absolutely can freeze them, but the texture satisfaction level drops slightly because the bread gets a little dense when thawing. If you want to freeze them, assemble them completely (meat, cheese, glaze, everything!), but *don’t bake them yet*. Wrap the unbaked slab tightly in plastic wrap, then wrap that entire package in aluminum foil, and freeze for up to two months. When you’re ready to serve, let them thaw in the fridge overnight, then follow Steps 6 through 10 in the main recipe instructions, adjusting the baking time slightly longer since they start cold.
Frequently Asked Questions About Grinder Sliders
I know you might have a few last-minute questions before diving into these incredible grinder sliders! It’s my job here at Gourmet Gaze to make sure you feel totally confident walking into the kitchen. This recipe is so popular because it hits that sweet spot between comfort food and party-ready, so it naturally sparks a few questions.
What actually makes these Italian Sliders count as “Grinder Sliders”?
That’s a great question! The term “grinder” traditionally refers to a specific style of Italian-American submarine sandwich, usually featuring multiple deli meats, sharp cheeses, onions, and often topped with a vinegary, herbaceous dressing or oil. We captured that exact rich, layered flavor profile—salami, ham, provolone—and put it into this baked slider format. They are essentially just a brilliant Grinder Sandwich Twist, made bite-sized!
Can I make these ahead of time, or do I have to bake them fresh?
You absolutely can prepare these in advance, which is why they make such perfect Party Appetizer Sliders! You can assemble the entire thing—meat, cheese, seasoning glaze and all—place it in the baking dish, cover tightly, and refrigerate it for up to 24 hours. Remember what I said earlier? Just make sure you add about five extra minutes to the initial covered baking time when you pull them straight from the fridge! They are fantastic as an Easy Make Ahead Appetizer.
If I can’t find Hawaiian Rolls, what should I use for these Easy Slider Recipes?
While the sweetness of the Hawaiian rolls is key to balancing the salty meats, if you genuinely can’t find them, look for a soft, slightly sweet slider roll, sometimes called Potato Rolls. The main thing is that the bread must be soft enough to absorb that buttery glaze and squish together nicely. Avoid anything too crusty or dense, like sourdough or ciabatta, because the end result won’t be the soft, yielding texture these Easy Slider Recipes are known for.
Do I have to use both Provolone and Swiss cheese?
You don’t *have* to, but I highly recommend using both for the best flavor melt! Provolone brings that classic Italian tang, while Swiss adds a subtle nuttiness and incredible stretchiness. If you have to choose just one, go with Provolone. If you need dairy switches, feel free to check out my notes in the substitution section above, but variety is the spice of life, even in Cheesy Sliders!
Nutritional Estimates for These Easy Slider Recipes
When you’re making something this rich and satisfying, it’s good to have a general idea of what you’re serving up. Since these Easy Slider Recipes pack a lot of savory meat and cheese between those sweet rolls, they aren’t exactly low-cal, but they are incredibly filling and perfect for a hearty appetizer or occasional weeknight meal. Please remember these are just estimates based on the ingredients listed above, but they should give you a good baseline for serving these Comfort Food Sliders.
Here’s the breakdown per slider (serves 1 of 12):
- Calories: 380
- Fat: 20g
- Saturated Fat: 9g
- Unsaturated Fat: 11g
- Trans Fat: 0.5g
- Carbohydrates: 28g
- Fiber: 1g
- Sugar: 10g
- Protein: 22g
- Sodium: 950mg (Yes, those deli meats add up, so be mindful!)
- Cholesterol: 55mg
Nutritional Estimates for These Easy Slider Recipes
When you’re making something this rich and satisfying, it’s good to have a general idea of what you’re serving up. Since these Easy Slider Recipes pack a lot of savory meat and cheese between those sweet rolls, they aren’t exactly low-cal, but they are incredibly filling and perfect for a hearty appetizer or occasional weeknight meal. Please remember these are just estimates based on the ingredients listed above, but they should give you a good baseline for serving these Comfort Food Sliders.
Here’s the breakdown per slider (serves 1 of 12):
- Calories: 380
- Fat: 20g
- Saturated Fat: 9g
- Unsaturated Fat: 11g
- Trans Fat: 0.5g
- Carbohydrates: 28g
- Fiber: 1g
- Sugar: 10g
- Protein: 22g
- Sodium: 950mg (Yes, those deli meats add up, so be mindful!)
- Cholesterol: 55mg
Easy Italian Grinder Sliders: The Ultimate Crowd-Pleasing Baked Appetizer
Make these easy Italian Grinder Sliders for your next gathering. These baked sliders, made on soft Hawaiian rolls with deli meats, cheese, and a savory garlic butter glaze, are perfect game day food and a simple weeknight dinner.
- Prep Time: 15 min
- Cook Time: 25 min
- Total Time: 40 min
- Yield: 12 sliders 1x
- Category: Appetizer
- Method: Baking
- Cuisine: American
- Diet: Vegetarian
Ingredients
- 1 (12 count) package sweet Hawaiian rolls
- 1/2 pound thinly sliced ham
- 1/2 pound thinly sliced salami
- 1/2 pound thinly sliced pepperoni
- 8 slices provolone cheese
- 4 slices Swiss cheese
- 1/2 cup (1 stick) unsalted butter, melted
- 2 tablespoons Dijon mustard
- 1 tablespoon dried Italian seasoning
- 1 teaspoon garlic powder
- 1/2 teaspoon onion powder
- 1/4 teaspoon black pepper
- 1/4 cup finely chopped red onion (optional, for topping)
Instructions
- Preheat your oven to 350 degrees Fahrenheit. Lightly grease a 9×13 inch baking dish.
- Slice the entire package of Hawaiian rolls in half horizontally, keeping the rolls connected. Place the bottom half of the rolls cut-side up in the prepared baking dish.
- Layer the meats and cheeses evenly over the bottom half of the rolls. Start with the ham, then salami, then pepperoni. Top the meats with the provolone and Swiss cheese slices.
- Place the top half of the rolls over the cheese layer.
- In a small bowl, whisk together the melted butter, Dijon mustard, Italian seasoning, garlic powder, onion powder, and black pepper to create the savory glaze.
- Evenly spoon or brush the butter glaze mixture over the top of the assembled sliders. Sprinkle with chopped red onion, if using.
- Cover the baking dish tightly with aluminum foil.
- Bake for 15 minutes covered.
- Remove the foil and bake for an additional 5 to 10 minutes, or until the cheese is fully melted and the tops of the rolls are golden brown.
- Let the sliders rest for 5 minutes before slicing them into individual portions. Serve warm.
Notes
- For extra flavor, you can add a thin layer of mayonnaise or Italian dressing to the bottom half of the rolls before adding the meat.
- These sliders reheat well in the oven or microwave, making them great for easy make ahead appetizers.
- If you prefer a spicier kick, add a layer of sliced pepperoncini peppers with the meat and cheese.
Nutrition
- Serving Size: 1 slider
- Calories: 380
- Sugar: 10
- Sodium: 950
- Fat: 20
- Saturated Fat: 9
- Unsaturated Fat: 11
- Trans Fat: 0.5
- Carbohydrates: 28
- Fiber: 1
- Protein: 22
- Cholesterol: 55