
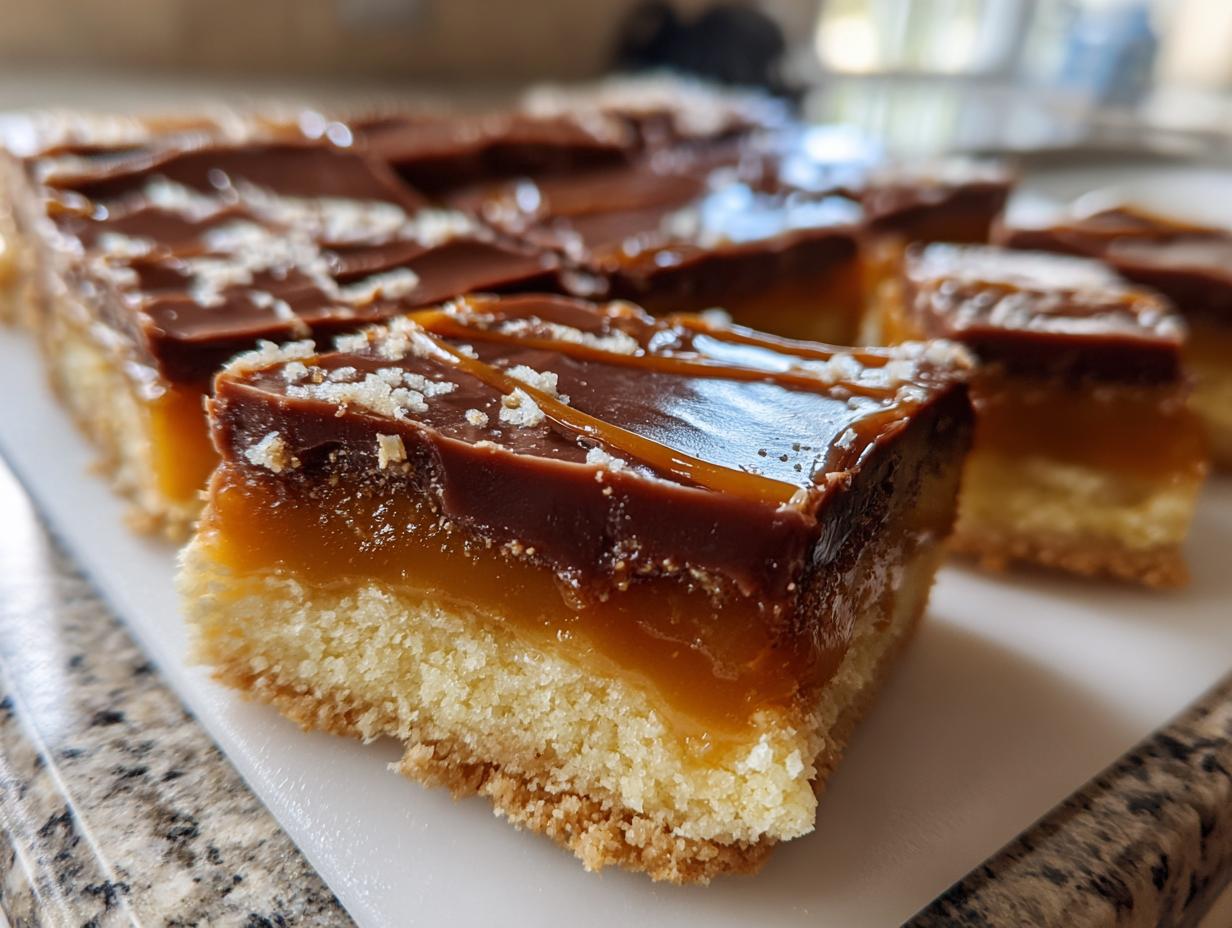

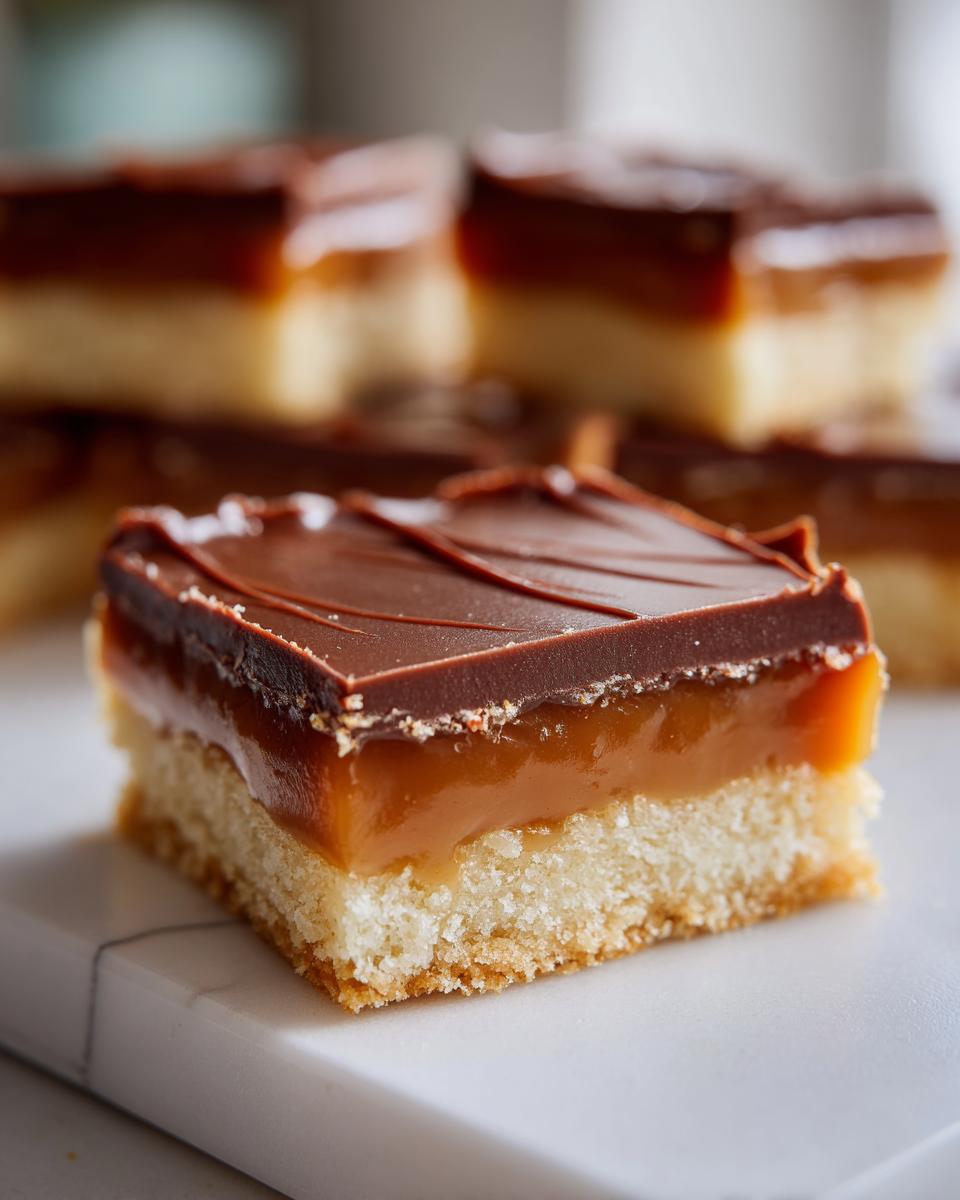
There’s something purely magical about that perfect, three-layer bite, isn’t there? That crisp, buttery shortbread, the river of gooey caramel, and the satisfying snap of chocolate. For years, I tried to replicate that iconic texture in my own kitchen—and trust me, there were some sticky disasters involving burnt sugar and rock-hard crusts along the way! But after endless testing, I’ve cracked the code. We are making the ultimate Homemade Twix Bars copycat recipe today. This isn’t just another dessert; it’s about perfecting a classic piece of American confectionery history right here to bring joy to your kitchen.
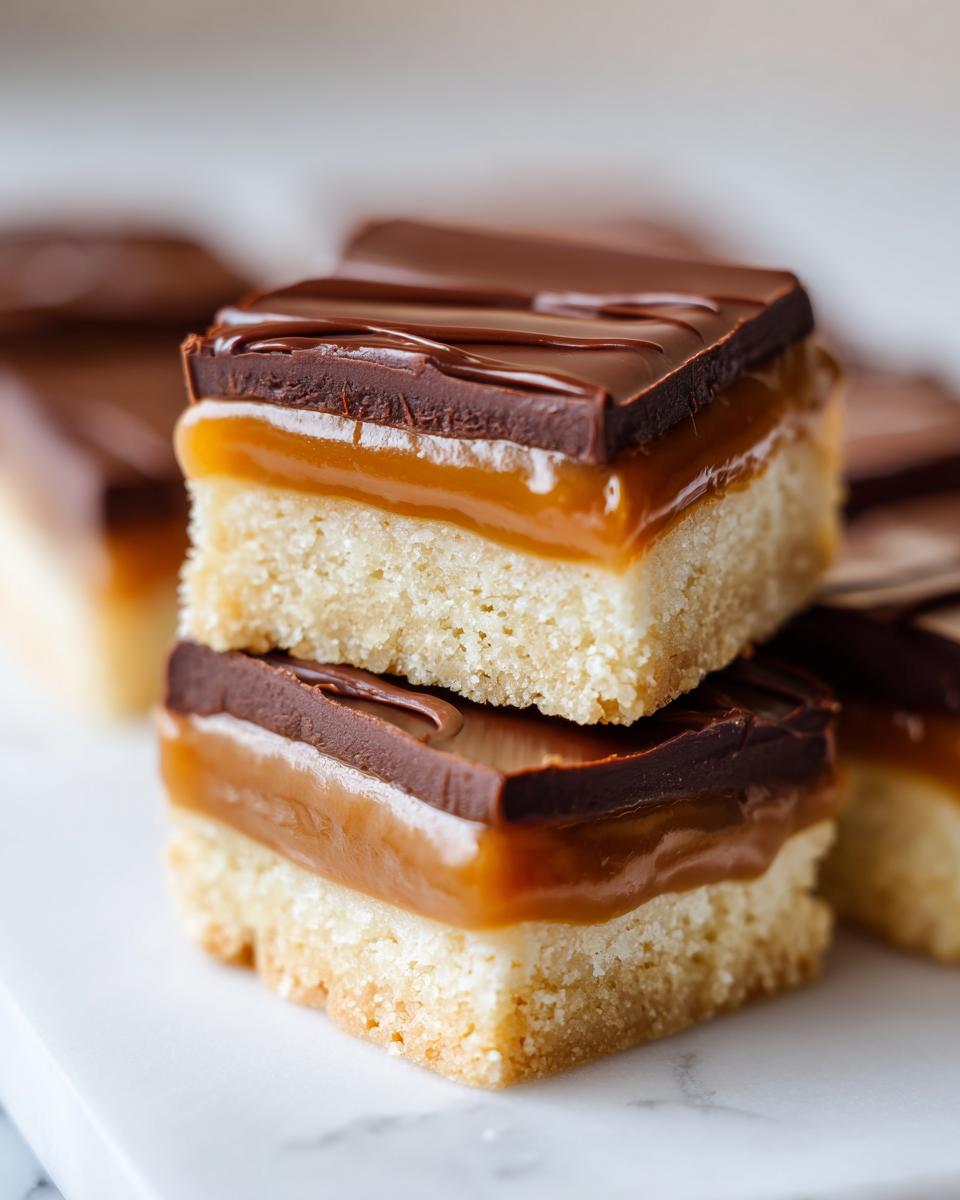
If you’re looking to elevate your dessert lineup, you absolutely must jump over to my main dessert collection for more inspiration after you finish these beauties right here.
- Why This Homemade Twix Bars Recipe is Your New Favorite Easy Twix Dessert
- Gathering Ingredients for Your Caramel Shortbread Chocolate Bars
- Step-by-Step Instructions for Perfect Homemade Twix Bars recipe
- Expert Tips for Success with Your Copycat Twix candy bar
- Twix Inspired Baking: Variations on the Classic Bar
- Storage and Reheating Instructions for Your Twix
- Frequently Asked Questions About Making Twix Cookies Recipe
- Estimated Nutritional Data for This Easy Twix Dessert
- Share Your Layered Cookie Bars Creations
- Share Your Layered Cookie Bars Creations
Why This Homemade Twix Bars Recipe is Your New Favorite Easy Twix Dessert
Look, when you make candy bars at home, you elevate them. Forget that slightly waxy texture of the store-bought kind; we’re aiming for decadent, buttery perfection. I know you want reliability in the kitchen—that’s why this recipe is completely tested and tweaked to give you that perfect crunch and gooey center, every single time. This particular layered cookie bars format is one of my most saved recipes!
- Superior Texture: You control the shortbread—it’s richer and crumbly, not hard.
- Better Caramel: Our homemade caramel doesn’t crystallize; it stays perfectly chewy.
- Customizable Chocolate: Want dark chocolate? Milk chocolate? You decide!
- The Flavor Factor: Everything tastes brighter when it’s fresh, trust me on this one.
If you want to see just how much other folks love recreating this classic, check out this great version for inspiration here!
Gathering Ingredients for Your Caramel Shortbread Chocolate Bars
Before we even think about turning on the oven, we need to make sure our station is stocked! When tackling layered desserts like this, having everything measured out and organized is key to keeping that shortbread crust from burning while you’re wrestling with caramel. Trust me, I learned the hard way mixing stuff on the fly means one layer always pays the price. Here is exactly what you’ll need for these decadent chocolate caramel desserts.
For the Buttery Shortbread Crust
- 1 cup (2 sticks) unsalted butter, softened (Make sure this is truly softened, not melted! It makes all the difference when creaming.)
- 1 cup granulated sugar
- 2 teaspoons vanilla extract
- 2 1/2 cups all-purpose flour
- 1/2 teaspoon salt
For the Gooey Caramel Layer of Your Twix
- 1 (14 ounce) can sweetened condensed milk
- 1 cup packed light brown sugar
- 1/2 cup (1 stick) unsalted butter
- 1/4 cup light corn syrup (This is our secret weapon to keep the caramel perfectly smooth and prevent it from turning grainy—expert tip, folks!)
- 1 teaspoon vanilla extract
- Pinch of salt
For the Chocolate Coating on These Layered Cookie Bars
- 12 ounces semi-sweet chocolate chips
- 2 tablespoons coconut oil or shortening (This helps thin the chocolate out just enough for a beautiful, glossy dip and coating.)
Step-by-Step Instructions for Perfect Homemade Twix Bars recipe
Alright, time to get baking! This is where we turn simple ingredients into pure magic layered heaven. Don’t rush the cooling stages, okay? That’s truly where many people run into trouble when making these copycat Twix bars. We build flavor and texture in phases here.
Baking the Buttery Shortbread Crust
First things first, get that oven warmed up to 350°F (175°C). Grab an 8×8 inch pan and line it with parchment paper—make sure you leave those big overhangs on two sides; they act as handles later, which is essential! In a big bowl, cream your softened butter and sugar until they look pale and fluffy, then beat in that vanilla. Now, slowly mix in your flour and salt until you just have a stiff, beautiful dough. Press that dough *firmly* and evenly into your prepared pan. Pop it in the oven for about 18 to 20 minutes. You’re looking for the edges to just barely kiss golden brown—don’t let it get dark! Let it cool down completely before moving on; I mean it, completely cool.
Creating the Rich Caramel Layer for Your Twix
This is the sticky part, so have your spoon ready! In a medium saucepan, combine your condensed milk, brown sugar, butter, and corn syrup. Bring that mixture up to a gentle bubble over medium heat. Once it starts bubbling, lower the heat to medium-low and stir constantly. This is non-negotiable! Stir for a solid 8 to 10 minutes until it thickens up nicely—you should be able to drag your spoon across the bottom and see the caramel slowly fill the track. Pull it off the heat, stir in the vanilla and salt, and immediately pour it right over that cooled shortbread crust. Spread it out gently and let it set for at least an hour. Seriously, patience pays off here; if it’s warm, the chocolate will just slide everywhere.
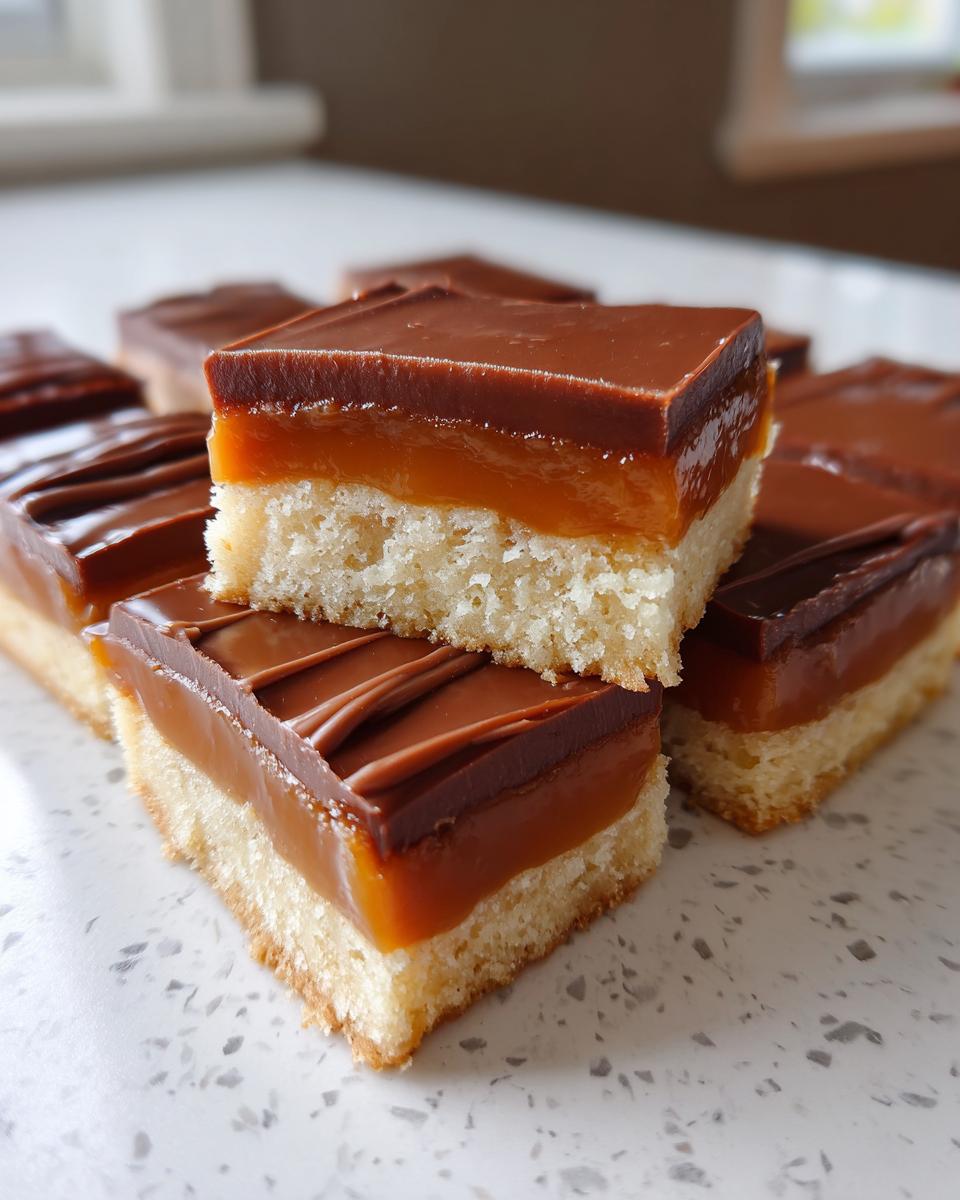
Coating and Cutting Your Decadent Chocolate Caramel Desserts
Time for the chocolate finish! In a microwave-safe bowl, melt your chips and coconut oil in 30-second bursts, stirring well after each one until it’s smooth as silk. Pour this glossy chocolate over the set caramel layer and tilt the pan to make sure it’s covered edge to edge. Let the chocolate set—you can speed this up in the fridge for about 15 minutes. And here is my pro tip for that professional candy bar look: pop the whole slab into the freezer for about 10 minutes just before cutting. This hardens everything up perfectly so your knife glides through the layers for beautiful, clean cuts. Lift using the parchment overhangs and slice into individual bars. If you want more baking guidance, definitely check out my latest posts here.
Expert Tips for Success with Your Copycat Twix candy bar
Even the best recipes need a little insider know-how, right? I’ve wrestled with these layers enough times to know where things can go sideways, especially with caramel. Let me share a quick story: I once thought I could ‘wing’ the caramel cooking time during a busy holiday week. Big mistake! It cooled down too fast and ended up being chewy, like taffy, instead of gooey. It was edible, sure, but definitely not a proper Twix experience. Stick to the timing I laid out, and you’ll avoid my amateur slip-up!
When you are ready to slice these beauties, remember these non-negotiable finishing tips:
- For cleaner cuts when slicing the bars, place the chocolate-coated slab in the freezer for precisely 10 minutes before cutting. That slight chill firms up the chocolate just enough so you don’t drag it everywhere.
- If you prefer an extra gooey caramel layer—maybe you like that almost-runny center—reduce the cooking time for the caramel by about 2 minutes. Just remember, this will make them a little messier to cut.
- You can totally substitute milk chocolate for the semi-sweet chocolate chips if you need a sweeter finish. I usually stick to semi-sweet because the caramel is already so rich, but for a holiday tray, milk chocolate always looks gorgeous.
If you want to check out another fantastic recipe for layered cookie bars that really nails that shortbread texture, take a look at this one here!
Twix Inspired Baking: Variations on the Classic Bar
The beauty of mastering this classic structure—shortbread, caramel, chocolate—is that you can riff on it endlessly! Once you nail this base recipe, it opens up so many doors for truly decadent chocolate caramel desserts. I love seeing how you all adapt these concepts. For instance, if you’re dealing with a crowd or want something truly different, think beyond the bar shape.
A popular request I get is for Twix brownies recipe additions. Trust me, swirling some of that caramel over a rich, fudgy brownie batter before baking, and then topping with chocolate, is *insane*. If you are already looking for incredible brownie ideas, my S’mores Brownies provide a similar layered structure you might enjoy as a starting point.
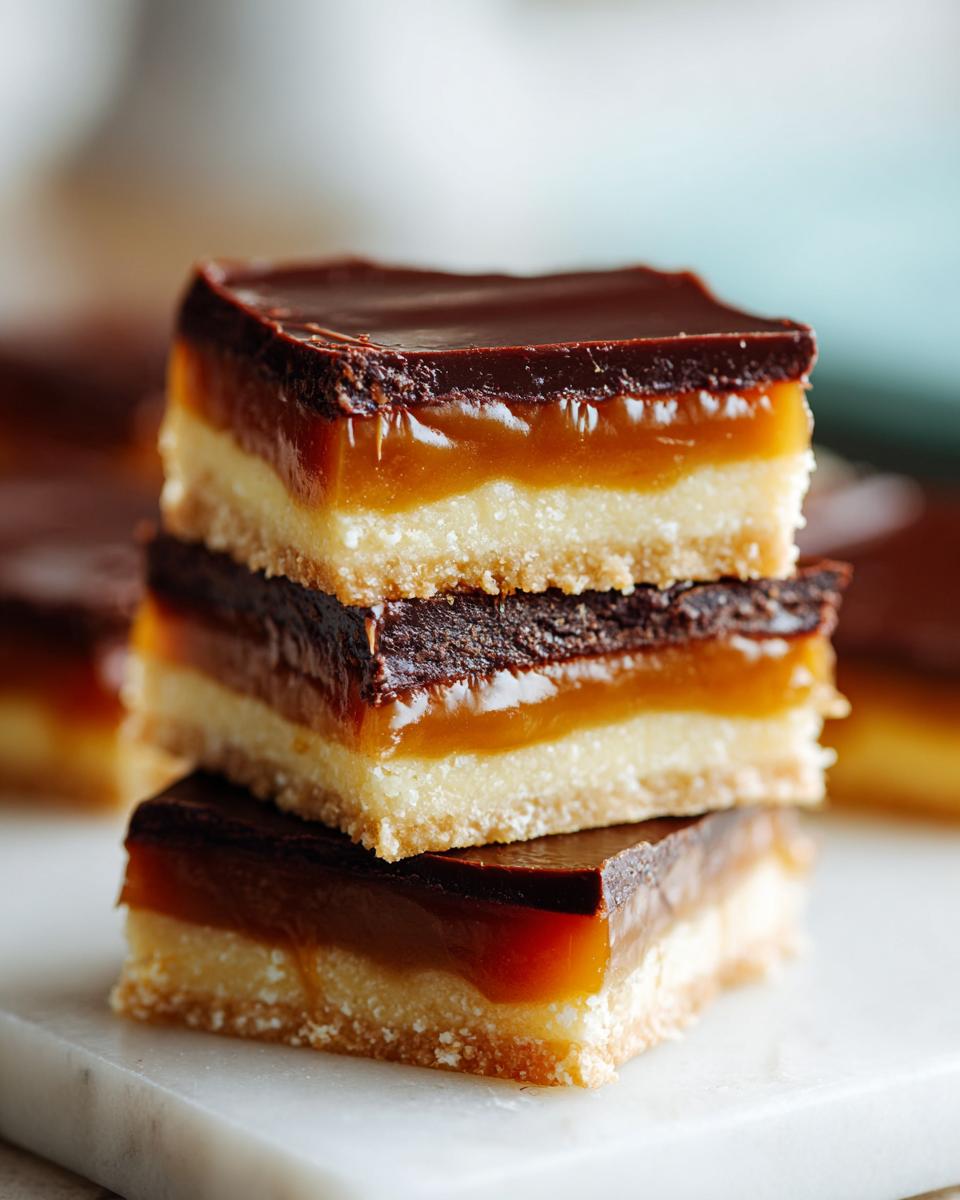
For something totally different, you can try scaling up the recipe slightly and using it as a filling base for a full Twix cake ideas layer! For a darker take on this candy inspiration, check out these amazing Twix Brownies I found online that show how versatile this flavor profile truly is.
Storage and Reheating Instructions for Your Twix
Storing your homemade Twix bars is super straightforward, which is wonderful because they rarely last long enough to worry about long-term storage! Because of that rich butter in the shortbread and the soft caramel, I generally recommend storing them in an airtight container right on the counter. Room temperature is best for keeping that shortbread delightfully tender. They should be good for about four to five days this way.
Now, if your kitchen is super warm, or if you just like that satisfying snap that cold chocolate gives you, popping them in the fridge is fine too. Just let them sit out on the counter for about 15 minutes before serving so the caramel can soften up a bit. Honestly, I wouldn’t bother reheating these layers; the goal is a crisp base and yielding caramel, and heat tends to make the chocolate coating sweat or soften too much!
Frequently Asked Questions About Making Twix Cookies Recipe
I get so many questions about these layered cookie bars once people try them! It’s exciting to see everyone experimenting with their own batch of homemade Twix. Here are a few common things I hear people asking when they dive into this recipe for the first time.
Can I use pre-made shortbread or cookies for the base?
Oh, I know the temptation is real, especially when you are looking for a lightning-fast dessert idea! While you absolutely *could* try using store-bought shortbread discs or vanilla wafers, I strongly advise against it for this particular recipe. The richness and texture of our buttery shortbread crust are what make this copycat version so unbelievably good. If you skip that step, you lose that essential, tender foundation. For the truly best results, especially if you’re aiming for those ultimate Twix cookies flavors, take the 20 minutes to bake the crust fresh!
How thick should the caramel be when I pour it over the crust?
This is crucial for getting that classic height on your bars! When you pull the caramel off the heat after cooking it down, it should be thick enough to coat the back of a wooden spoon, like I mentioned in the steps. When you spread it over the crust, you are aiming for a layer that’s about 1/4 to 3/8 of an inch thick. If it looks too thin before you chill it, don’t panic; it will thicken up considerably as it cools and settles onto the shortbread. Remember, if you want those gooier treats like the simple Twix bites mentioned online, pull the cooking time back slightly, but for the traditional bar, stick to coating consistency!
Can I freeze homemade Twix bars?
Yes, you certainly can freeze them, and I often do this right before big holidays when I need freezer space! Once the bars are fully set—crust, caramel, and chocolate coating all firm—you can cut them into individual pieces. Wrap each piece tightly in plastic wrap first, and then place them together in a heavy-duty freezer bag. They keep wonderfully for up to two months. When you want to enjoy one, just pull it out and let it thaw on the counter for about an hour. The texture stays surprisingly stable!
What’s the difference between this and ‘Twix Bites’?
The difference is almost entirely presentation! This recipe yields classic, rectangular bars that mimic the candy bar shape. If you wanted to make these into bite-sized treats, you would simply cut the final, chilled slab into small squares or use a mini cookie cutter on the chilled caramel/shortbread layer *before* you pour the chocolate over the top. They are easy to eat in one or two bites that way, but the core flavor profile remains the same delicious caramel shortbread chocolate bars!
If you run into any snags while making these, please don’t hesitate to reach out to me directly through the contact page. I’m always here to help troubleshoot your desserts! Contact me here.
Estimated Nutritional Data for This Easy Twix Dessert
Now, let’s talk about what’s going into our bodies. Listen, I won’t lie—these are decadent, rich, glorious layers of pure joy, so they aren’t exactly a health food! But since we are eating with our eyes *and* our souls here at Gourmet Gaze, it’s good to know what we’re working with. Please keep in mind that these figures are just estimates based on the standard ingredients listed above, and your yield size will slightly change the numbers.
- Serving Size: 1 bar (Yielded 16)
- Calories: 350
- Sugar: 35g
- Total Fat: 22g
- Carbohydrates: 38g
- Protein: 4g
Share Your Layered Cookie Bars Creations
I put my heart and soul into developing this recipe for the best Homemade Twix Bars, and honestly, seeing them come to life in *your* kitchens is the absolute best part of this whole process. That moment when you break into that crisp shortbread and see the perfect caramel layer—that’s the payoff!
Once you’ve finished cutting and admiring your handiwork, I’d love to hear about it. Did the caramel turn out perfectly gooey? Did the chocolate set beautifully? Drop a comment below and give the recipe a rating so other home cooks know just how reliable this classic copycat is. And please, if you take photos—and you should, because these are gorgeous—tag me on social media. I love sharing your creations on my feed!
Happy baking, everyone! I hope these layered cookie bars bring as much joy to your table as they bring to mine. If you want to read a bit more about my journey from spreadsheets to baking, check out my About Page.
Share Your Layered Cookie Bars Creations
I put my heart and soul into developing this recipe for the best Homemade Twix Bars, and honestly, seeing them come to life in *your* kitchens is the absolute best part of this whole process. That moment when you break into that crisp shortbread and see the perfect caramel layer—that’s the payoff!
Once you’ve finished cutting and admiring your handiwork, I’d love to hear about it. Did the caramel turn out perfectly gooey? Did the chocolate set beautifully? Drop a comment below and give the recipe a rating so other home cooks know just how reliable this classic copycat is. And please, if you take photos—and you should, because these are gorgeous—tag me on social media. I love sharing your creations on my feed!
Happy baking, everyone! I hope these layered cookie bars bring as much joy to your table as they bring to mine. If you want to read a bit more about my journey from spreadsheets to baking, check out my About Page.
PrintHomemade Twix Bars: Decadent Caramel Shortbread Copycat Recipe
Make your own decadent Twix bars at home. This recipe features a buttery shortbread base, smooth caramel, and rich chocolate coating, creating layered cookie bars that taste better than store-bought.
- Prep Time: 25 min
- Cook Time: 20 min
- Total Time: 1 hour 45 min
- Yield: 16 bars 1x
- Category: Dessert
- Method: Baking
- Cuisine: American
- Diet: Vegetarian
Ingredients
- For the Shortbread Crust: 1 cup (2 sticks) unsalted butter, softened
- 1 cup granulated sugar
- 2 teaspoons vanilla extract
- 2 1/2 cups all-purpose flour
- 1/2 teaspoon salt
- For the Caramel Layer: 1 (14 ounce) can sweetened condensed milk
- 1 cup packed light brown sugar
- 1/2 cup (1 stick) unsalted butter
- 1/4 cup light corn syrup
- 1 teaspoon vanilla extract
- Pinch of salt
- For the Chocolate Coating: 12 ounces semi-sweet chocolate chips
- 2 tablespoons coconut oil or shortening
Instructions
- Prepare the Shortbread Crust: Preheat your oven to 350°F (175°C). Line an 8×8 inch baking pan with parchment paper, leaving an overhang on two sides for easy removal.
- In a large bowl, cream together the softened butter and granulated sugar until light and fluffy. Beat in the vanilla extract.
- In a separate bowl, whisk together the flour and salt. Gradually add the dry ingredients to the wet ingredients, mixing until just combined to form a stiff dough.
- Press the dough evenly into the bottom of the prepared pan. Bake for 18 to 20 minutes, or until the edges are lightly golden. Let the crust cool completely while you prepare the caramel.
- Make the Caramel Layer: In a medium saucepan, combine the sweetened condensed milk, brown sugar, butter, and corn syrup. Cook over medium heat, stirring constantly, until the mixture dissolves and begins to bubble.
- Reduce the heat to medium-low and continue to cook, stirring frequently, for 8 to 10 minutes, until the caramel thickens enough to coat the back of a spoon. Remove from heat and stir in the vanilla extract and salt.
- Pour the hot caramel evenly over the cooled shortbread crust. Spread it gently to cover the entire surface. Let the caramel set at room temperature for at least 1 hour, or chill for 30 minutes until firm.
- Melt the Chocolate Coating: Place the chocolate chips and coconut oil in a microwave-safe bowl. Microwave in 30-second intervals, stirring well after each interval, until the chocolate is smooth and fully melted.
- Pour the melted chocolate over the set caramel layer. Tilt the pan to spread the chocolate evenly across the top. Allow the chocolate to set completely at room temperature or chill for 15 minutes until firm.
- Lift the parchment paper overhang to remove the entire block from the pan. Use a sharp knife to cut the large slab into individual Twix bar shapes.
Notes
- For cleaner cuts when slicing the bars, place the chocolate-coated slab in the freezer for 10 minutes before cutting.
- If you prefer a gooier caramel layer, reduce the cooking time for the caramel by about 2 minutes.
- You can substitute milk chocolate for the semi-sweet chocolate chips for a sweeter finish.
Nutrition
- Serving Size: 1 bar
- Calories: 350
- Sugar: 35g
- Sodium: 120mg
- Fat: 22g
- Saturated Fat: 14g
- Unsaturated Fat: 8g
- Trans Fat: 0.5g
- Carbohydrates: 38g
- Fiber: 1g
- Protein: 4g
- Cholesterol: 45mg