
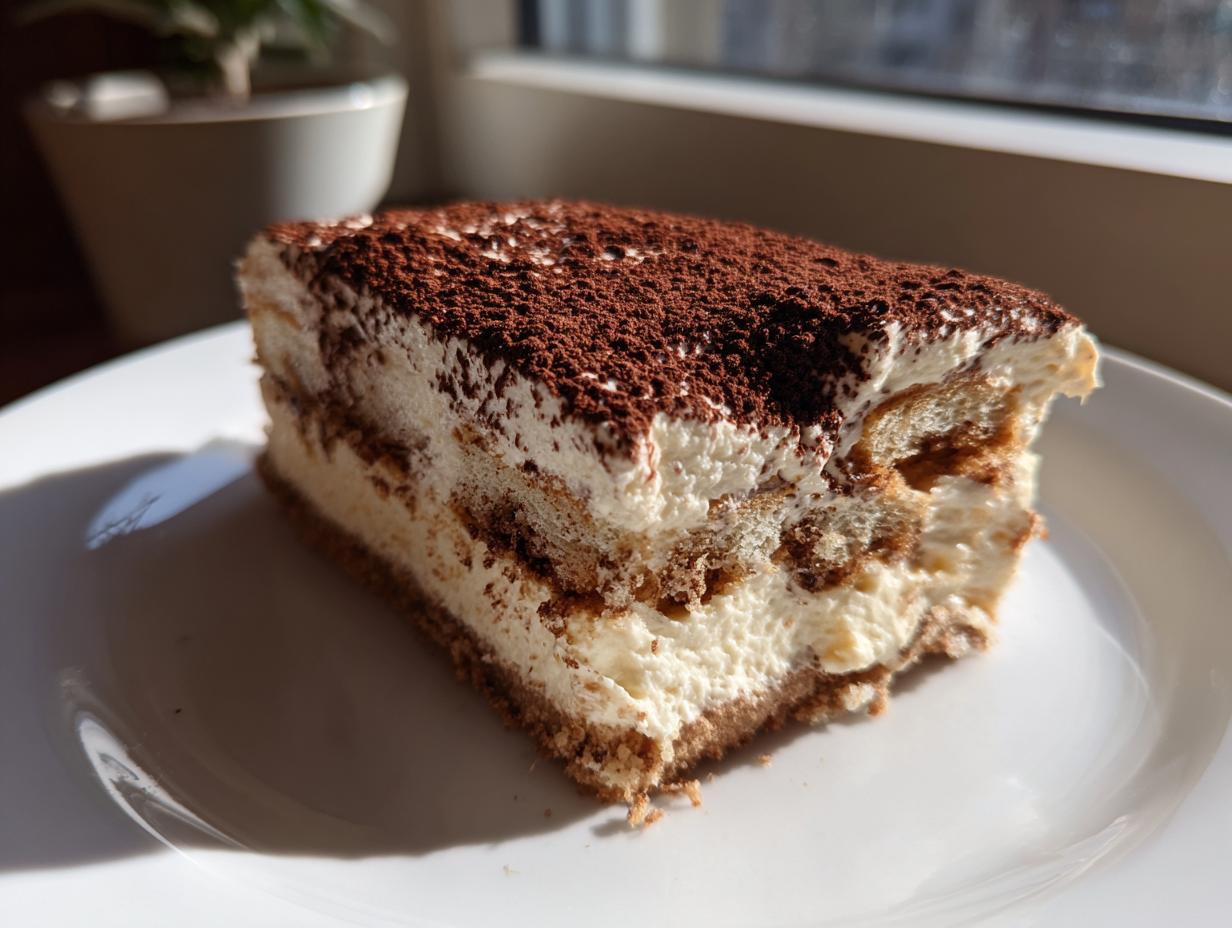

If you’ve ever stared longingly at a slice of classic tiramisu but secretly wished it had that dense, creamy anchor only a cheesecake can provide, then stop what you’re doing. Because today, we are merging two titans of indulgence to create the tiramisu cheesecake—truly the ultimate dessert mashup. This isn’t your grandmother’s stuffy baked dessert; this is the result of realizing that sometimes, you need elegance without turning on the oven.
When I first traded my spreadsheets for serving spoons a few years back, I learned that the best stories in food often come from unexpected unions. This specific dessert tells a tale of Italian luxury meeting American creaminess. I’m Leo Maxwell, and trust me, my corporate burnout taught me the value of a truly satisfying treat, and this no-bake version absolutely delivers that silky, rich finish. You can explore more of my favorite indulgent creations over in my dedicated desserts section!
This tiramisu cheesecake recipe is pure magic because it skips the bake time entirely. We’re focusing purely on cold-set perfection. You get the bold, beautiful flavor of strong espresso and mascarpone, layered over a crisp chocolate base, leading to a dessert that is both incredibly decadent and surprisingly simple to manage for any dinner party. Get ready for the most requested recipe on your dessert table!
- Why This No Bake Tiramisu Cheesecake Recipe Works (E-E-A-T)
- Gathering Ingredients for Your Tiramisu Cheesecake
- Step-by-Step Instructions for the No Bake Tiramisu Cheesecake
- Tips for Success with Your Coffee Infused Dessert
- Serving Suggestions for This Elegant Dinner Dessert
- Storage and Reheating Instructions for Leftover Tiramisu Cheesecake
- Comparing Baked Tiramisu Cheesecake vs. No-Bake
- Frequently Asked Questions About This Italian Cheesecake Fusion
- Nutritional Estimates for a Slice of Tiramisu Cheesecake
Why This No Bake Tiramisu Cheesecake Recipe Works (E-E-A-T)
When I’m developing a recipe, especially one that fuses two classics, reliability is everything. That’s why I always lean toward the no-bake approach for this particular dessert. Honestly, traditional baked cheesecakes can feel temperamental, but with this tiramisu cheesecake recipe, you skip all the cracking, water baths, and nervous hovering over the oven. We’re aiming for that luxurious, chilled finish right from the start.
This method is truly the secret weapon for anyone hosting a gathering—it’s the ultimate easy make ahead cheesecake solution. You assemble it, it chills, and when it’s time for dessert, it’s flawless. That cold setting is what guarantees the texture we’re after.
Achieving the Perfect Creamy Mascarpone Cheesecake Texture
The magic here lies in that balanced foundation we’re building. We use both cream cheese and mascarpone for a reason. The cream cheese gives us that structural integrity that lets it slice cleanly, but the mascarpone? That’s what injects the pure, velvety richness. It’s the key to that unbelievable creamy mascarpone cheesecake texture that melts on your tongue without feeling heavy.
The Convenience of a Make-Ahead Tiramisu Cheesecake Recipe
If you’re balancing appetizers, drinks, and conversation, baking is the last thing you need adding stress. This whole tiramisu cheesecake recipe sings because it’s a set-it-and-forget-it star. You can assemble the whole thing the day before your party. This makes it one of the best choices for easy layering desserts because everything melds perfectly in the fridge overnight. You just dust it with cocoa right before serving, and boom—you look like a culinary genius!
Gathering Ingredients for Your Tiramisu Cheesecake
Okay, let’s talk about what you need to pull off this masterpiece! Since this is a no-bake recipe, assembling your mise en place correctly is half the battle won. I’ve laid out exactly what you need below, right down to how your ingredients should be prepped—softened, cooled, or sifted. Precision here is what transitions us from ‘good’ to ‘OMG, what is this magical thing?’
- 1 1/2 cups chocolate wafer crumbs or Oreo crumbs
- 6 tablespoons unsalted butter, melted
- 1/4 cup strong brewed espresso, cooled
- 1 tablespoon coffee liqueur (optional, for extra flavor)
- 1 package (8 ounces) cream cheese, softened
- 8 ounces mascarpone cheese, softened
- 1 cup powdered sugar, sifted
- 1 teaspoon vanilla extract
- 1 cup heavy whipping cream, cold
- 1/2 cup ladyfingers, split lengthwise
- 2 tablespoons unsweetened cocoa powder, for dusting
Ingredient Notes and Substitutions for Your Tiramisu Cheesecake
Sourcing the right cheese matters when we are aiming for that gorgeous creamy mascarpone cheesecake flavor. Make sure your mascarpone is high quality—it should be firm but slightly yielding. If you can’t find chocolate wafers, classic Oreos (filling removed, just the crumb!) or even graham crackers work just fine for the base. You want that rich chocolate note to balance the coffee.
And listen, if you want to really dive into the world of espresso dessert recipes, don’t skip that optional coffee liqueur! If you need a mocktail version, just add 1 teaspoon of instant espresso powder right into the soak mixture instead. It boosts that deep coffee essence beautifully.
Step-by-Step Instructions for the No Bake Tiramisu Cheesecake
Alright, let’s dive into the construction phase! Since this is a no-bake situation, the timing on the wet ingredients is slightly different, but the result is pure, dreamy texture. Remember, we are making an easy make ahead cheesecake here, so speed in assembly is your friend, but patience during the chill is mandatory. Follow these steps closely, and you’ll have a showstopper ready for the fridge.
Building the Chocolate Crust Foundation for the Tiramisu Cheesecake
First things first, we need a base that’s sturdy enough to hold all that creamy goodness. Mix your chocolate wafer crumbs—or Oreos, crumbs only!—with that melted butter until it looks like wet sand. Press it firmly into the bottom of your springform pan. I mean *firmly*; use the bottom of a measuring cup to really compact it down. Once it’s packed tight, slide the whole thing into the freezer while you tackle the filling. A chilled crust sets up much cleaner!
Creating the Silky Mascarpone Filling for Your Tiramisu Cheesecake
Now for the filling, the heart of this tiramisu cheesecake! In one bowl, beat your softened cream cheese and mascarpone until they are absolutely smooth—no lumps allowed! Then, slowly add in your powdered sugar and vanilla until everything is unified. The real trick for that beautiful, silky tiramisu dessert texture comes next: Whip your cold heavy cream separately until it forms stiff peaks. You want it holding its shape perfectly. Then, and this is key, gently fold that whipped cream into the mascarpone mixture. Fold, don’t stir! We are keeping all those beautiful air bubbles in there.
Layering and Setting the Ultimate Dessert Mashup
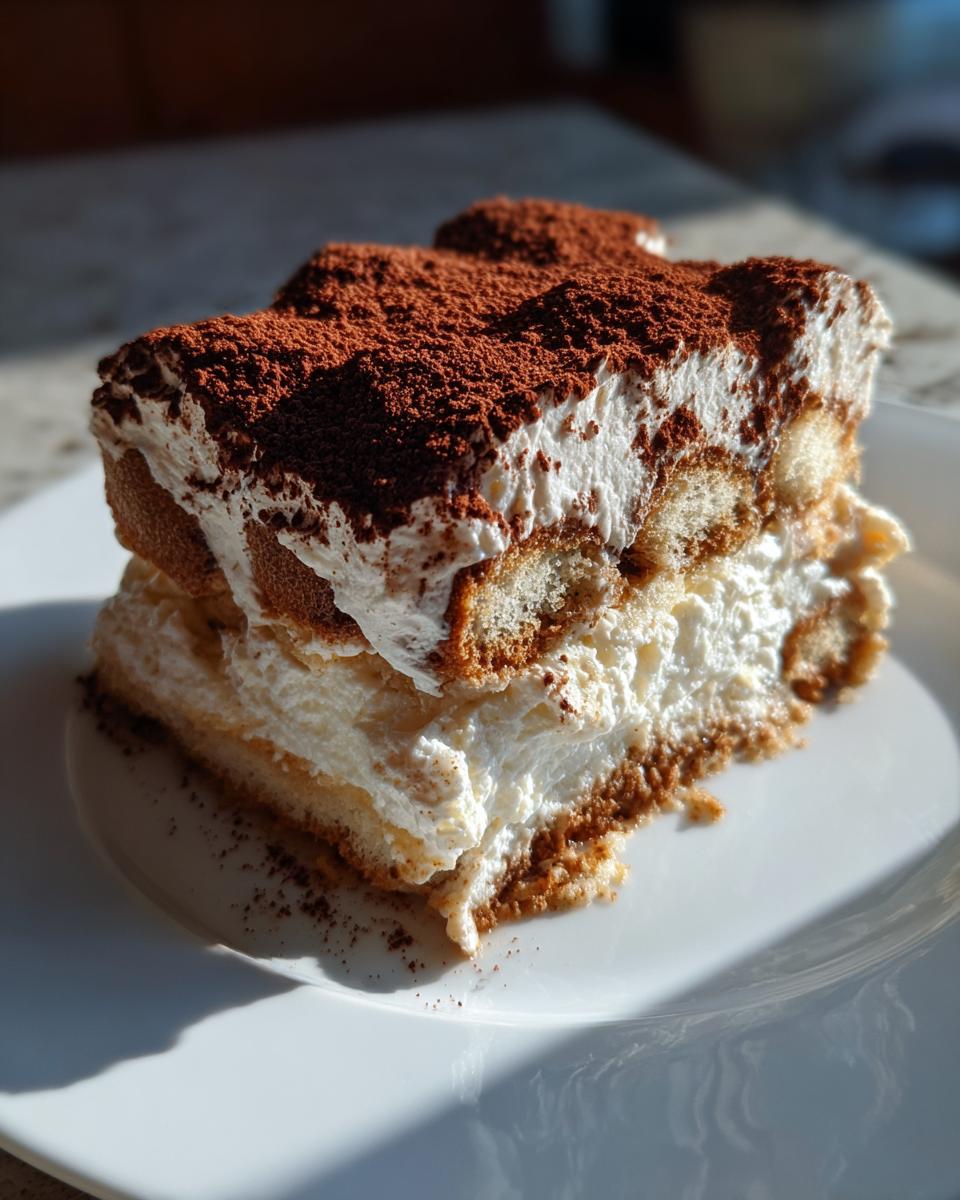
Time to bring in the coffee! Quickly combine your cooled espresso and liqueur (if using) in a shallow dish. Take your split ladyfingers and dip them *fast*—one second per side, that’s all they need! If they soak too long, your whole base gets mushy. Lay those quickly dipped ladyfingers over your chilled crust, covering the surface. Spread half your mascarpone mix over them, add a second layer of dipped ladyfingers, and top with the remaining filling. Smooth it all out, cover it loosely, and commit to chilling. We need a bare minimum of six hours, but overnight is truly the best time for this tiramisu cheesecake.
Tips for Success with Your Coffee Infused Dessert
I know recipes look great on paper, but a few little secrets make the difference between a good dessert and one that makes people ask for the recipe immediately. Since this is a no-bake confection, controlling temperature and allowing enough rest time are non-negotiable. Trust me, I learned this the hard way when my first attempt at a chilled dessert collapsed because I rushed the chilling!
First off, make sure both your cream cheese and mascarpone are actually room temperature before you even think about mixing them. If they are cold, you’ll end up with lumps, and nothing ruins the feeling of an Italian cheesecake fusion faster than rogue chunks of hard cheese! Set them out for a good hour before you start measuring.
When you’re whipping that heavy cream—remember, it has to be COLD, straight from the back of the fridge! Use a chilled bowl if you can manage it; the colder the cream starts, the quicker and more stable those stiff peaks get. That’s the foundation of our light, gorgeous texture that differentiates this from a standard, heavier cheesecake.
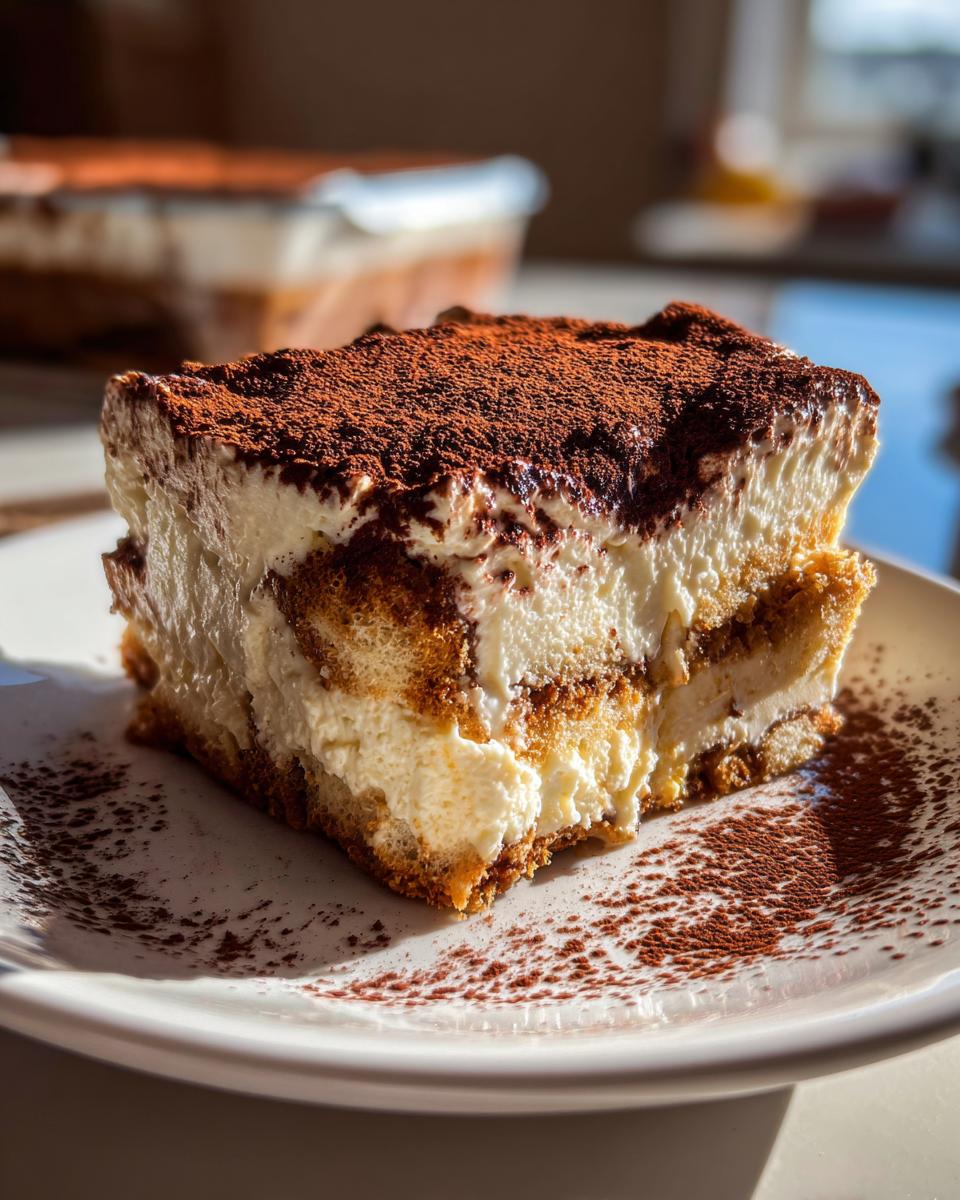
The number one piece of advice I can give you for this coffee infused dessert is to practice patience during the setting phase. While the recipe calls for six hours minimum, I honestly think this tiramisu cheesecake hits its absolute peak magnificence after a solid 12 to 18 hours in the fridge. That extra chill time allows the espresso to fully permeate the ladyfingers and the whole structure to tighten up, resulting in the silkiest slice possible.
Serving Suggestions for This Elegant Dinner Dessert
Now that you’ve mastered the assembly of this spectacular tiramisu cheesecake, the real fun begins: making it look as incredible as it tastes! Since we are striving for that refined, elegant finish, presentation definitely matters here. This dessert is practically begging to be the centerpiece of any special gathering.
Forget just dusting it with cocoa and calling it a day—although that is certainly a classic and perfectly acceptable finish! For a next-level presentation that really elevates this to the rank of one of the best cheesecake recipes for parties, I have a few tricks up my sleeve. You want texture contrast when you serve this, don’t you?
My favorite move is adding a halo of fine toppings right around the edge of the cake after you’ve gently removed the springform ring. Think thinly shaved dark chocolate—use a vegetable peeler on a high-quality bar of 70% cacao for those beautiful, dramatic curls. A little sprinkle of finely chopped, toasted pecans tucked around the rim adds a wonderful crunch that contrasts the silky texture inside.
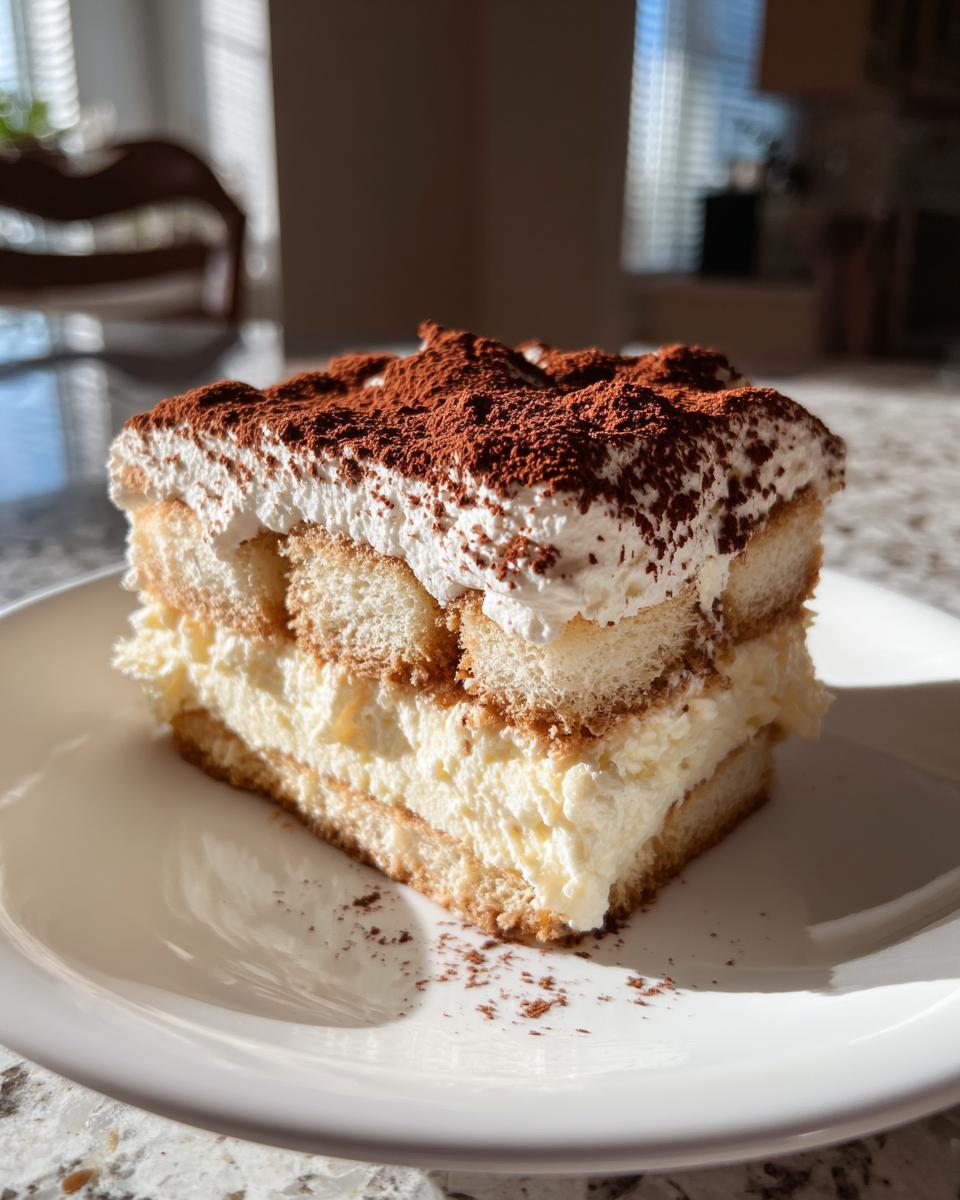
If you want to lean into the Italian theme a bit more, consider serving thin shavings of bittersweet chocolate sprinkled over the top along with the cocoa powder. It catches the light beautifully! We want this elegant dinner dessert to pull double duty: satisfying the sweet tooth and wowing your guests aesthetically.
As for pairings? Because this coffee infused dessert has such rich, deep notes, you want something to cleanse the palate slightly afterward. It goes phenomenally well with a small glass of Vin Santo, or if you prefer something stronger, a tiny serving of amaretto or a nice homemade limoncello on the side provides that perfect bright digestif finish. If you’re looking for ways to start the party off right before serving this masterpiece, check out my ideas for appetizers and snacks!
Storage and Reheating Instructions for Leftover Tiramisu Cheesecake
One of the absolute best parts about this spectacular tiramisu cheesecake is how perfectly it handles leftovers—assuming you have any, which in my house is rare! Because this is a chilling champion and stays firmly in the no-bake camp, storage is all about keeping that luxurious, silky texture intact.
You absolutely must keep this baby refrigerated from the moment it sets. Humidity and temperature swings are the enemy of a perfect cheesecake, even one that hasn’t seen the oven. Make sure you cover it tightly, but here’s a small pro tip: Don’t let plastic wrap touch the surface, especially where the cocoa powder is dusted. If the plastic sticks to the cocoa, you get that ugly, messy film when you lift it off later.
I use toothpicks stuck around the perimeter of the cake before loosely draping the plastic wrap over the top. This creates a small tent, keeping the plastic off the cocoa coating while still sealing in the freshness. This method helps maintain the integrity of our beautiful mascarpone cream desserts.
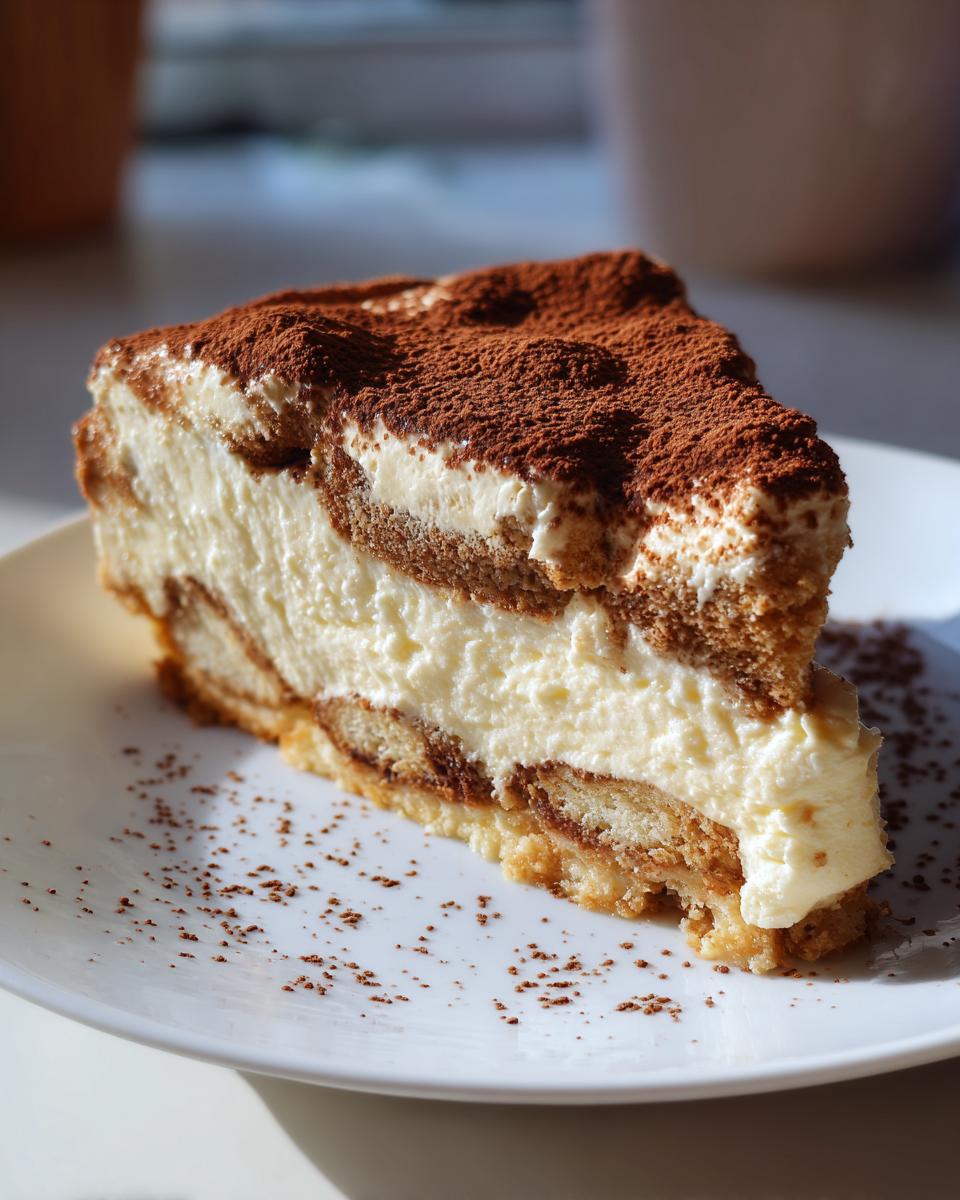
How long does it keep? Remarkably well! Since it’s mostly cheese and cream, if you keep it properly covered, it will taste fantastic for up to four days in the fridge. The espresso flavor actually deepens slightly, which is lovely. However, let’s be clear: you absolutely do not reheat this! Heating up this chilled, beautifully set dessert will turn your lovely structure into a puddle of runny espresso sweetness. We want that cool, clean bite every time.
This make-ahead quality is why I always encourage people to whip this up the day before a big event. It solidifies beautifully, and you never have to stress about dessert the day of the party. It’s the definition of an impressive, stress-free easy make ahead cheesecake!
Comparing Baked Tiramisu Cheesecake vs. No-Bake
Now that you’ve seen how straightforward and outrageously creamy this no-bake tiramisu cheesecake is, I always get asked about its cousin: the baked version. It’s natural to wonder if you should turn on the oven, especially if you’re building a full holiday menu. Listen, both styles can be absolutely wonderful, but they deliver fundamentally different experiences. It’s really about what kind of texture you crave in your ultimate dessert mashup.
When you bake a cheesecake, you get that classic, dense, almost velvety crumb. It’s rich, it holds its shape like a brick (in the best way possible!), and it has that slightly tangy, baked quality common to traditional New York-style cheesecakes. If you prefer that firm structure, checking out a baked tiramisu cheesecake might be the route for you. It definitely leans harder toward the ‘cheesecake’ side of the equation.
But for this fusion? I stand by the no-bake! Why? Because we are aiming for the feeling of the silkiest piece of tiramisu you’ve ever had, but with the structural integrity of a solid dessert base. The no-bake method keeps the filling light, airy, and incredibly cold. We aren’t setting eggs; we are setting fat and cream. That results in a lighter, fluffier mouthfeel that truly showcases the delicate, soaked ladyfingers better than a dense baked base ever could. It keeps that silky tiramisu dessert promise perfectly.
Think of it this way: If you want cozy, comforting, firm dessert, go baked. If you want cool, airy, intensely flavorful, and incredibly easy, stick with this no-bake champion. For my baked zucchini adventure, I love the oven time, but for this Italian dream, cold is king. This approach ensures you get the light structure so many people search for when they want an elegant dinner dessert.
Frequently Asked Questions About This Italian Cheesecake Fusion
It’s natural to have a few questions percolate when you’re diving into a hybrid dessert like this! I’ve gathered some of the most common things people ask me about making the perfect tiramisu cheesecake so you can feel totally confident before you start assembling. Don’t worry if you need to swap out ingredients; we’ve got solutions!
Can I use a different crust instead of chocolate wafers?
Absolutely, you can mix things up! If you don’t have chocolate wafers on hand, or maybe you just prefer a different flavor profile, go for it. Crushed graham crackers are a fantastic stand-in because they offer a nice buttery crunch. Another surprisingly great option that pairs wonderfully with coffee is crushed shortbread cookies—they lend a delicate sweetness instead of the deep cocoa you get from Oreos. Just remember the ratio: 1 1/2 cups of crumbs to 6 tablespoons of melted butter; that ratio is what keeps your crust structurally sound.
How important is the coffee liqueur in this recipe?
That coffee liqueur is purely optional, but oh boy, does it take this dessert to the next level! It adds depth and that slight adult kick that complements the mascarpone so nicely, making it taste like a decadent, almost rich coffee cake alternative. If you are serving this to a crowd where you want to skip the alcohol, it is super simple to substitute.
Instead of liqueur in the coffee soak, just add one full teaspoon of instant espresso powder directly into your 1/4 cup of brewed espresso. That concentration boosts the coffee flavor throughout the whole structure without adding liquid, keeping that gorgeous set.
My filling didn’t set. What went wrong?
This is almost always down to two culprits: either the heavy cream wasn’t whipped enough, or you didn’t chill it long enough. For a no-bake filling, the whipped cream is doing most of the heavy lifting to keep things firm. Make absolutely sure those peaks are stiff—if you lift the whisk and the cream flops over, it’s not ready! You need that firmness so it can support the dense cheese filling.
The second factor is patience. Seriously, if you think it’s set, chill it for another hour! This Italian cheesecake fusion relies so heavily on that cold time to firm up properly. If you try slicing it too soon, you end up with a beautiful mess, which, while tasty, isn’t great for company. If you ever run into trouble or have a question when baking, please feel free to reach out to me directly at the contact page so we can troubleshoot together!
Nutritional Estimates for a Slice of Tiramisu Cheesecake
As someone who transitioned from spreadsheets to savoring every detail of a meal, I know that sometimes you need to see the numbers alongside the stunning flavor. Creating a dessert as absolutely decadent as this tiramisu cheesecake means we’re working with rich dairy and sugars, so I always like to be upfront with what’s in a slice. Remember, whether this is your holiday indulgence or a simple weekend treat, these figures are just estimates based on the standard ingredients used in this recipe.
We used standard calculations for the proportions listed. For a dessert this luxurious, I consider the satisfaction gained to be incredibly high, but it’s good practice to know what you’re working with when enjoying this creamy mascarpone cheesecake!
- Serving Size: 1 slice
- Calories: 450
- Sugar: 30g
- Sodium: 250mg
- Total Fat: 32g
- Saturated Fat: 19g
- Carbohydrates: 35g
- Protein: 8g
This information is provided purely for transparency and to help you plan your wonderful feasts, not to stop you from enjoying this silky tiramisu dessert! If you’re using different brands of cream cheese or swapping out the chocolate wafer crumbs, these numbers will shift slightly, naturally. It’s an indulgent delight, and every bite is worth it when you’re celebrating.
PrintNo-Bake Tiramisu Cheesecake: The Ultimate Dessert Mashup
You create a luxurious, creamy dessert by fusing classic Italian tiramisu flavors with a rich, no-bake cheesecake base. This recipe uses espresso-soaked ladyfingers for an authentic coffee kick.
- Prep Time: 30 min
- Cook Time: 0 min
- Total Time: 6 hours 30 min
- Yield: 10 servings 1x
- Category: Dessert
- Method: No-Bake
- Cuisine: Italian Fusion
- Diet: Vegetarian
Ingredients
- 1 1/2 cups chocolate wafer crumbs or Oreo crumbs
- 6 tablespoons unsalted butter, melted
- 1/4 cup strong brewed espresso, cooled
- 1 tablespoon coffee liqueur (optional, for extra flavor)
- 1 package (8 ounces) cream cheese, softened
- 8 ounces mascarpone cheese, softened
- 1 cup powdered sugar, sifted
- 1 teaspoon vanilla extract
- 1 cup heavy whipping cream, cold
- 1/2 cup ladyfingers, split lengthwise
- 2 tablespoons unsweetened cocoa powder, for dusting
Instructions
- Prepare the crust: Combine the chocolate wafer crumbs and melted butter in a bowl. Press the mixture firmly into the bottom of a 9-inch springform pan. Chill the crust while you prepare the filling.
- Mix the coffee soak: In a shallow dish, combine the cooled espresso and coffee liqueur, if using.
- Make the filling: In a large bowl, beat the softened cream cheese and mascarpone cheese until smooth. Gradually beat in the sifted powdered sugar and vanilla extract until fully combined and creamy.
- Whip the cream: In a separate, chilled bowl, whip the cold heavy whipping cream until stiff peaks form. Gently fold the whipped cream into the mascarpone mixture until just combined. Do not overmix.
- Assemble the layers: Dip each ladyfinger half quickly into the espresso mixture—do not let them soak too long, or they will become soggy. Arrange a single layer of the dipped ladyfingers over the chilled crust.
- Spread half of the cheesecake filling over the ladyfingers. Top with a second layer of espresso-dipped ladyfingers. Spread the remaining filling evenly over the top layer.
- Chill: Cover the pan loosely with plastic wrap and refrigerate for at least 6 hours, or preferably overnight, to allow the cheesecake to set completely.
- Serve: Before serving, carefully remove the springform ring. Dust the top generously with unsweetened cocoa powder. Slice and serve this decadent chocolate dessert.
Notes
- For a richer coffee flavor in the filling, you can add 1 teaspoon of instant espresso powder directly to the mascarpone mixture.
- If you skip the coffee liqueur, add 1 extra tablespoon of strong brewed espresso to the soak mixture.
- This no bake tiramisu cheesecake is best made one day ahead to achieve the silkiest texture.
Nutrition
- Serving Size: 1 slice
- Calories: 450
- Sugar: 30
- Sodium: 250
- Fat: 32
- Saturated Fat: 19
- Unsaturated Fat: 13
- Trans Fat: 0.5
- Carbohydrates: 35
- Fiber: 1
- Protein: 8
- Cholesterol: 100