
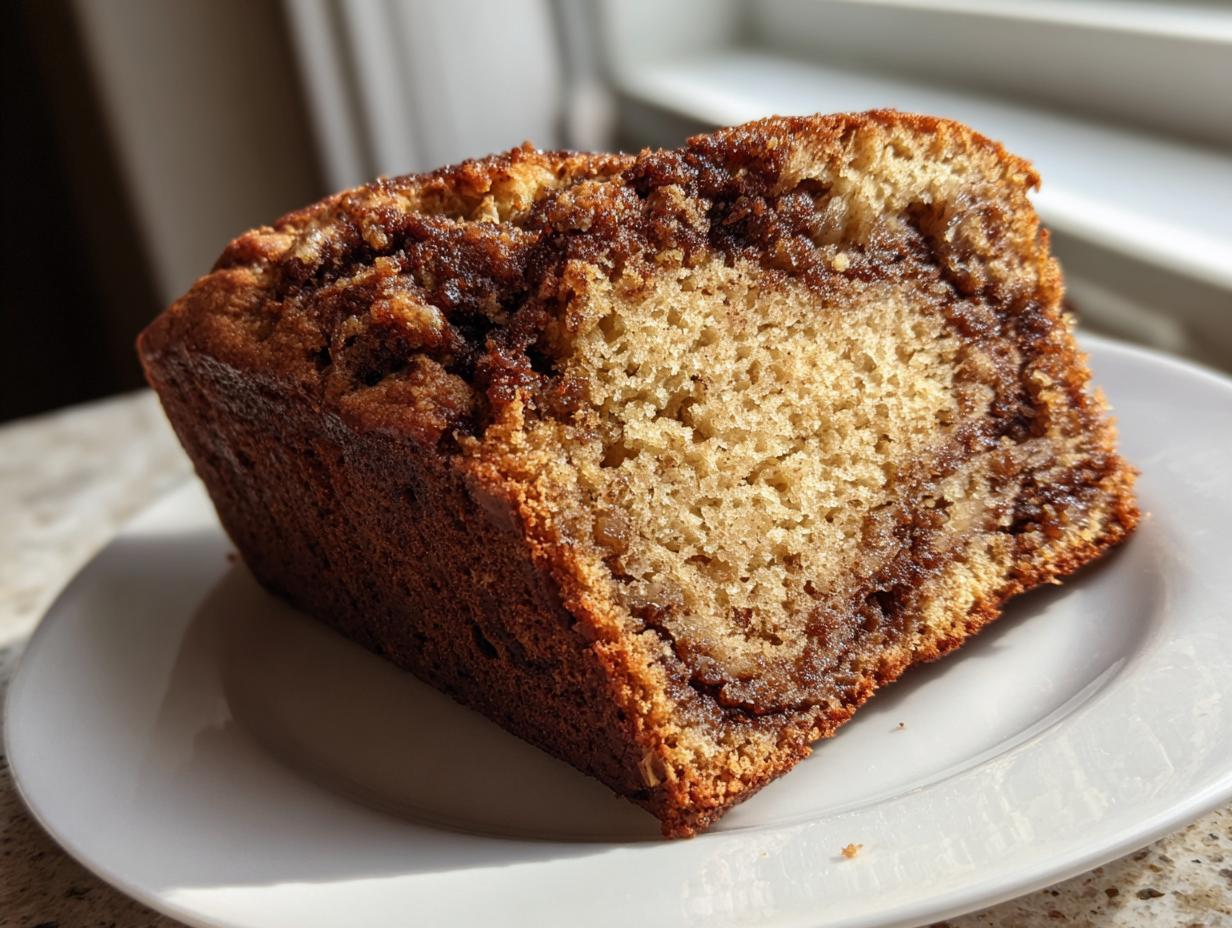

When the air turns crisp and you start lighting those first cozy candles, you know what time it is: time for fall baking recipes that wrap you up like a warm blanket. Forget those dry, disappointing loaves you might have baked before. After my culinary journey, I swore I’d never settle for anything less than perfect when it comes to comfort food baking, and I’ve finally cracked the code on the ultimate apple bread.
This recipe for Moist Apple Cinnamon Bread with Brown Sugar Swirl delivers exactly what you’re craving. We’re not just talking about apples and spice; we’ve got a rich, molten brown sugar center that keeps every single bite incredibly moist. Trust me, this is the reliable, deeply satisfying loaf that you’ll want to master for your home. If you love this flavor profile, you should also check out my approach to the best pumpkin bread for tackling those other seasonal favorites!
- Why This Is the Best Apple Bread for Fall Baking Recipes
- Ingredients for Moist Apple Bread Recipe
- Tips for the Perfect Apple Cinnamon Swirl Bread
- How to Prepare This Easy Apple Bread
- Making Your Apple Bread Bakery Style
- Storage and Reheating Instructions for Your Apple Bread
- Variations on the Classic Apple Bread
- Frequently Asked Questions About This Apple Bread
- Nutritional Estimates for This Homemade Apple Dessert
Why This Is the Best Apple Bread for Fall Baking Recipes
If you’re looking for a true showstopper in your kitchen this season, look no further. This isn’t just any loaf; this is the quintessential companion for your morning coffee or dessert after a hearty dinner. What sets this apple bread apart from everything else is how perfectly it hits that ‘comfort food baking’ sweet spot. I talk about achieving that feeling in my pumpkin bread recipe too, but this one captures autumn perfectly.
You absolutely need to try this because:
- The moisture level is insane. We use techniques that guarantee it stays soft for days.
- The apple cinnamon swirl bread effect from the brown sugar ribbon running through the center is pure decadence. Sometimes I even skip the glaze because the swirl is just so good!
- It’s wonderfully versatile—serve it warm for breakfast, slice it for an afternoon snack, or dress it up for dessert.
It’s truly the best apple bread for fall baking because it’s incredibly reliable. You can see why folks call treats like this the perfect fall treat over at Recipes by Janet; when something tastes this good, it earns its spot on the rotation!
Ingredients for Moist Apple Bread Recipe
Okay, let’s talk about what you need to pull off this incredible moist apple bread recipe. When you’re making a quick bread like this, the quality and preparation of your ingredients really shine through, especially for that swirl! I’ve listed everything out here precisely as I use it to guarantee that bakery-style crumb we’re aiming for.
For the main body of this spiced bread, you’ll gather:
- 2 1/2 cups all-purpose flour
- 1 teaspoon baking soda
- 1/2 teaspoon salt
- 2 teaspoons ground cinnamon (this is for the batter, not the swirl!)
- 1/4 teaspoon ground nutmeg
- 1/2 cup (one full stick) unsalted butter, make sure it’s softened up nice
- 1 cup granulated sugar
- 1/2 cup packed brown sugar (get that rich flavor in there!)
- 3 large eggs—room temperature eggs mix so much better, trust me on this one.
- 1 teaspoon vanilla extract
- 1/2 cup milk
- 2 cups peeled and finely chopped Granny Smith apples (about 2 medium apples—we need that tartness!)
- 1/2 cup chopped walnuts or pecans (If nuts aren’t your thing, just skip them, no problem.)
Now, here is the star of the show for that beautiful visual appeal—the swirl component:
- For the Swirl: 1/4 cup packed brown sugar mixed really well with 1 teaspoon cinnamon. Mix this separately until it looks like wet sand, that’s how you know the spice is evenly distributed!
Tips for the Perfect Apple Cinnamon Swirl Bread
Achieving that perfect texture where every slice of your apple bread is unbelievably soft is all about technique, not luck. We are aiming for light aeration, not something heavy and close-textured, which is why these expert tips are crucial for mastering these moist quick bread techniques. You want that tender crumb that makes this a spectacular comfort food baking success!
The absolute most important thing to remember when working with quick breads? Do not, and I mean DO NOT, overmix the batter once the flour goes in. Overmixing develops gluten, which turns your beautiful loaf into something closer to a doorstop. Mix only until you see those last streaks of flour disappear. You’ll see a similar warning in lots of great guides, like the one over at Everyday Cooking Tips, because it’s truly the secret to a light texture.
Choosing and Preparing Your Apples for Apple Bread
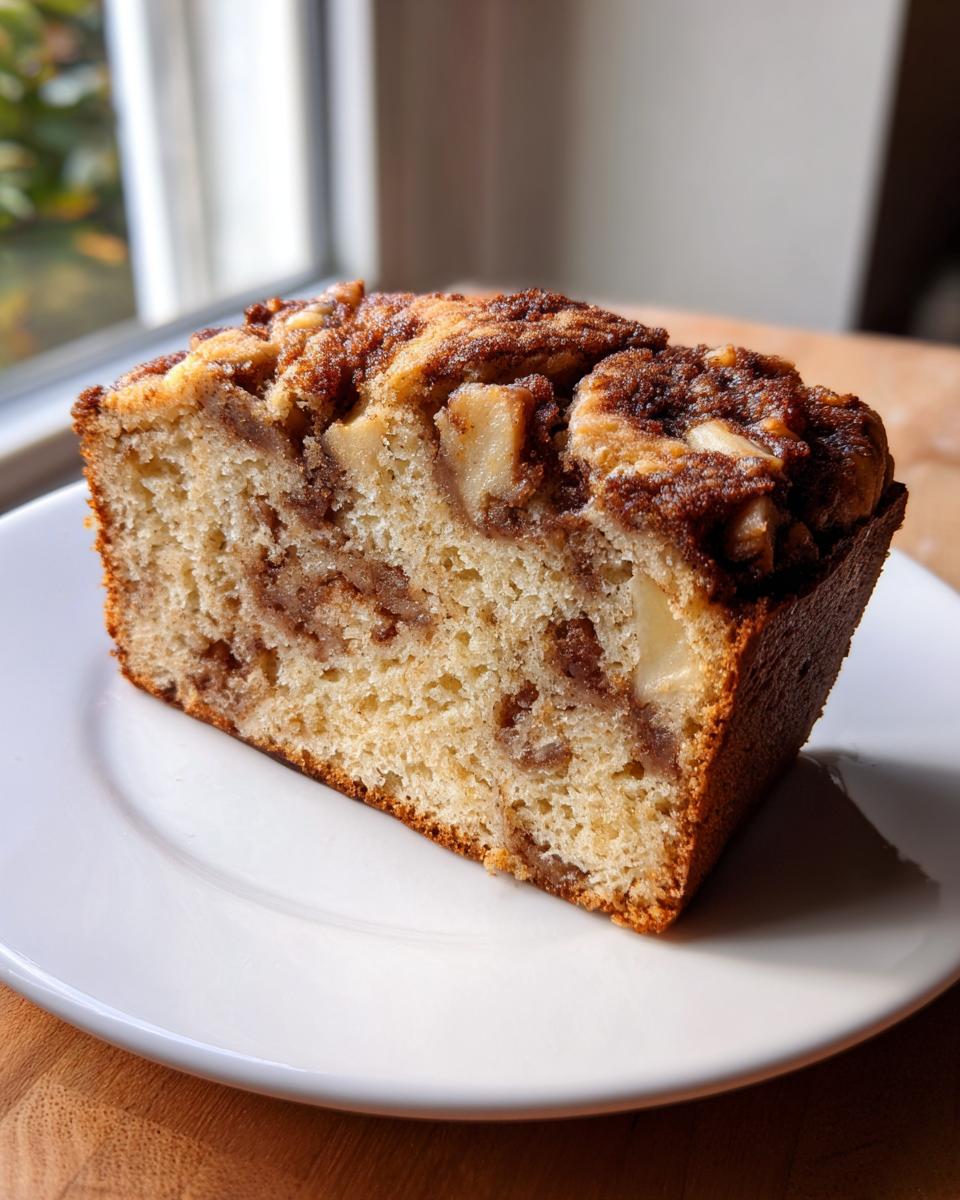
I insist on Granny Smith apples here. Why? Because they hold up beautifully to the heat of the oven and their natural tartness is the perfect foil to all that sweet sugar we’re adding. You need that little bit of tang to keep the whole profile bright. Make sure you chop them finely—think small dice, not great big chunks. In an apple bread, smaller pieces distribute the moisture evenly. If they’re too big, they might sink to the bottom or leave a watery pocket!
Achieving the Cinnamon Apple Loaf Swirl
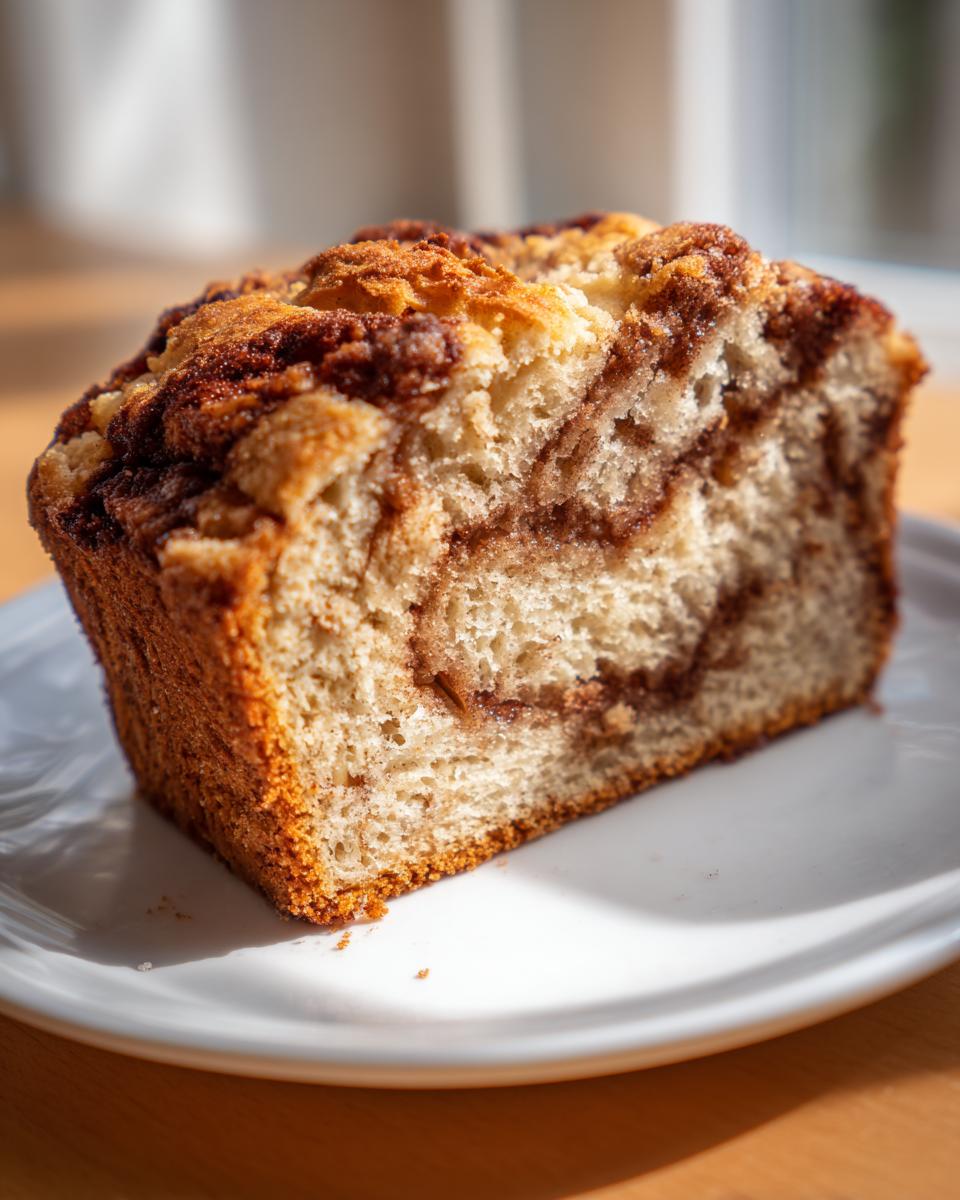
This is where the visual magic happens for our apple cinnamon swirl bread! Once you’ve poured in half your batter, sprinkle that pre-mixed cinnamon and brown sugar swirl evenly over the top. Then, gently pour the remaining batter over that layer. Now, grab a butter knife or a thin skewer. Dip it just below the surface and gently draw a single figure-eight or zig-zag motion through the top layer. Don’t dig down to the bottom or you’ll just mix everything together! We want streaks, not soup. For more inspiration on keeping quick breads beautiful, take a look at my guide to banana zucchini bread where texture control is key!
How to Prepare This Easy Apple Bread
You asked for an easy apple bread, and that’s exactly what you’re getting! We’ve done the hard thinking on the science of mixing, so now all you need to do is follow these clear steps. Preparation is half the battle, and getting organized upfront means the actual mixing goes fast, keeping that gluten development in check!
First things first, get that oven ready. Preheat everything to 350°F (175°C). While it warms up, take a 9×5 inch loaf pan, give it a good grease, and dust it lightly with flour—that ensures an easy release later. If you want extra security against sticking (especially on those rainy fall baking recipes days when things always seem to go wrong), I highly recommend using my simple cake-release paste technique!
- Combine the Dry Stuff: In a medium bowl, grab a whisk and combine your flour, baking soda, salt, the 2 teaspoons of cinnamon for the batter, and the nutmeg. Set this aside for a minute.
- Cream the Fats and Sugars: In a separate, bigger bowl—this is where you’ll mix everything else—beat that softened butter, the granulated sugar, and the 1/2 cup of brown sugar together. You’re aiming for something light and fluffy here. It shouldn’t look like glue anymore!
- Add the Eggs and Vanilla: Beat in the three large eggs, but add them in one at a time. Make sure each egg is fully incorporated before you drop the next one in. Then, stir in your vanilla extract.
- Alternate Wet and Dry Wisely: This is the critical part for a moist quick bread! You’re going to alternate adding your dry mixture and the milk. Start with about a third of the dry ingredients, mix just until *barely* combined, then add half the milk, mix briefly, then another third of the dry, the rest of the milk, and finally finish with the very last bit of the dry mix. Stop mixing the second you don’t see loose flour streaks. Seriously, stop!
- Fold in the Goodness: Gently fold in your chopped Granny Smith apples and any nuts you decided to use. Don’t use the electric mixer for this part; use a spatula and just cut through the batter a few times to distribute them.
- Layer for the Swirl: Now comes the fun part! Pour half of what you have made into your prepared loaf pan. Sprinkle that pre-mixed swirl topping (the other 1/4 cup brown sugar and 1 teaspoon cinnamon) evenly over that batter layer. Then, pour the remaining batter right on top.
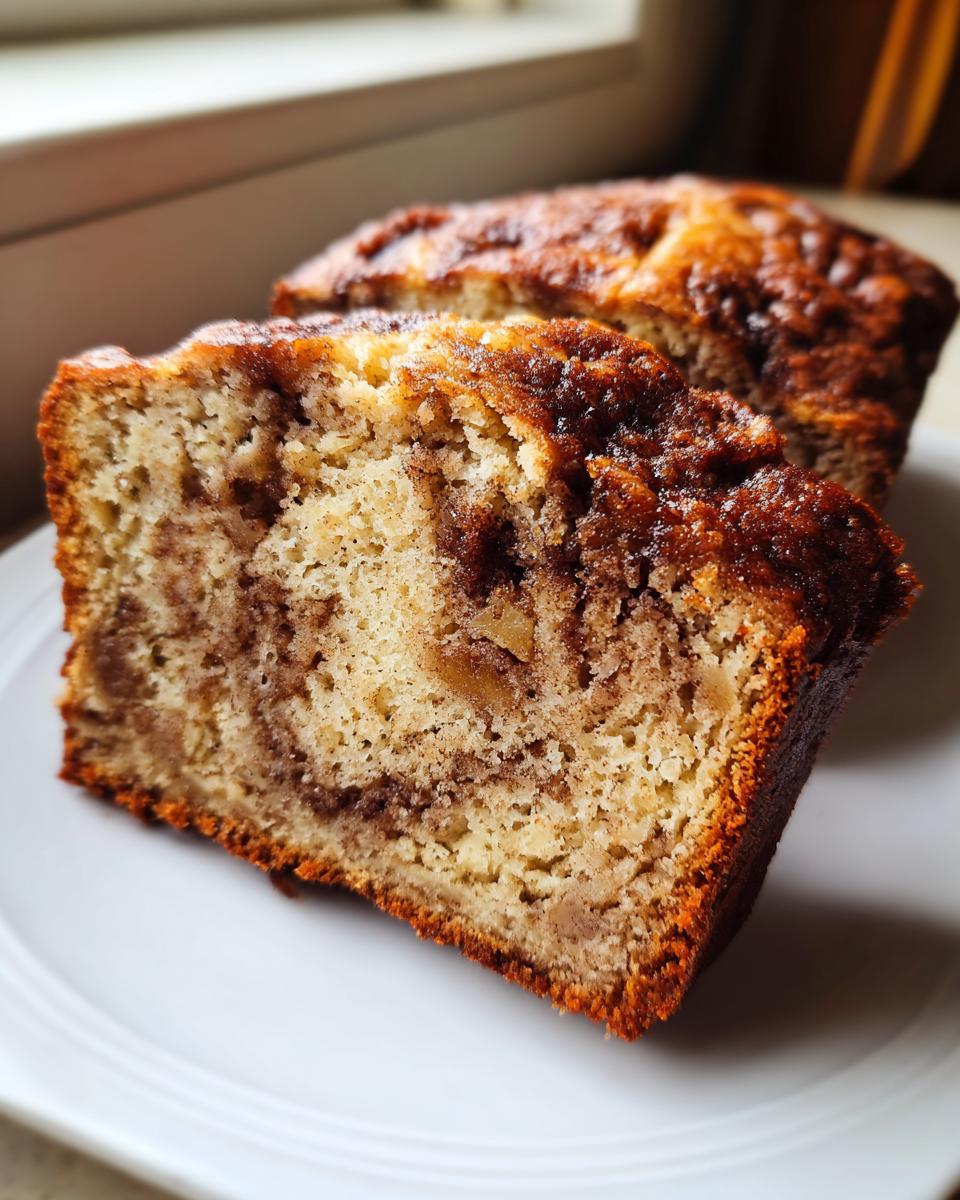
- Create the Marbling: Take a knife or a skewer and dip it just below the surface of the top batter layer. Gently run it through in a zig-zag or figure-eight pattern a couple of times. This gives you that gorgeous marbled effect when sliced.
- Bake Time: Slide it into the 350°F oven and let it bake for about 55 to 65 minutes. You’ll know it’s done when a wooden skewer stuck right in the thickest part comes out clean—no wet batter clinging to it.
- Cool It Down: Patience, my friend! Let it rest in the pan for a good 15 minutes so it sets up. If you flip it immediately, it tends to crash. After 15 minutes, carefully turn it out onto a wire rack to cool completely before slicing into that perfect cinnamon apple loaf.
Making Your Apple Bread Bakery Style
We’ve nailed the interior texture—that beautiful, moist crumb filled with tender apples—but if we want this to truly feel like a slice of heaven from that gourmet bakery you see on Instagram, we need to talk finishes. Making this apple bread feel bakery style elevates it from a great homemade snack to a genuine showstopper for brunch or dessert. While the swirl alone is gorgeous, a little something extra on top seals the deal.
Remember those notes I mentioned? If you’re looking for that extra layer of sweetness and presentation that really catches the eye—especially if you’re gifting this perfect homemade apple dessert—you’ve got to add the glaze. It’s totally optional, of course, because the brown sugar swirl inside is so rich, but a drizzle just screams “I spent all morning lovingly crafting this!”
To make a simple glaze that pairs perfectly without overpowering the spices, keep it light. You just need to whisk together about 1 cup of powdered sugar with 2 to 3 tablespoons of milk. If you want an extra zip that really complements the apple, try swapping one tablespoon of the milk for fresh lemon juice. You want this mixture thin enough to drip elegantly down the sides, not sit there like royal icing.
If you prefer a slightly richer topping, you could use the principle from my fudge frosting recipe but swap the chocolate for cinnamon and a touch of vanilla. However, for this particular apple cinnamon loaf, I usually stick to that bright, simple powdered finish. When you’re ready to drizzle, make sure the loaf is completely cool—otherwise, that glaze melts right off and sinks in, defeating the whole purpose! For more beautiful topping ideas, I always love seeing what other bakers are doing, like the lovely finishes on the loaf discussed over at Cookies for Day.
Storage and Reheating Instructions for Your Apple Bread
The hardest part about baking this incredible apple bread is letting it cool down enough to slice, right? Well, the second hardest part is making sure you keep that fresh-baked moisture locked in long enough to enjoy leftovers! Since this is a truly moist apple bread recipe, proper storage is key to keeping that tender crumb intact.
Here’s the deal: I strongly advise against refrigerating this loaf. Cold temperatures make quick breads dry out way faster than you’d expect, and we worked hard to get that perfect texture!
Keeping Your Apple Bread Fresh at Room Temperature
For the first couple of days, room temperature is your friend. Once the loaf is completely cool—and I mean *completely* cool, no steam left!—wrap it up tightly. I use a layer of plastic wrap pressed snugly against the surface, followed by a layer of aluminum foil or sticking the whole thing into a zip-top bag. This creates a double seal to block out air, which is what dries things out.
This easy homemade bread will keep wonderfully for about three full days this way. Honestly, if you’ve got the self-control, it tastes best on day two because the spices have had time to really meld!
Methods to Revive Stale Apple Bread
Let’s be real, sometimes life gets busy, and that last piece gets forgotten for a day or two. If your cinnamon apple loaf seems a little firm when you pull it out of storage, don’t toss it! There’s an easy fix to bring back that fresh-from-the-oven fluffiness.
The trick is using quick heat and a tiny bit of steam. Take your slice and wrap it loosely in a slightly damp paper towel. Pop that wrapped slice into the microwave for about 10 to 15 seconds on medium power. That little bit of moisture from the towel warms up right inside the bread, softening everything instantly. If you want it absolutely perfect, you can slice it, toast it lightly, and then spread a thin layer of apple butter on top. It’s a fantastic way to enjoy those last bites of your homemade apple dessert!
Variations on the Classic Apple Bread
Part of the joy of baking is knowing you can take a fantastic blueprint—like this apple bread—and tweak it just a little bit to make it your own signature creation. Once you’ve mastered the basic method for the moist apple bread recipe, you’ve basically unlocked a whole world of cozy baking possibilities! I love experimenting, especially when the weather starts cooling down and I pull this recipe out for my weekly fall baking recipes sessions.
Don’t feel tied down just to the swirl; look at this as a launchpad for so much more! If you enjoy the flavor combination, you might also adore how I handle spice in my pancake recipe; check out the full flavor profile in my guide to cinnamon roll pancakes for inspiration.
Turning It Into Apple Streusel Bread
If you love a crunchy topping that adds texture and buttery sweetness, let’s pivot this into an apple streusel bread! This is super simple, but it makes the top layer utterly irresistible. Before you add your top layer of batter in Step 6 of the instructions, skip the brown sugar swirl topping completely. Instead, quickly mix up a streusel topping!
For the topping, you just need: 1/2 cup flour, 1/4 cup cold butter cut into small bits, 1/4 cup brown sugar, and maybe an extra 1/2 teaspoon of cinnamon. Use your fingers to rub the butter into the dry ingredients until it looks like coarse crumbs. Sprinkle this generously over the top layer of batter before you swirl it, and bake as directed. That crispy, sweet topping paired with the inside moisture? Perfection!
The Amish Apple Fritter Bread Vibe
Lots of people search for that classic amish apple fritter bread recipe, and honestly, the flavor profile of ours is very close! The fritter flavor tends to come from two things: more cinnamon and a very heavy glaze. If you want to lean into that decadent, dessert-like feel, here’s what I do:
- Increase the cinnamon in the main batter to 3 teaspoons instead of 2.
- Skip the internal brown sugar swirl entirely.
- When the bread is completely cool, use the simple powdered sugar glaze I showed you in the ‘Bakery Style’ section, but make it thinner—runnier, almost like maple syrup. Drizzle it heavily across the top so it pools in all the crevices.
The result is softer, sweeter, and tastes just like you pulled a fritter straight from the oil, without any of the deep-frying mess! You can find a similar concept well executed by the folks at Share the Oven.
Making Breakfast Loaf Recipes: Apple Bread Muffins
Sometimes you don’t want a whole loaf, especially when you’re rushing out the door for an easy-grab breakfast! This batter converts beautifully into muffins, which makes them great for grab-and-go breakfast loaf recipes. The main thing you must adjust here is the baking time.
Use standard, lined muffin tins and fill the cups about 2/3 full. Because they are smaller, the baking time shrinks dramatically—usually down to 20 to 25 minutes at the same 350°F oven temperature. Check them early! They still need that apple, and they bake up delightfully fluffy without the swirl feature, though you can still drop a tiny pinch of the cinnamon sugar mix right on top of the batter before baking for a little extra caramelized crunch.
Frequently Asked Questions About This Apple Bread
I know when you bake something this cozy and delicious, you’re going to have questions! I’ve gathered a few of the most common ones I get about this apple bread to make sure your experience is perfect, right down to the storage. We pride ourselves on making sure these recipes are foolproof for every home cook, so let’s clear up any lingering doubts!
Can I make this apple bread without nuts?
Absolutely, yes! I listed the walnuts or pecans as completely optional because I know nuts aren’t for everyone. If you happen to have an allergy or just prefer a smoother texture, simply leave them out when folding them in during Step 5. The bread texture will be just as light and moist without them; those apples do most of the heavy lifting!
How long does this moist apple bread recipe stay fresh?
This is where we win with a good moist apple bread recipe! Because we use those tart apples and proper creaming techniques, this loaf stays fantastic at room temperature for a solid three days when stored properly and tightly wrapped (remember that double-wrap method I mentioned?). If you manage to keep it that long—which is a feat!—it will still be better than most store-bought loaves.
What is the best way to freeze this cinnamon apple loaf?
If you want to bake ahead for the holidays or just want to stock up on this wonderful cinnamon apple loaf, freezing is brilliant. You should let the bread cool completely first. Then, I recommend slicing the loaf *before* freezing. Wrap each individual slice tightly in plastic wrap, and then place the wrapped slices into a freezer-safe zip-top bag. This way, you can just pull out one slice at a time for a quick snack! It keeps great for up to three months this way. We keep all our recipe tutorials here on the Gourmet Gaze blog if you need more general baking tips!
Nutritional Estimates for This Homemade Apple Dessert
Now, I know that for many of us, especially those tracking macros or just generally curious, the final breakdown matters. While my main focus here at Gourmet Gaze is always on soul-satisfying flavor and making sure you nail that perfect texture for your homemade apple dessert, understanding the estimates is just good kitchen practice! Remember, baking precision matters, but so does the brand of butter you use!
These figures are calculated based purely on the ingredients listed in our recipe above. Since we’re using specific measurements, these ought to get you very close to your tracking goals, but always treat these as estimates. If you’re looking for detailed macro breakdowns on other recipes, you can check out my guide to high-protein waffles, which gets broken down even further!
Here is the estimated nutritional information per slice:
- Serving Size: 1 slice
- Calories: 320
- Sugar: 28g (That swirl is delicious, but it adds up!)
- Sodium: 250mg
- Fat: 16g
- Saturated Fat: 9g
- Unsaturated Fat: 7g
- Trans Fat: 0.3g
- Carbohydrates: 45g
- Fiber: 2g
- Protein: 4g
- Cholesterol: 65mg
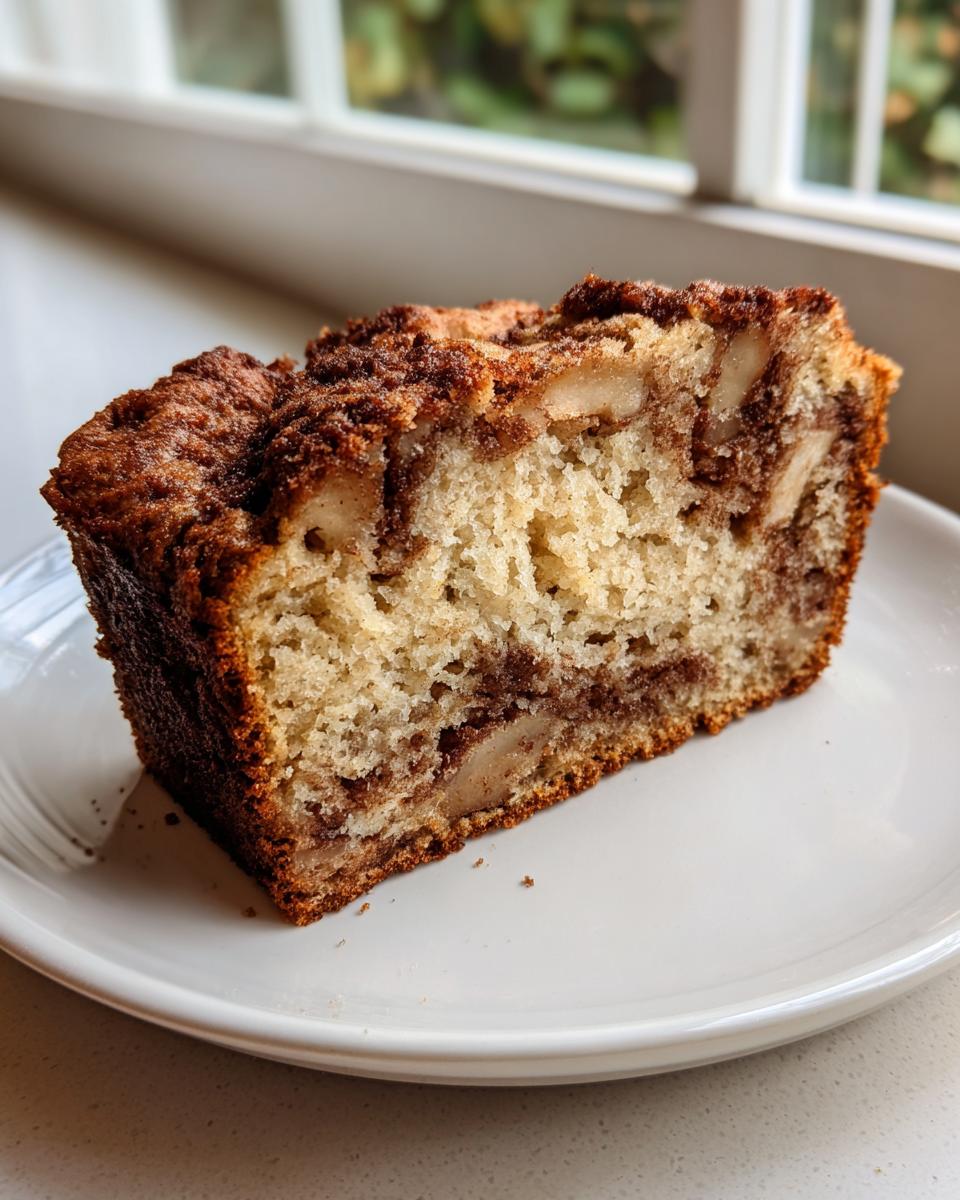
Take these numbers with a grain of salt—or perhaps a pinch of cinnamon! Every brand of flour, the exact size of those “large” eggs, and whether you use salted or unsalted butter upfront can shift these values slightly. The most important takeaway for your apple bread is that it’s rich in the good stuff—real apples and warming spices—making it a comforting treat worth every calorie!
PrintMoist Apple Cinnamon Bread with Brown Sugar Swirl
Make this incredibly moist apple cinnamon bread, featuring tender apples and a rich brown sugar swirl. This quick bread is perfect for a cozy breakfast, snack, or a satisfying homemade dessert.
- Prep Time: 20 min
- Cook Time: 60 min
- Total Time: 80 min
- Yield: 1 loaf (about 10 servings) 1x
- Category: Dessert
- Method: Baking
- Cuisine: American
- Diet: Vegetarian
Ingredients
- 2 1/2 cups all-purpose flour
- 1 teaspoon baking soda
- 1/2 teaspoon salt
- 2 teaspoons ground cinnamon
- 1/4 teaspoon ground nutmeg
- 1/2 cup (1 stick) unsalted butter, softened
- 1 cup granulated sugar
- 1/2 cup packed brown sugar, plus 1/4 cup for swirl
- 3 large eggs
- 1 teaspoon vanilla extract
- 1/2 cup milk
- 2 cups peeled and finely chopped Granny Smith apples (about 2 medium apples)
- 1/2 cup chopped walnuts or pecans (optional)
- For the Swirl: 1/4 cup packed brown sugar mixed with 1 teaspoon cinnamon
Instructions
- Preheat your oven to 350°F (175°C). Grease and flour a 9×5 inch loaf pan.
- In a medium bowl, whisk together the flour, baking soda, salt, 2 teaspoons cinnamon, and nutmeg. Set aside.
- In a large bowl, cream together the softened butter, granulated sugar, and 1/2 cup brown sugar until light and fluffy.
- Beat in the eggs one at a time, mixing well after each addition. Stir in the vanilla extract.
- Alternate adding the dry ingredients and the milk to the wet ingredients, beginning and ending with the dry ingredients. Mix only until just combined. Do not overmix.
- Gently fold in the chopped apples and nuts, if using.
- Pour half of the batter into the prepared loaf pan. Sprinkle the brown sugar and cinnamon swirl mixture evenly over the batter. Top with the remaining batter.
- Use a knife or skewer to gently swirl the top layer for a marbled effect.
- Bake for 55 to 65 minutes, or until a wooden skewer inserted into the center comes out clean.
- Let the bread cool in the pan for 15 minutes before inverting it onto a wire rack to cool completely. Slice and serve this best apple bread for fall treat.
Notes
- For the moistest results, use slightly tart apples like Granny Smith or Honeycrisp.
- If you prefer an apple fritter bread recipe feel, you can top the cooled loaf with a simple powdered sugar glaze made from 1 cup powdered sugar mixed with 2-3 tablespoons of milk.
- This quick bread recipe keeps well stored tightly wrapped at room temperature for up to three days.
Nutrition
- Serving Size: 1 slice
- Calories: 320
- Sugar: 28g
- Sodium: 250mg
- Fat: 16g
- Saturated Fat: 9g
- Unsaturated Fat: 7g
- Trans Fat: 0.3g
- Carbohydrates: 45g
- Fiber: 2g
- Protein: 4g
- Cholesterol: 65mg