
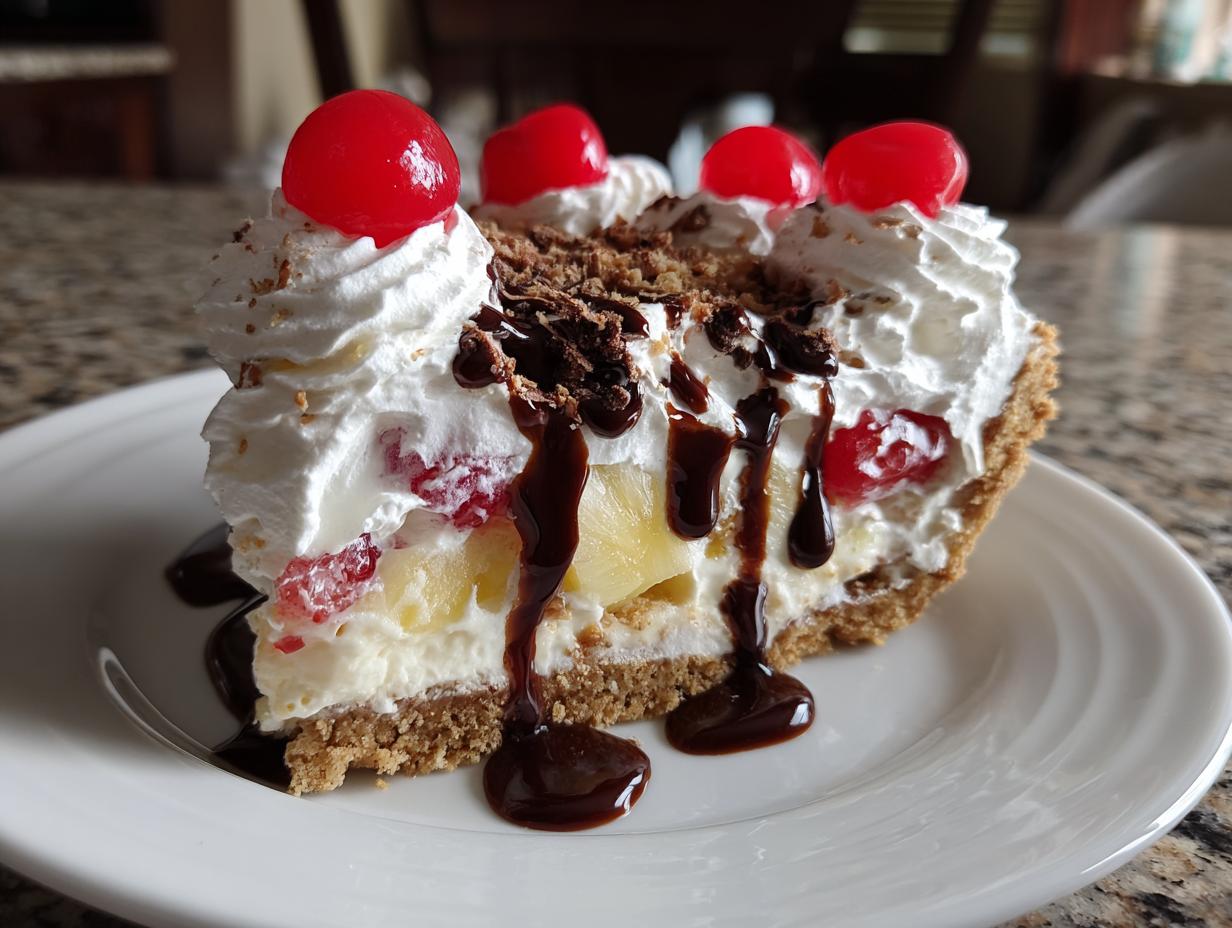

When the summer heat cranks up, the last thing I want to do is stand over a hot oven just to make a spectacular dessert. Believe me, I remember those days chained to my desk in Chicago, thinking cooking was one more agonizing task on the list. But that’s why I fell head-over-heels for no-bake recipes, especially when they bring back childhood memories! If you’re craving the rich, indulgent flavors of an old-fashioned ice cream parlor—the buttery crust, the creamy filling, the fresh fruit—but need something simple and cool, I have the answer. This banana split cake captures every classic element of that iconic sundae, delivering a show-stopping visual feast that requires zero baking time. Trust me, this is the most reliable, visually stunning summer dessert you’ll make all year. If you want to learn more about how my culinary journey evolved from spreadsheets to stunning food, check out my story over at Gourmet Gaze.
- Why This No-Bake Banana Split Cake is Your New Summer Favorite
- Gathering Ingredients for Your Banana Split Cake
- Step-by-Step Instructions for the Creamy No Bake Dessert
- Expert Tips for the Best Banana Split Cake Presentation
- Make Ahead Dessert and Storage for Your Banana Split Cake
- Variations: Making Your Own Banana Split Inspired Treats
- Frequently Asked Questions About This Chilled Summer Cakes Recipe
- Estimated Nutritional Data for the Banana Split Cake
- Share Your Experience Making This Easy Banana Split Dessert
Why This No-Bake Banana Split Cake is Your New Summer Favorite
If there’s one dessert rule I stick to in the height of summer, it’s this: no oven allowed! This banana split cake is truly the MVP for any gathering. It’s ridiculously easy to assemble, looks like you spent all day on it, and it’s the ultimate Summer Banana Dessert. Forget turning on the AC; this cake keeps everything cool and delicious. You can find more incredible chilled treats like this over in my Desserts section.
- Talk about impressing your friends—this easily becomes the star of any BBQ or picnic. It is absolutely Potluck Perfect Cake!
- It’s so straightforward, even if you’re currently escaping burnout like I did, you can pull this off flawlessly.
Effortless Assembly: The Ultimate No-Bake Banana Split Cake
You read that right—no bake! The only thing resembling heat management here is melting a little butter for the base. Seriously, that’s it. We are ditching scorched pans and fussy techniques for pure, chilled perfection. This simplicity makes the Ultimate No-Bake Banana Split Cake a lifesaver when time is tight or the kitchen is already too hot.
Classic Banana Split Flavors in a Layered Banana Cake Recipe
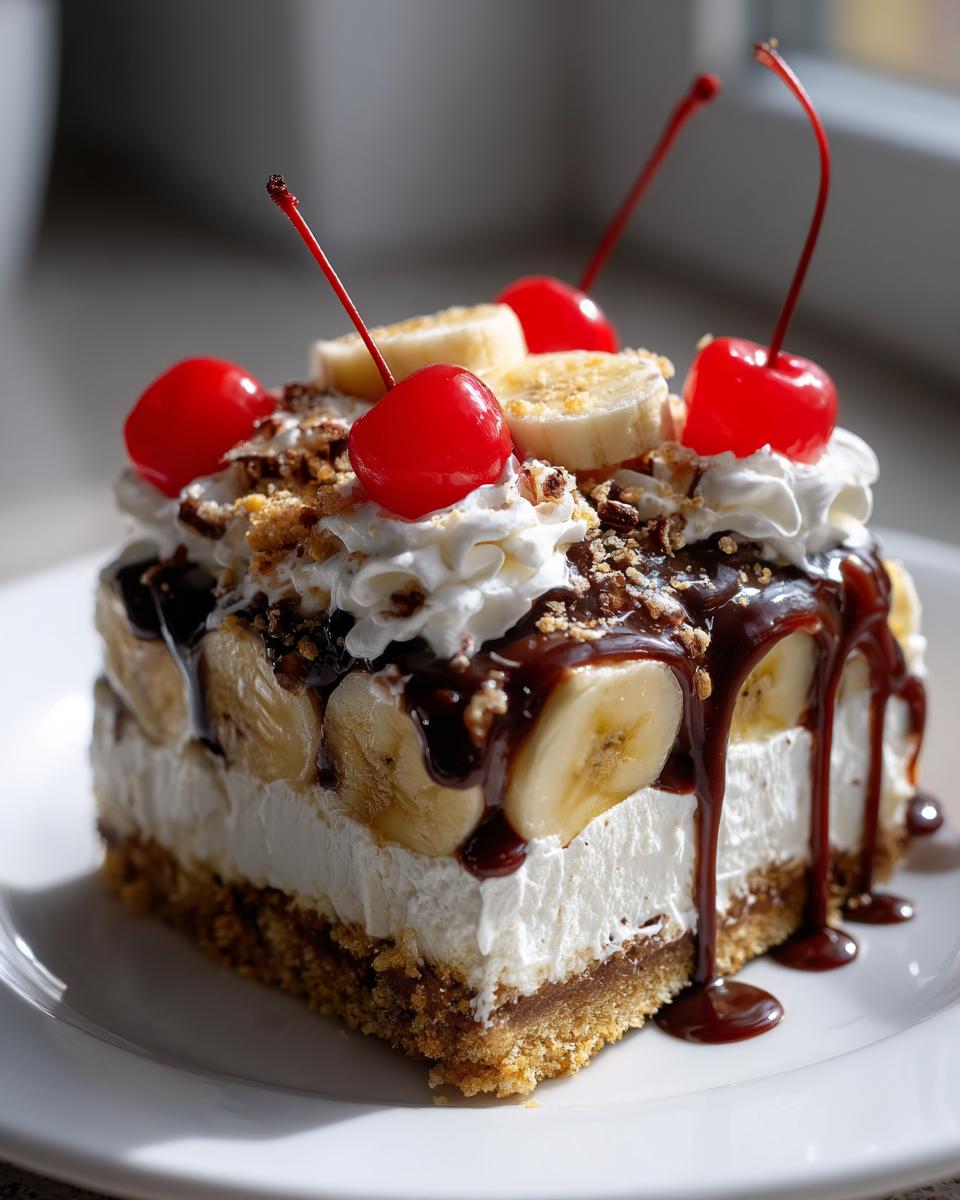
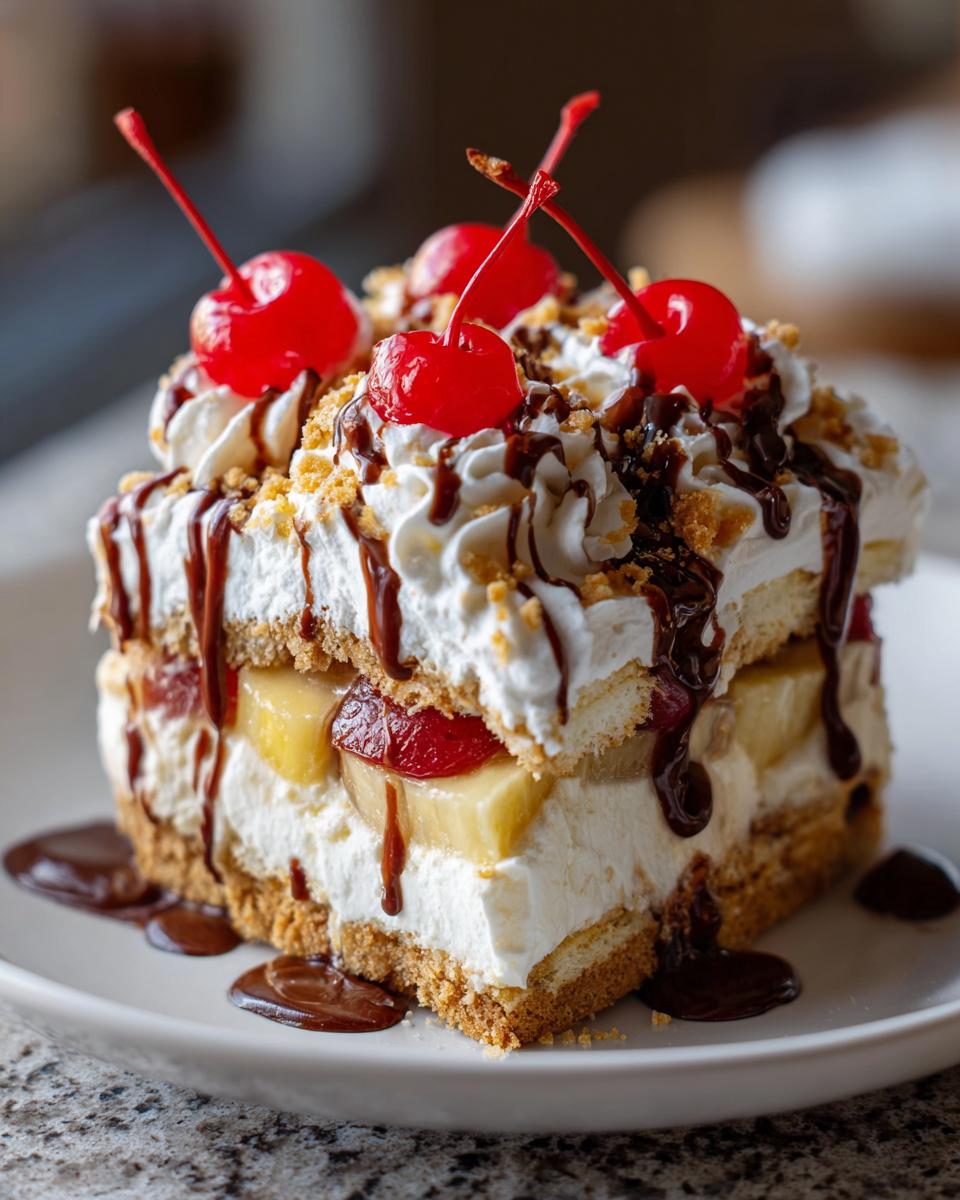
This isn’t just some random dessert; it’s a nostalgic trip! We’re hitting all those iconic notes: the crunchy graham cracker crust stands in for the long wafer, that thick, sweet cream filling replaces the scoops of ice cream, and of course, the chocolate syrup and cherries seal the deal. It’s such a fun way to experience those Classic Banana Split Flavors without needing a bowl and spoon.
Gathering Ingredients for Your Banana Split Cake
Okay, let’s talk about what you need. Since this wonderful dessert is all about layers, you want to make sure everything is prepped just right before you start assembling, or you’ll end up hunting for things mid-spread. We aren’t whipping up a stiff cake here; we’re building a rich, Creamy No Bake Dessert, so don’t skimp on the quality of the ingredients that make the filling! You can see a full list below, but the proportions are key.
I’ve included some links to other things you might like if you’re stocking up, like this amazing cream cheese caramel dip recipe, but focus on grabbing these essentials first.
- 1 1/2 cups graham cracker crumbs (This is your sturdy base!)
- 1/2 cup unsalted butter, melted (Buttery connection to the crust, yum.)
- 8 ounces cream cheese, softened (Make sure this is really soft, or it’ll clump.)
- 1 cup granulated sugar
- 1 teaspoon vanilla extract
- 1 cup heavy whipping cream, cold (Ice cold, please! This is crucial for the structure.)
- 1 (8 ounce) container frozen whipped topping, thawed, divided (We use half now, half later!)
- 3 large ripe bananas, sliced (Don’t use mushy ones!)
- 1 (20 ounce) can crushed pineapple, drained well (Pay attention here—this is important.)
- 1 (10 ounce) jar maraschino cherries, drained and halved
- 1/2 cup chocolate syrup
- 1/4 cup chopped nuts (Optional, but I love that crunch!)
Here’s one of my biggest non-negotiables, especially for keeping this banana split cake from getting sad and soupy on you. You absolutely must drain that crushed pineapple like your life depends on it! I usually put the can in a fine-mesh sieve and press down on the fruit with the back of a spoon for a solid minute. Excess liquid is the enemy of any Refrigerated Dessert Recipes, especially one that relies on cream cheese and whipped topping to hold its shape. Trust Leo on this one—thoroughly drained fruit means a perfectly set dessert!
Step-by-Step Instructions for the Creamy No Bake Dessert
Now that we have all our beautiful components ready, it’s time for assembly! Remember, since this is an honor roll student in the world of Refrigerated Dessert Recipes, patience during the chilling stage is non-negotiable. We aren’t using an oven, so we need the fridge to do the hard work of setting this beautiful banana split cake. You can find more great recipes that take advantage of chilling time right here on the site.
Creating the Graham Cracker Crust Recipes Base
Start by mixing your graham cracker crumbs and melted butter until everything looks like wet sand. Press this mixture down, down, down into the bottom of your 9×13 dish. I use the flat bottom of a glass measuring cup to really compact it—we need this base to be rock solid so your first layer doesn’t crumble when you slice it. Pop that into the freezer while you move on to the filling. A firm base prevents the entire banana split cake from staging a delicious collapse later!
Preparing the Banana Cream Dessert Filling
In one bowl, beat your softened cream cheese with the sugar and vanilla until it’s completely lump-free and smooth. In a separate, super-chilled bowl, whip that cold heavy cream until you get those lovely stiff peaks—that’s air, and we want all of it! Now, gently fold the whipped cream into the cream cheese mixture. Then, and this is important for that fluffy texture, gently fold in half of your thawed whipped topping. We need to gently fold here; if you stir aggressively, you’ll knock all that beautiful air out, and we’ll lose the magic of this creamy no bake dessert.
Layering and Chilling the Banana Split Cake
Spread half of that glorious cream mixture right over your chilled crust. Next, arrange your sliced bananas evenly over that layer, then sprinkle on your well-drained pineapple. Take the remaining cream mixture and spread it carefully over the fruit. Then, cover the whole dish loosely and send it straight to the fridge. You absolutely must chill this for a minimum of four hours, but honestly, overnight makes the structure perfect. Don’t rush fate! The chilling time is essential for setting the layers properly.
Expert Tips for the Best Banana Split Cake Presentation
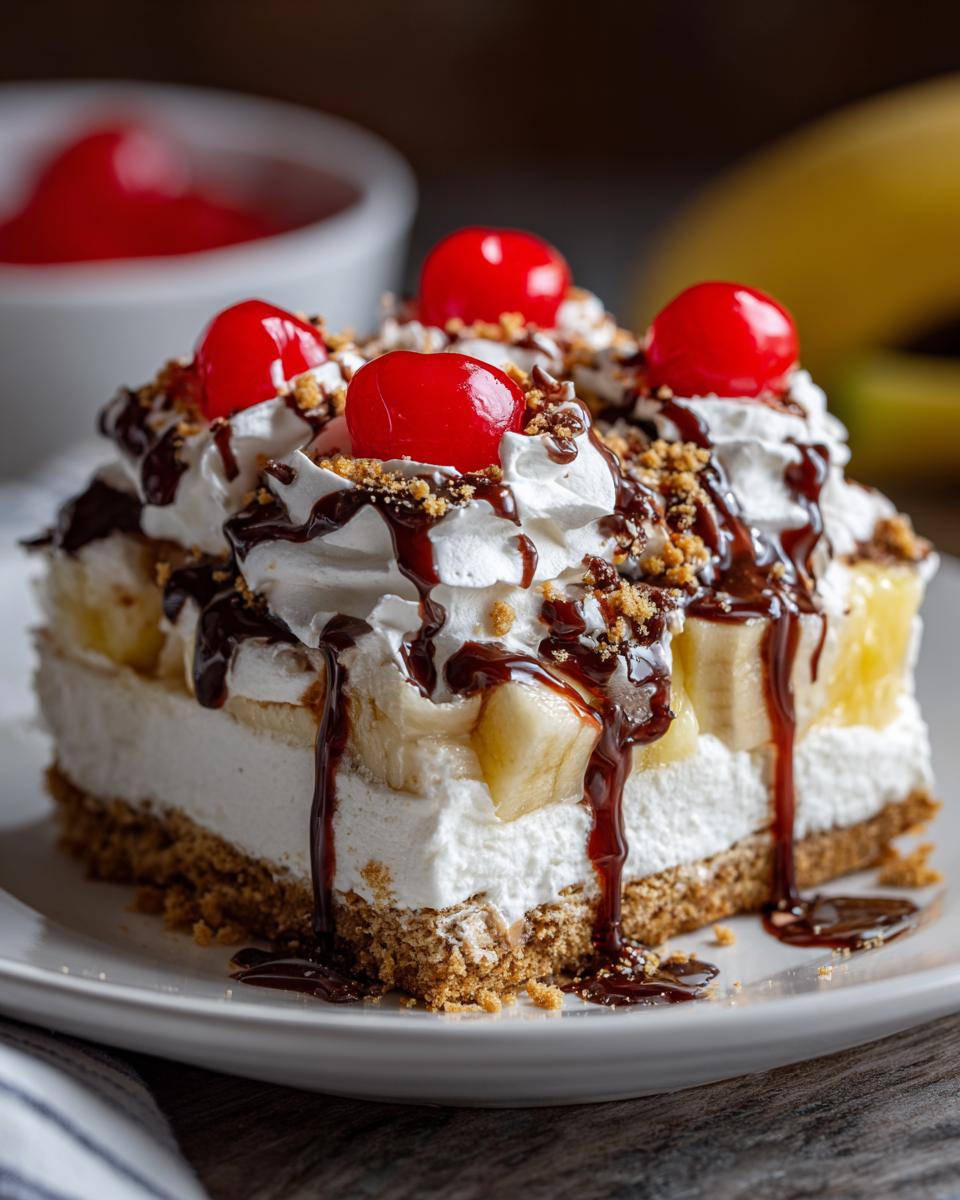
When I first started making this banana split cake on my road trip pilgrimage, I focused so much on the taste—which, let’s be real, is incredible—that I sometimes forgot about the look! As someone who spent years marketing beautiful products, I know that presentation is the first invitation to dive in. This layered dessert has to look as good as it tastes. I remember bringing one to a small neighborhood potluck, and it vanished before I could even grab a second slice just because everyone was raving about how vibrant the layers looked.
To make sure your final product shouts “summer perfection” and stays true to those beautiful colors, you need a couple of little tricks up your sleeve. If you’re looking for another fun, easy way to use chocolate and banana, check out my chocolate banana pops recipe. We want this to be the picture-perfect centerpiece for your next gathering.
Preventing Brown Bananas in Your Layered Banana Cake Recipe
Oh, the dreaded browning banana! It’s the Achilles’ heel of any Layered Banana Cake Recipe featuring fresh fruit. Bananas oxidize faster than you can say “ice cream parlor,” and brown fruit just doesn’t scream ‘refreshing summer dessert.’ My trick is simple, Leo Maxwell approved, and it keeps those slices bright yellow. As soon as you slice your bananas (use slightly under-ripe ones, they hold up better!), toss them lightly in a small bowl with about a tablespoon of good quality lemon juice. Don’t drown them! Just a gentle toss to coat. The subtle acidity stops the browning process dead in its tracks, guaranteeing bright yellow slices peek through the creamy white filling when you serve that magnificent banana split cake.
Achieving Perfect Whipped Topping Desserts Texture
For this to be the star of the Whipped Topping Desserts category, you need that final topping layer to be stable and beautiful—not runny, not weeping, just light and fluffy. Remember how I said the heavy cream needs to be cold? That’s only half the battle for stiff peaks. The other half is making sure your tools are cold, too. Before you whip that heavy cream, pop your mixing bowl and the whisk attachment into the freezer for at least 15 minutes. Seriously, chill everything! Cold fat whips up faster and holds its structure much, much longer. This simple step ensures your final layer holds those lovely swirls you create when decorating your spectacular, chilled banana split cake.
Make Ahead Dessert and Storage for Your Banana Split Cake
This is why I call this the ultimate Potluck Perfect Cake—it’s designed for making ahead! Because this is a fully Chilled Summer Cakes recipe, you actually want to prepare it early. I rarely assemble this banana split cake less than six hours before serving. Overnight is even better because those flavors truly marry together beautifully as they chill.
When storing leftovers (if you have any!), cover the dish tightly with plastic wrap, making sure the wrap doesn’t touch the chocolate or cherry toppings too much, as that can smear things around later. It keeps wonderfully in the fridge for up to three days. If you need another fantastic Make Ahead Dessert for a different occasion, my easy apple crumble recipe is another winner that tastes better the next day!
Just remember to keep those tempting toppings—the extra whipped topping, chocolate syrup, and nuts—ready in the fridge until the very last minute. We want that fresh garnish look when you finally slice into this Easy Summer Dessert.
Variations: Making Your Own Banana Split Inspired Treats
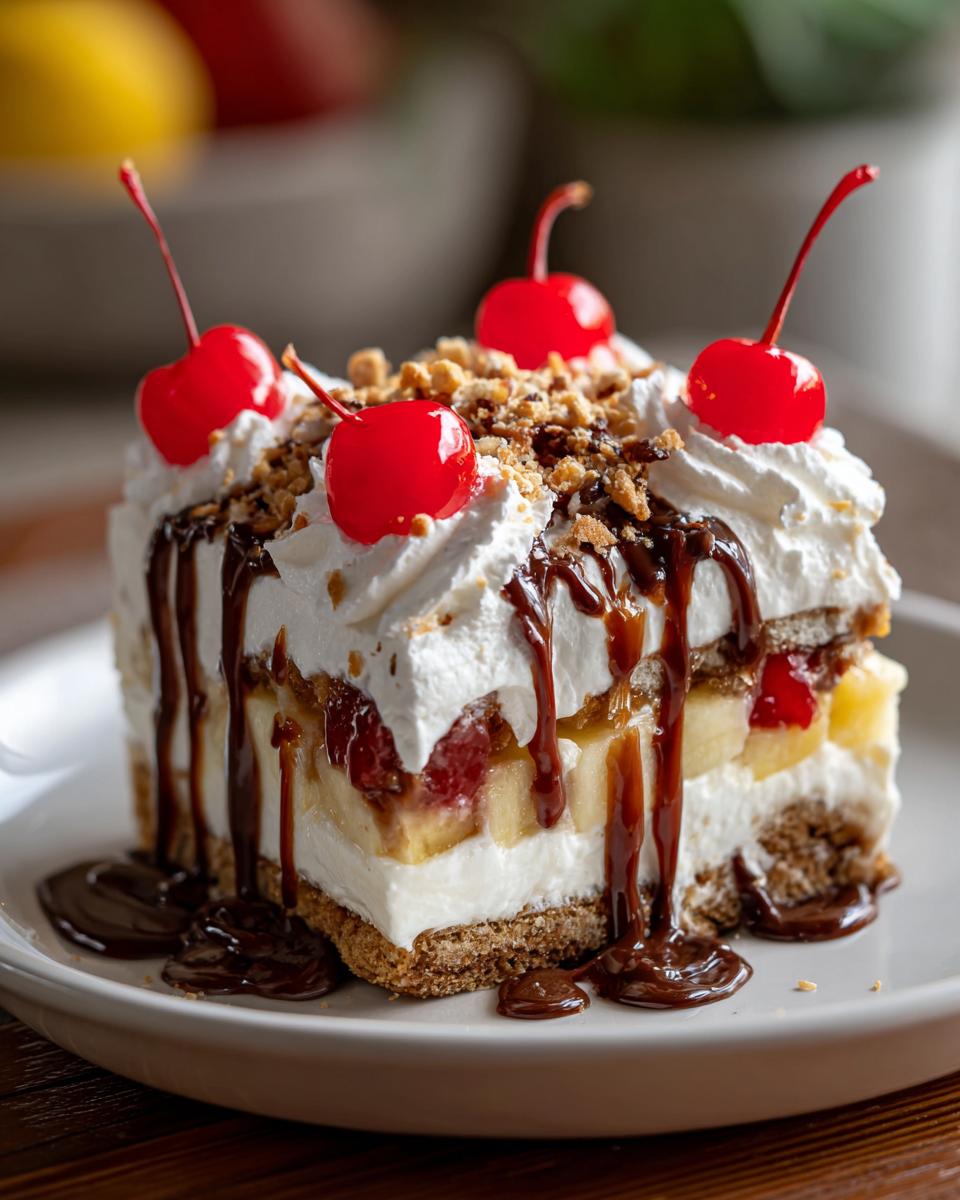
While this Ultimate No-Bake Banana Split Cake is pretty much perfection as written, I know the home cook in you wants to tinker! That sense of culinary freedom is exactly why I stopped just following recipes and started embracing the process. Luckily, because this cake relies on layering structured components, you can make fun swaps while keeping the overall spirit of the dessert intact. Think of it as building your own sundae in cake form!
If you’re aiming for something slightly different or just need to use what you have on hand, don’t stress. We’re keeping things fun and easy—no major compromises on the creamy texture needed here. If you’re curious about another fun, slightly messy but totally worth-it treat, you absolutely have to check out my gooey S’mores Brownies Recipe for a campfire vibe!
Here are a few simple ways to customize your Banana Split Inspired Treats:
- Swap the Fruit Base: While banana and pineapple are classic, nothing stops you from swapping that pineapple for sliced strawberries—just make sure you drain them really, really well, perhaps even patting them gently with a paper towel. You can also add some halved raspberries for a nice tart burst nestled in the cream.
- Crust Confusion? If you run out of graham crackers, don’t panic! Try using vanilla wafers or even crushed shortbread cookies for a slightly different flavor profile on your crust. The butter ratio should stay the same, just crush those wafers finely.
- The Nut Question: In the original recipe, nuts are optional, but if you want to switch them up, try adding chopped pecans or even crushed waffle cones right before you add the final whipped topping layer for an extra layer of satisfying crunch.
- Chocolate Variation: Instead of just drizzling chocolate syrup, sometimes I fold in a half cup of mini chocolate chips right into the bottom cream layer. It gives you a little chocolate surprise in every single bite of the banana split cake that isn’t just on top!
See? It’s still undeniably that comforting, chilled dessert we love. You’re just putting your own spin on this incredible Simple Layered Dessert. The core structure—graham crust, creamy filling, fresh fruit—remains the backbone of this sweet symphony.
Frequently Asked Questions About This Chilled Summer Cakes Recipe
I get so many questions about modifications for this banana split cake, which honestly, I love! Seeing people adapt recipes is the best part of cooking. Since this is meant to be a truly No Oven Dessert Idea, we have to be careful about ingredients that might break down during storage or assembly. Here are the most common things folks ask when they are getting ready to make this gorgeous, layered beauty.
Can I use fresh, diced pineapple instead of canned and drained?
Technically, yes, but I strongly advise against it for this specific recipe. Fresh pineapple contains enzymes (like bromelain) that can actually prevent gelatin or dairy-based fillings, like our cream cheese mixture, from setting properly. The canning process neutralizes those enzymes, which is why the canned version works so perfectly for a set, stable Creamy No Bake Dessert. If you absolutely must use fresh, you should either briefly poach it in a simple syrup and cool it completely, or make sure you drain it for an extra-long time—but honestly, stick to the canned and well-drained for the best result!
What happens if I decide to freeze this banana split cake?
Freezing is tricky for this one, friend. Since our filling relies heavily on whipped cream and cream cheese, freezing it turns the texture a bit grainy once thawed—it just doesn’t hold up well like an ice cream cake would. For the best experience as a Refrigerated Dessert Recipes treat, I recommend making it the day before and keeping it chilled in the fridge. If you need a frozen option, look into making an actual ice cream cake version instead, but this specific dairy-based structure prefers the fridge.
I don’t have graham crackers; what’s the best alternative for the crust?
Don’t let a missing ingredient stop you from making this fantastic Easy Party Dessert! The goal of the crust is to provide a buttery, crumbly base that contrasts the creamy top layers. If graham crackers are gone, vanilla wafers (like Nilla Wafers) are my absolute top choice for an alternative crust. They crush up beautifully and give a similar texture. If you have shortbread cookies, those work wonders too! Just use the same amount of melted butter specified in the recipe, and you’ll have a delicious base for your Simple Layered Dessert.
How far ahead of time can I assemble the main layers?
This is the best part of making this Summer Banana Dessert! You can assemble everything up to the final topping stage one day ahead. In fact, chilling it overnight makes the graham cracker crust stay perfectly crisp against the filling layers. Just cover it tightly. Remember, you only want to add the final blanket of whipped topping, chocolate syrup, and cherries right before you serve it. That keeps everything looking fresh and vibrant for your guests!
If you’re keen on more make-ahead magic, I’ve got some great strategies in my guide on moist fall baking that actually apply to chilling desserts too!
Estimated Nutritional Data for the Banana Split Cake
Because we all need to know what deliciousness we’re actually diving into—and because I believe in transparency when moving away from my old corporate spreadsheets—here is the estimated nutritional breakdown for one slice of this incredible banana split cake. This data is based on standard ingredient measurements derived from the recipe card.
I want to be clear, though: I’m a chef now, not a nutritionist! These figures are just helpful reference points, like how I use my trusty kitchen scale now instead of just guessing measurements. The actual count can swing based on the brand of whipped topping you buy or how much chocolate drizzle you decide you truly *need* (which, let’s be honest, is usually more than the recipe calls for!).
- Serving Size: 1 slice
- Calories: 380
- Sugar: 32g
- Sodium: 210mg
- Fat: 22g
- Saturated Fat: 13g
- Unsaturated Fat: 9g
- Trans Fat: 0.5g
- Carbohydrates: 45g
- Fiber: 2g
- Protein: 4g
- Cholesterol: 55mg
Remember, this is a rich, celebratory dessert, not an everyday snack! When you’re enjoying this amazing chilled summer cakes treat, focus on the flavor and the joy it brings to the party. That’s the real value here!
Share Your Experience Making This Easy Banana Split Dessert
And there you have it! The Ultimate No-Bake Banana Split Cake—ready to be the coolest, prettiest thing on your dessert table.
I put my entire heart, and honestly, a fair amount of my old corporate planning skills, into making sure this recipe works every single time, even if you’re just learning to cook or need a fantastic Make Ahead Dessert to impress the neighbors. When you pull this creamy, layered beauty out of the fridge, I want you to feel that same burst of joy I felt when I first truly tasted the potential in simple ingredients.
Now comes the fun part for me—hearing from you! Truly, nothing makes me happier than knowing a recipe born out of my own journey to find joy in the kitchen is now showing up at someone else’s family gathering. I’d absolutely love to see what you create. This is such an Easy Banana Split Dessert, so don’t be shy!
Did you try swapping out the pineapple? Did you go heavy on the chocolate syrup? Tell me everything! Please take a moment to leave a star rating right below the recipe card—it lets me know how reliable the steps are for other home cooks.
If you snap a picture of your gorgeous, chilled layers, tag me on social media! I try to share as many of your recreations as possible because that’s what this whole community is about—creating delicious connections.
If you have any lingering questions about preparation or just want to chat about how to move past the spreadsheet life and into the kitchen, feel free to reach out through the contact page. I always love hearing from my readers. Happy baking—or, well, happy chilling!
PrintUltimate No-Bake Banana Split Cake
Create this easy, layered No-Bake Banana Split Cake for a refreshing summer dessert. It captures all the classic banana split flavors using a graham cracker crust, creamy filling, fresh fruit, and whipped topping, requiring no oven time.
- Prep Time: 25 min
- Cook Time: 0 min
- Total Time: 4 hr 25 min
- Yield: 12 servings 1x
- Category: Dessert
- Method: No-Bake/Refrigerated
- Cuisine: American
- Diet: Vegetarian
Ingredients
- 1 1/2 cups graham cracker crumbs
- 1/2 cup unsalted butter, melted
- 8 ounces cream cheese, softened
- 1 cup granulated sugar
- 1 teaspoon vanilla extract
- 1 cup heavy whipping cream, cold
- 1 (8 ounce) container frozen whipped topping, thawed, divided
- 3 large ripe bananas, sliced
- 1 (20 ounce) can crushed pineapple, drained well
- 1 (10 ounce) jar maraschino cherries, drained and halved
- 1/2 cup chocolate syrup
- 1/4 cup chopped nuts (optional)
Instructions
- Prepare the crust: Mix the graham cracker crumbs and melted butter in a bowl until combined. Press this mixture firmly into the bottom of a 9×13 inch baking dish. Place the crust in the freezer while you prepare the filling.
- Make the cream cheese layer: In a large bowl, beat the softened cream cheese, granulated sugar, and vanilla extract until smooth.
- Whip the cream: In a separate, chilled bowl, beat the cold heavy whipping cream until stiff peaks form. Gently fold the whipped cream into the cream cheese mixture.
- Fold in topping: Fold in half of the thawed whipped topping into the cream cheese mixture until just combined. Do not overmix.
- Assemble the layers: Spread half of the cream cheese mixture evenly over the chilled graham cracker crust.
- Add bananas and pineapple: Arrange the sliced bananas over the cream cheese layer. Sprinkle the drained crushed pineapple evenly over the bananas.
- Top with remaining cream: Spread the remaining cream cheese mixture over the pineapple layer.
- Chill: Cover the dish with plastic wrap and refrigerate for at least 4 hours, or preferably overnight, to allow the cake to set.
- Garnish before serving: Before serving, spread the remaining half of the whipped topping over the cake. Drizzle generously with chocolate syrup. Sprinkle with chopped nuts, if using. Place the halved maraschino cherries decoratively on top.
- Slice and serve this easy summer dessert immediately after garnishing.
Notes
- For the best texture, drain the crushed pineapple very thoroughly; excess liquid will thin the filling.
- If you want a firmer base, chill the crust for 30 minutes before adding the first filling layer.
- This make ahead dessert tastes best when chilled for at least 6 hours.
Nutrition
- Serving Size: 1 slice
- Calories: 380
- Sugar: 32g
- Sodium: 210mg
- Fat: 22g
- Saturated Fat: 13g
- Unsaturated Fat: 9g
- Trans Fat: 0.5g
- Carbohydrates: 45g
- Fiber: 2g
- Protein: 4g
- Cholesterol: 55mg