
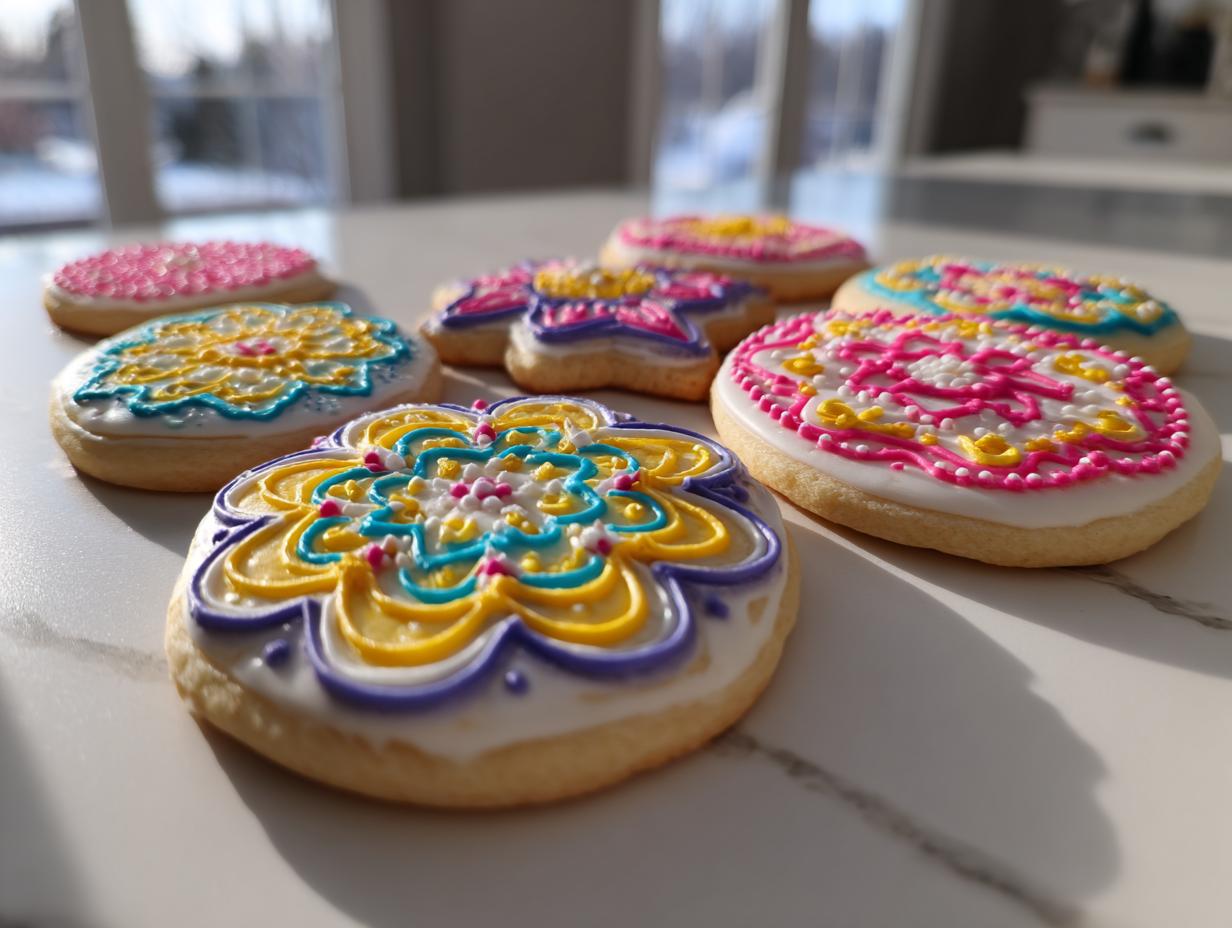

There is truly nothing more frustrating than putting hours into baking the perfect cut-out sugar cookies only to top them with an icing that stays sticky, cracks bizarrely, or spreads into a sad, grainy puddle. I spent years dealing with that exact scenario when I was still stuck behind a desk; making food look beautiful on paper was my job, but making it look beautiful on a plate was a challenge I hadn’t mastered yet. That all changed when I committed to understanding the science behind baking, shifting my focus from spreadsheets to stunning results. Now, I bring that dedication to reliability and visual appeal—the “Feast for the Eyes”—to you. Forget the runny mess; what you need is this foolproof sugar cookie icing recipe that delivers a professional, glossy finish, dries rock hard, and guarantees your decorated cookies remain perfect, even when stacked high for gifting. You can read more about my journey from marketing director to dedicated baker over on my About Page.
- Why This Is the Best Sugar Cookie Icing Recipe for Decorating
- Essential Ingredients for Your Sugar Cookie Icing Recipe
- Step-by-Step Instructions for This Sugar Cookie Icing Recipe
- Tips for Success with Your Hardening Sugar Cookie Icing Recipe
- Storage and Reheating Instructions
- Ingredient Notes and Substitutions for This Sugar Cookie Icing Recipe
- Frequently Asked Questions About Cookie Icing
- Nutritional Estimates for Homemade Sugar Cookie Glaze
- Share Your Decorated Cookie Creations
Why This Is the Best Sugar Cookie Icing Recipe for Decorating
I know you’ve been searching for that one recipe that just *works*, especially when it comes to icing. Most basic powdered sugar glazes end up sticky or take forever to set, which is a disaster if you plan on transporting or gifting your beautiful cookies. What I’ve landed on here is a phenomenal royal icing, and trust me, it’s the key to elevating your home baking to that bakery-style finish we all admire. This reliable sugar cookie icing recipe delivers on three fronts: it sets fast, it shines brilliantly, and it’s surprisingly simple, even if you’re just starting out.

Achieving a Cookie Icing Recipe That Hardens Firmly
The game-changer here is the meringue powder—it’s non-negotiable! Meringue powder is what turns this from a simple glaze into a true, durable icing that hardens. When it sets, it sets *hard*. This means you finally have that Hard Icing for Cut Out Cookies that won’t smudge if you accidentally bump a tin of them. You can stack them! You can pack them! They stay pristine!
The Secret to a Glossy Cookie Frosting Finish
If you want that smooth, high-end look, the texture you achieve when mixing is everything. After you combine the ingredients, you need to pull out the electric mixer and beat it for a solid five to seven minutes on high speed. This step whips in the air needed to create that beautiful, almost reflective shine. That long beat is exactly how you get that Smooth Icing for Decorated Cookies that looks absolutely professional.
Essential Ingredients for Your Sugar Cookie Icing Recipe
When we are focused on making sure our icing sets right—that it doesn’t run everywhere or dry patchy—the ingredients matter immensely. Precision is everything in frosting, just like in marketing copy! I don’t mess around with substitutions here because reliability is what we’re striving for. This recipe is designed to give you that fantastic, sturdy finish, and it starts with using exactly what’s listed below exactly as described. This is the foundation for your rock-solid, beautiful sugar cookie icing.
Ingredient Clarity and Preparation
My absolute first piece of advice for using this sugar cookie icing recipe is to sift your powdered sugar. If you skip this, I guarantee you’ll end up wrestling with tiny, stubborn lumps, completely undoing any effort you put into that beautiful glossy finish. For this recipe, which is perfect for an Easy Sugar Cookie Icing, here is what you need:
- 4 cups powdered sugar, sifted
- 3 tablespoons meringue powder
- 6 tablespoons warm water
- 1 teaspoon vanilla extract
The warm water helps a little bit to get the initial mixing going, but remember, the real volume and shine come from that intense beating we do in the next step!
Step-by-Step Instructions for This Sugar Cookie Icing Recipe
Alright, now that we have our perfectly sifted ingredients ready, this is where the magic really happens. Making this sugar cookie icing recipe reliable means following the sequence precisely. Don’t rush the mixing, especially that final whipping stage—that’s the secret handshake for becoming a pro at Beginner Cookie Decorating Icing!
Mixing for Piping Consistency
First things first: in your medium bowl, whisk together the dry components—that sifted powdered sugar and the meringue powder—just until they look uniform in color. No streaks allowed! Once those are combined, you can add your measured warm water and that teaspoon of vanilla extract.
Now, grab your electric mixer. Start it on low speed. We don’t want a sugar cloud explosion across our kitchen; I’ve learned that lesson the hard way, and trust me, cleaning powdered sugar off the ceiling is no joy. Mix on low only until everything comes together and you scrape down the sides of the bowl really well. This prevents unmixed pockets!
Here is the important part that creates the strength: bump that mixer up to medium-high speed. You need to beat this icing for a full five to seven minutes. Seriously, set a timer if you need to! When it’s done, it should be incredibly smooth, glossy, and thick enough to hold stiff peaks when you lift the beaters. That’s your piping consistency, people!
Adjusting the Consistency for Flooding and Glazing
If you are planning on doing any outlining or intricate work, use that stiff peak icing straight away. But if you need to fill (or “flood”) in large areas on your cookies, you need a thinner texture, which brings us to the beautiful flow of a Vanilla Cookie Glaze Recipe.
To thin it out, you add water, but you must be cautious. Add only one teaspoon of water at a time, beating well after each addition. Keep doing this until the icing flows exactly how you want it to. You’re looking for that sweet spot where it still holds its shape for a moment but then settles smoothly back into the bowl. This versatility is why I love this royal icing so much!
Once you have your consistency, use the icing immediately, or cover that bowl tightly with plastic wrap, making sure the wrap physically touches the surface of the icing. That seal is critical—it keeps the air out and stops that tell-tale crust from forming.
Tips for Success with Your Hardening Sugar Cookie Icing Recipe
Making a beautiful glaze that sets firm is satisfying, but keeping it perfect while you work can be tricky. Since this is a fantastic sugar cookie icing recipe meant for detailed work, you need to treat it right while you decorate. I’ve developed a few rules over the years that ensure your icing stays vibrant in color and maintains that perfect, smooth texture right up to the moment it hits the cookie.
Coloring and Texture Maintenance
When it comes to color, forget the liquid food coloring you might use in a cake batter. Those drops add unnecessary water, which will absolutely ruin the structural integrity we worked so hard to achieve by whipping the icing for seven minutes! Always, always, always use gel food coloring. A tiny toothpick-dip of gel concentrates the color intensely without changing the consistency of your strong sugar cookie icing recipe at all. You can achieve deep holiday reds and blues easily this way.

Now, what happens when you’re halfway through coloring a batch and you notice the icing seems stiff? Maybe the humidity in your kitchen is just too high, or perhaps you just took a little too long between piping sessions. Don’t panic! The icing hasn’t gone bad. I always keep a tiny bowl of water nearby—just a few drops at a time—and slow this down. Stir in just a few drops of water until you feel that texture return to your desired state. It’s a small fix, but it saves your whole batch and keeps your color vibrant and ready for beautiful decoration!
Storage and Reheating Instructions
Since this sugar cookie icing recipe takes a little time to mix properly, you might end up with leftover icing, or you might just need a break mid-decorating session. The biggest enemy of royal icing is air! If you leave that bowl sitting out for even fifteen minutes, you’ll come back to a thick, cracked skin forming on top, and that is never what we want when aiming for a Glossy Cookie Frosting.
My golden rule for storage, whether it’s for an hour or overnight, is to take a sheet of plastic wrap and press it directly onto the surface of the icing inside the bowl. I mean *touching* the icing—no air gap allowed! This physical barrier stops that frustrating crust from forming entirely. If you plan on storing it longer than a few hours, seal the bowl tightly with a lid or more plastic wrap over the top to be safe.

Now, you usually don’t “reheat” this icing. It’s not like a buttercream that needs stirring back to life. If you pull out your stored icing and it feels a bit stiff—which it probably will after sitting in the fridge or just cooling down—you don’t need heat. You just need a tiny bit of encouragement. Grab a separate bowl with a few drops of water. Dip a clean spoon or a small spatula into the water, then gently fold those drops into your icing. Keep adding water, teaspoon by teaspoon at the most, and mixing really gently until it loosens back up to the consistency you need for that Quick Cookie Icing That Sets perfectly on your cookies. No microwave needed, just patience!
Ingredient Notes and Substitutions for This Sugar Cookie Icing Recipe
I know many tried-and-true recipes out there call for corn syrup when making a glossy frosting, but I wanted to ensure this sugar cookie icing recipe was as accessible as possible for home bakers. So, rest assured: this recipe is completely corn syrup-free! We’re sticking to the fundamentals—powdered sugar, meringue powder, and a little liquid—to give you that professional flair without any extra fuss. This reliability is what makes it the top choice for making Durable Icing for Gift Cookies.
The star that really makes this royal icing shine, texture-wise, is that meringue powder. It’s not just a fancy way to say egg white; it contains stabilizers that give us that perfect structure and help the icing dry down to a crisp finish instead of staying tacky. It’s why we get that satisfying, smooth shell over our beautiful custom designs.
Meringue Powder Substitutions (Proceed with Caution!)
If you absolutely cannot find meringue powder—and trust me, I try to make this readily available—you *can* substitute it with pasteurized dried egg whites. The conversion is usually about double the amount of egg whites to meringue powder, but honestly, the results are rarely as consistent. Because the meringue powder is pre-mixed with stabilizers, it gives us that predictable, hard crust. If you use plain egg whites, you might find your icing cracks more as it dries, or it might not achieve that perfect snap we’re looking for.
Another substitution people ask about is using lemon juice instead of water. Some classic royal icing recipes do this, and the acid helps slightly with texture, but I prefer the neutral flavor of water for this specific batch since we are already adding vanilla. If you must swap the water, use a tiny bit of lemon juice or even a splash of clear milk, but always remember to add liquid slowly! We are aiming for that strong, structural finish that makes this sugar cookie icing recipe famous for setting solid.
Frequently Asked Questions About Cookie Icing
When you’re looking for that perfect Glossy Cookie Frosting, questions pop up fast. Decorating takes practice, but knowing what to expect from your royal icing definitely helps smooth the learning curve! Don’t worry if you’ve struggled with runny icing before; this professional-grade sugar cookie icing recipe is designed to minimize frustrating trial and error. Here are a few of the things I hear most often from readers diving into detailed cookie decorating.
How long does it take for this icing to dry completely?
This is the million-dollar question! Because meringue powder creates such a strong structure, this icing dries significantly faster than a simple powdered sugar glaze. For thinly iced cookies or simple drizzle work, you might find it hard to the touch in just a couple of hours, provided your climate isn’t super humid. However, for any detailed work, or if you’ve applied a thick layer for outlining, I always tell people to wait overnight. Allowing it to dry completely, uncovered, at room temperature ensures you get that perfect, satisfyingly crisp finish that lets you stack your cookies or put them into gift boxes without fear of smudging. Humidity is your enemy here, so if it’s a damp day, definitely plan on an overnight dry time.
What is the best consistency for piping borders?
Ah, piping borders! This requires the stiffest consistency possible, which is exactly what you achieve right after that five-to-seven-minute high-speed beating session. When you lift the beaters out, the icing should form firm, distinct peaks that do not droop or collapse whatsoever. That texture is what we refer to when talking about the Best Icing Consistency for Piping. If you can easily form that peak, you know your icing is thick enough to hold a sharp line that won’t spread out into your flooded area while it sits. If it looks even slightly slumped, you need to whip it longer or add a tiny sprinkle more of sifted powdered sugar!

Another thing that trips people up is consistency for flooding versus outlining. Remember, flooding requires you to gradually thin the piping consistency down with water, one teaspoon at a time, until it can flow smoothly off your spatula and settle after about 10-15 seconds. If your piping consistency is too thin, your border lines will look sloppy. Keep that initial batch stiff for outlining, and only thin the icing you plan to use for filling!
Nutritional Estimates for Homemade Sugar Cookie Glaze
As someone who transitioned from an analytical corporate world to finding true joy in creating food that is both visually stunning and deeply satisfying, I know how important transparency is. We want that “Feast for the Eyes” to not derail the “Feast for the Soul,” right? Since this sugar cookie icing recipe is quite simple—made mostly of sugar, naturally—I want to share the estimates. Please remember that because we are dealing with a homemade recipe where precise measurement of sifted sugar can vary slightly, these figures are an educated estimate based on the formula provided.
We’ve kept this recipe focused on creating that perfect, durable crust, and since we avoided corn syrup, the profile reflects cleaner ingredients where possible. Think of this as a guide, not strict dietary law, but it’s crucial information for anyone watching their intake!
- Serving Size: 1/4 cup
- Calories: 190
- Sugar: 48g
- Sodium: 5mg
- Fat: 0g
- Saturated Fat: 0g
- Unsaturated Fat: 0g
- Trans Fat: 0g
- Carbohydrates: 49g
- Fiber: 0g
- Protein: 1g
- Cholesterol: 0mg
Take these numbers as a starting point for whatever you are tracking. Ultimately, the value of this sugar cookie icing recipe is in the joy it brings when you share beautifully decorated holiday cookies or birthday treats. Enjoy that controlled indulgence!
Share Your Decorated Cookie Creations
If my corporate career taught me anything, it’s that you must measure results! And for me, the true measure of success isn’t a spreadsheet, but seeing your beautiful, glossy, perfectly hardened sugar cookies!
I truly hope this sugar cookie icing recipe has brought a little more “Gaze”—that visual delight—into your kitchen. Whether you made simple, elegant borders or dove deep into intricate flooding work, I want to see what you’ve created. Sharing our successes is what makes this community so rewarding.
When you finish decorating your batch, please take a moment to leave a star rating right here on the page. It helps me know that this recipe is as reliable for you as it is for me. I’m always tinkering—but only making things better! If you have any wild color combinations or amazing themes you pulled off, drop a comment below; I absolutely love reading about your kitchen adventures!
And if you happen to post a picture on social media—maybe showing off how well your icing held up or how glossy that finish turned out—please tag me! Seeing your work reminds me why I swapped deadlines for dough. You can find me on all the main platforms under the Gourmet Gaze handle. Don’t hesitate to reach out through my Contact Page if any questions pop up while you’re working! Happy decorating; I can’t wait to see what you’ve made!
PrintFoolproof Royal Icing That Hardens Perfectly for Decorated Sugar Cookies

Learn to make this easy sugar cookie icing recipe that hardens completely, dries smooth, and provides a professional, glossy finish. This durable frosting is perfect for beginner cookie decorating and intricate designs.
- Prep Time: 10 min
- Cook Time: 0 min
- Total Time: 10 min
- Yield: Coats approximately 2 dozen standard cookies 1x
- Category: Baking
- Method: Mixing
- Cuisine: American
- Diet: Vegetarian
Ingredients
- 4 cups powdered sugar, sifted
- 3 tablespoons meringue powder
- 6 tablespoons warm water
- 1 teaspoon vanilla extract
Instructions
- In a medium bowl, whisk together the sifted powdered sugar and meringue powder until fully combined.
- Add the warm water and vanilla extract to the dry ingredients.
- Using an electric mixer on low speed, gradually mix the ingredients until just combined. Scrape down the sides of the bowl.
- Increase the mixer speed to medium-high and beat for 5 to 7 minutes until the icing is smooth, glossy, and holds stiff peaks. This is your piping consistency.
- To achieve a thinner consistency for flooding or glazing, add water, one teaspoon at a time, beating well after each addition until the desired flow is reached.
- Use immediately for piping details or cover the bowl tightly with plastic wrap pressed directly onto the surface to prevent drying.
- Apply icing to cooled sugar cookies. Allow the icing to dry completely, uncovered, at room temperature for several hours or overnight until it sets hard.
Notes
- For coloring, use gel food coloring, as liquid coloring can alter the icing consistency too much.
- If the icing becomes too thick while working, stir in a few drops of water to restore the correct texture.
- This recipe creates a durable icing that is ideal for stackable or giftable cookies.
Nutrition
- Serving Size: 1/4 cup
- Calories: 190
- Sugar: 48
- Sodium: 5
- Fat: 0
- Saturated Fat: 0
- Unsaturated Fat: 0
- Trans Fat: 0
- Carbohydrates: 49
- Fiber: 0
- Protein: 1
- Cholesterol: 0