
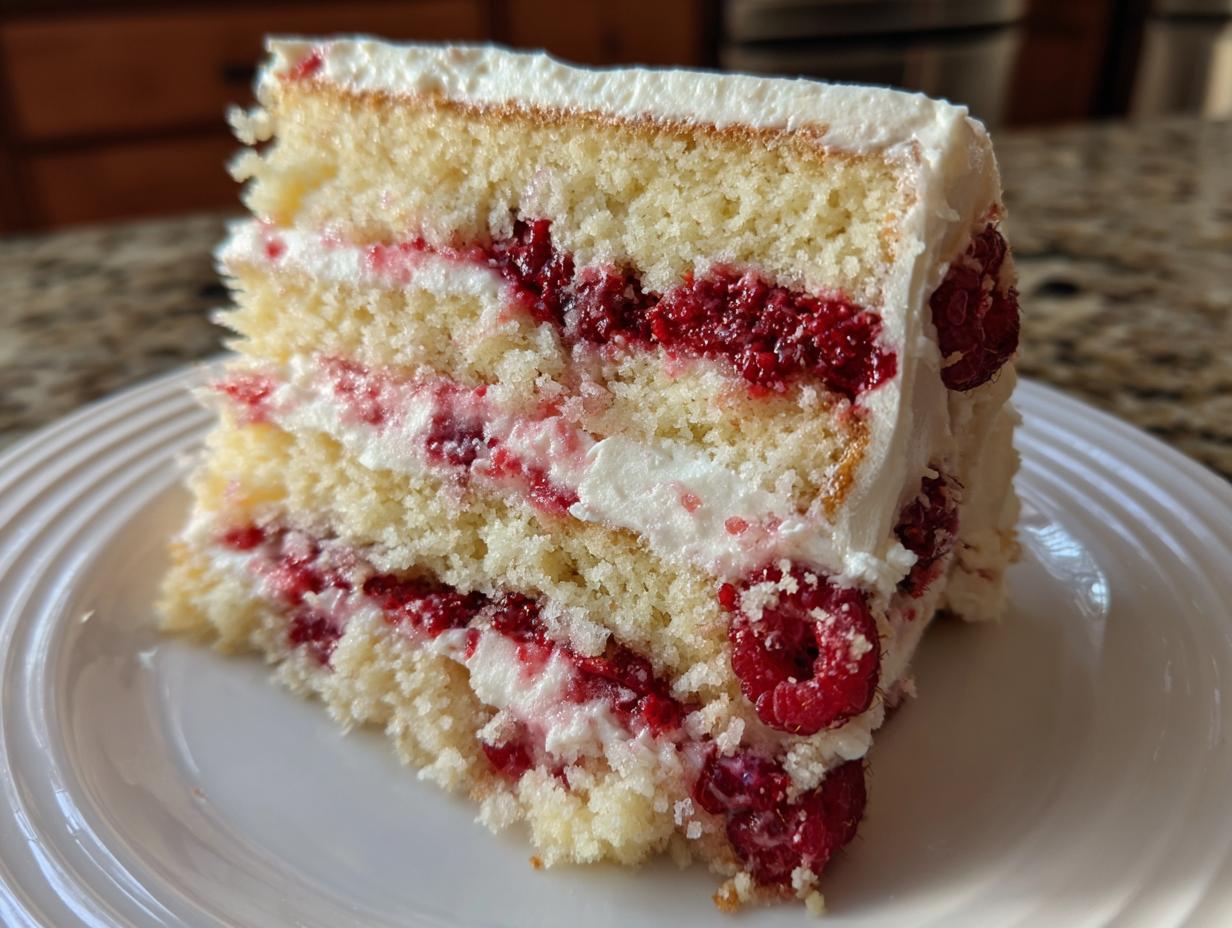

If I told you that achieving that show-stopping, perfectly balanced white chocolate raspberry cake you see on magazine covers was actually within reach for a home baker—especially one who used to order takeout every night—you might not believe me. But trust me, it is! After leaving my high-pressure corporate life, I dedicated myself to translating those complex, gourmet flavors into recipes that actually work reliably in a home kitchen. We aren’t just aiming for food that tastes good; we’re aiming for food that becomes the centerpiece of your celebration. This isn’t just a dessert; it’s proof that you can create true culinary magic without needing a pastry degree. Get ready, because this layered beauty is about to become your new favorite way to celebrate. You can find more of my favorite show-stopping ideas over in my general Desserts section.
- Why This White Chocolate Raspberry Cake is Your Next Showstopper Birthday Cake
- Gathering Ingredients for Your Gourmet White Chocolate Cake
- Step-by-Step Instructions for the White Chocolate Raspberry Cake
- Assembling Your Decadent White Chocolate Raspberry Layer Cake
- Tips for Success with Your White Chocolate Raspberry Cake
- Variations on the Raspberry Layer Cake Recipe
- Storage and Reheating Instructions for Your White Chocolate Raspberry Cake
- Frequently Asked Questions About This White Chocolate Raspberry Cake
- Estimated Nutritional Snapshot for This Creamy White Chocolate Dessert
Why This White Chocolate Raspberry Cake is Your Next Showstopper Birthday Cake
Look, I’ve tested things like lemon poppy seed and salted caramel, but when I first nailed the ratios for this particular cake, it just stopped me cold. That precise tart raspberry white chocolate pairing? It’s everything. The white chocolate is deeply creamy and sweet, but that intense, slightly acidic burst from the fresh raspberries cuts through it perfectly. It keeps the cake from ever tasting cloying or heavy.
When I first served this as a test batch to my neighbors—back when I was still figuring out if I could actually bake for a living—people stopped mid-conversation. This flavor combination elevates it beyond just a simple cake; it becomes an experience. Hand me that buttercream recipe any day, and I can confirm this is set up to be your true Showstopper Birthday Cake. It’s an instant memory-maker. If you’re looking for more inspiration on my journey, check out the latest posts on the Gourmet Gaze Blog.
Gathering Ingredients for Your Gourmet White Chocolate Cake
Alright, let’s talk ingredients. For a cake this elegant, you can’t just toss things together; we need precision for that perfect texture and flavor balance, especially in the frosting. I’ve broken everything down here into three manageable groups—the cake layers, the vibrantly tart filling, and that unbelievably creamy white chocolate dessert topping you’re dreaming about. Remember, using high-quality white chocolate makes a massive difference here; don’t skimp!
Here is exactly what you need gathered before you even preheat the oven:
For the Moist Raspberry Layer Cake:
- 1 3/4 cups all-purpose flour
- 1 1/2 cups granulated sugar
- 1 tablespoon baking powder
- 1/2 teaspoon salt
- 1 cup unsalted butter, softened
- 4 large eggs
- 1 teaspoon vanilla extract
- 1 cup whole milk
- 8 ounces white chocolate, melted and cooled slightly
- 1 1/2 cups fresh raspberries (for cake batter)
For the Fresh Raspberry Filling Recipe:
- 1 1/2 cups fresh raspberries (for filling)
- 1/2 cup granulated sugar (for filling)
- 2 tablespoons lemon juice (for filling)
For the Silky White Chocolate Buttercream Frosting:
- 1 pound (16 ounces) unsalted butter, softened
- 4 cups powdered sugar, sifted
- 1/2 cup white chocolate, melted and cooled (for frosting)
- 1 teaspoon vanilla extract (for frosting)
- 2 tablespoons heavy cream (for frosting)
Step-by-Step Instructions for the White Chocolate Raspberry Cake
Okay, this is where the magic really happens! We’re tackling three main components here: getting those beautiful, moist cake layers baked, cooking down our tart filling—which provides that essential contrast—and whipping up the White Chocolate Buttercream Frosting. Do these steps in order, and you can have this white chocolate raspberry cake ready for layering tonight. Remember what I always say: temperature matters for a perfect bake! For reference on building basic vanilla layers, you can check out my guide on the Easy Vanilla Cake, but don’t worry, these steps are straightforward.
Preparing the Moist Raspberry Layer Cake Batter
First things first: set your oven to 350°F (175°C) and get those three 8-inch pans greased, floured, and lined on the bottom with parchment. Don’t skip that parchment step—it saves so much heartache later!
In one bowl, whisk your dry stuff: flour, baking powder, and salt. In your stand mixer bowl (or using a very patient hand mixer), beat your softened butter and 1 1/2 cups of sugar until it’s genuinely light and fluffy—think pale yellow, not dingy white. Add your eggs one by one, making sure each one is fully blended before adding the next, then hit it with the vanilla extract.
Now for the alternation, which is key to a great texture. Mix your milk and melted, slightly cooled white chocolate together in a separate container. Add about a third of your dry ingredients to the butter mixture, mix until *just* incorporated, then scrape down the bowl. Next, add half of the white chocolate milk mixture, mix briefly, then another third of the dry. Repeat this pattern, ending with the remaining dry mix. You are looking for *just* combined—no dense gluten development here!
Finally, gently fold in those 1 1/2 cups of fresh raspberries. Carefully divide that gorgeous batter among your three pans and get them into the oven for about 28 to 32 minutes. They’re done when a toothpick comes out clean. Always cool them in the pan for 10 minutes before flipping them out onto a rack to cool completely.
Creating the Fresh Raspberry Filling Recipe
While those layers are cooling, we move onto the star flavor component. Grab a small saucepan. Combine the 1 1/2 cups of filling raspberries, the 1/2 cup of sugar, and the lemon juice. Turn the heat to medium.
You need to let this cook down, stirring occasionally, for about 8 minutes. The goal here is for the berries to break down and for the liquid to reduce until it’s slightly thickened—we want that tart burst, not runny jam that runs everywhere when you slice the cake. Once it looks glossy and thick enough to coat the back of a spoon, pull it off the heat. This needs to be totally, completely cool before it ever touches frosting, otherwise, you’ll have a soupy mess when you try to stack! I usually stick mine in the fridge to speed that up.
Whipping Up the Silky White Chocolate Buttercream Frosting
This frosting is what ties the whole elegant package together. You need that full pound of softened butter beating away until it’s smooth. Slowly introduce your 4 cups of sifted powdered sugar until it’s incorporated. Don’t rush this part; powdered sugar needs time to merge without flying everywhere!
Once combined, you’ll add the flavor: the melted white chocolate, vanilla, and heavy cream. Here’s my pro-tip I learned the hard way: make sure that melted white chocolate is only barely warm—like room temperature or even slightly cooler. If it’s too hot, it can cause the fat structure in the buttercream to seize up and turn grainy. We want smooth, silky, decadent! Beat this mixture on high speed for a full two minutes until it literally doubles in volume and looks light and airy. That’s your perfect finishing touch!
Assembling Your Decadent White Chocolate Raspberry Layer Cake
We’ve made our cake layers, we’ve cooked down that tart filling, and the beautiful, silky white chocolate buttercream is resting perfectly. Now comes the fun part: building this absolute masterpiece! If you want that professional, clean finish that makes this a true Elegant Dessert Recipe, there’s a specific order I follow. I mentioned chilling the layers in the notes, and trust me, taking that extra 30 minutes to chill the cooled cake layers prevents any crumbling mess when you start stacking.
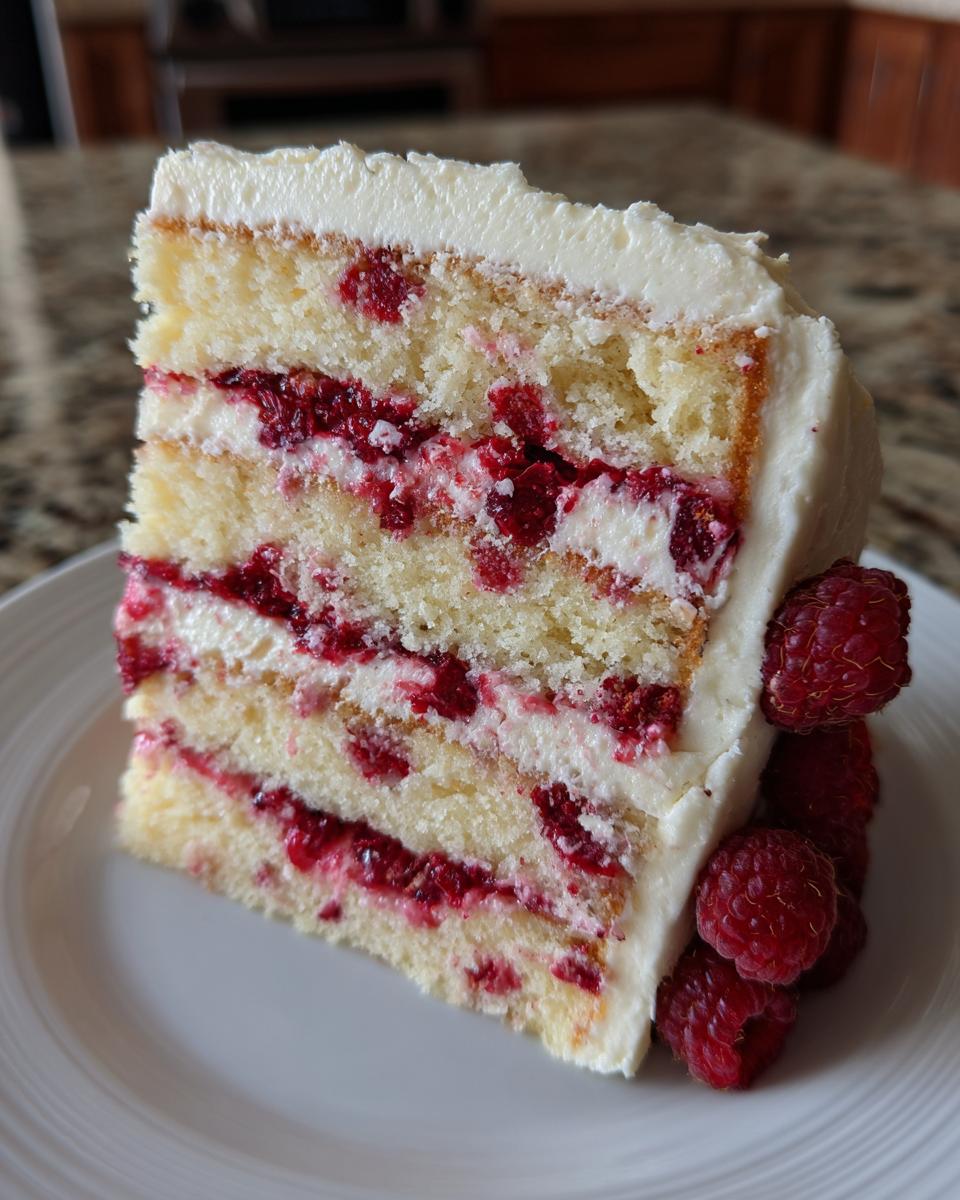
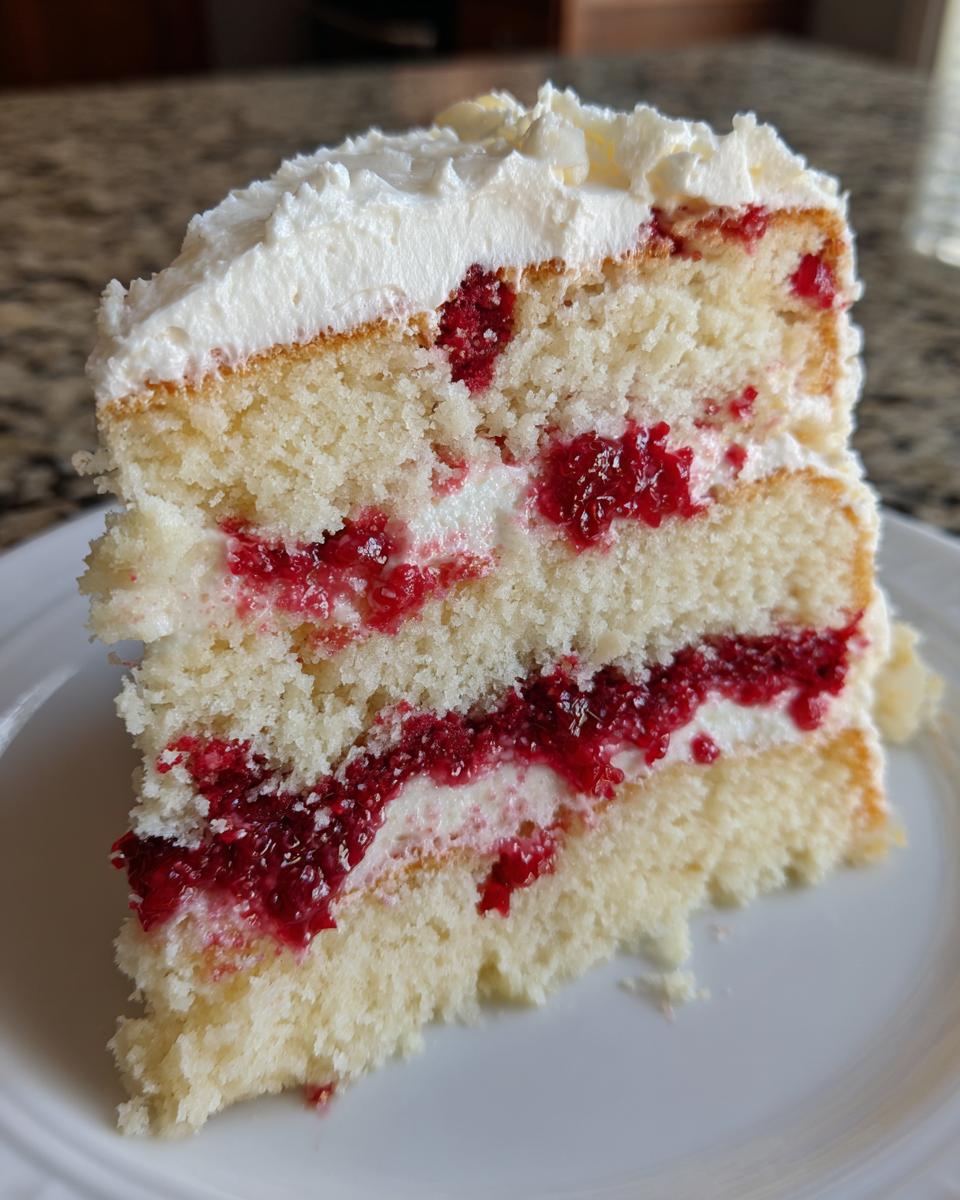
First, grab your serving plate or cake stand. Place your first cake layer down. I always start by making a dam—a small, thick ring of the buttercream piped around the outer edge of the cake layer. This acts like a tiny retaining wall, keeping our glorious raspberry filling exactly where it should be.
Once your buttercream dam is set, spread about a third of your remaining frosting inside that ring. Then, carefully spoon half of your completely cooled raspberry filling right into the center of that dam. It should sit neatly contained. Place your second cake layer directly on top and press down gently—just enough to seat it. Repeat the process: buttercream dam, remaining filling, top it with the final cake layer.
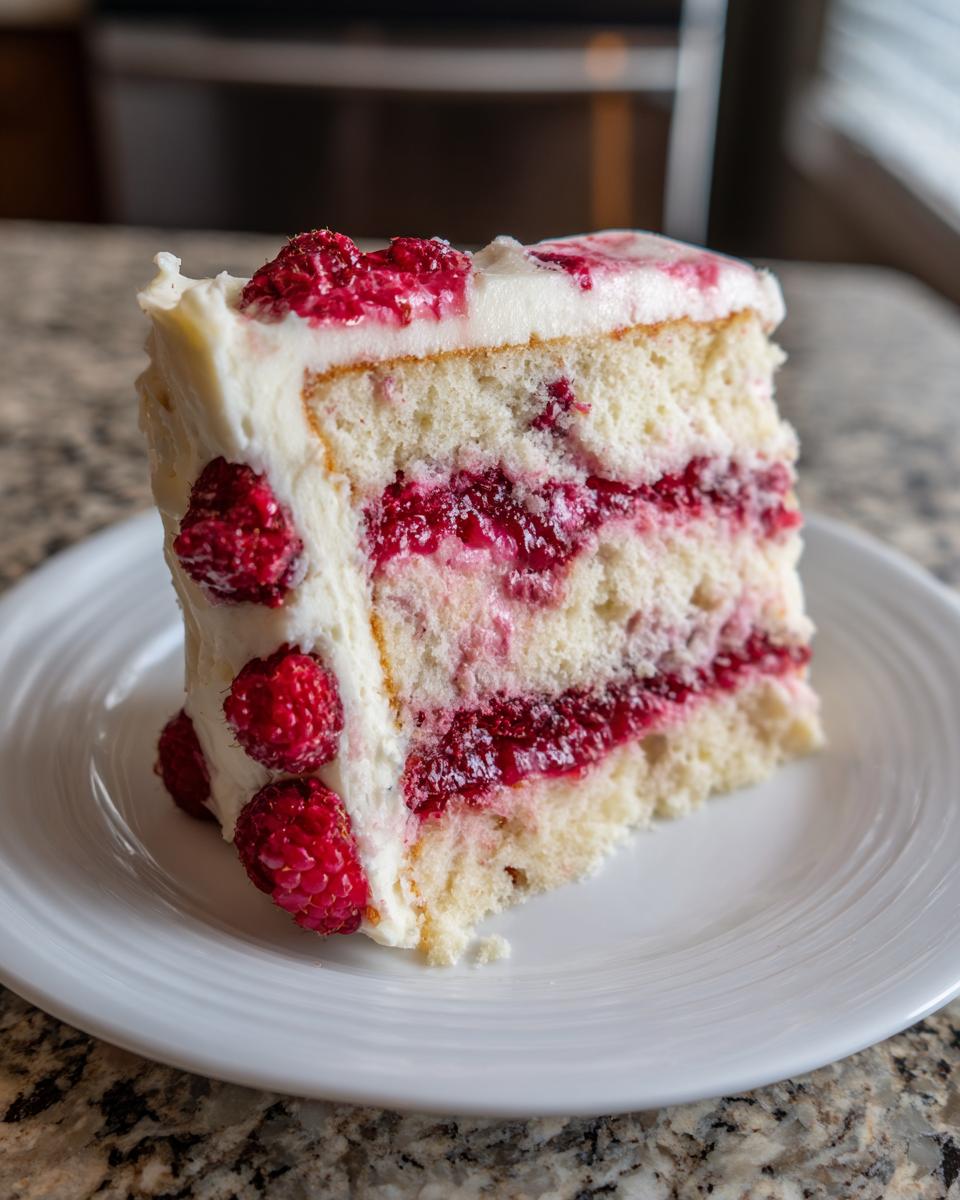
Now, it’s time for the final frost. I highly recommend doing a very thin layer coating—a crumb coat—all over the cake first. This traps any loose crumbs so your final coat is spotless. Pop the crumb-coated cake back into the fridge for about 15 minutes to set that coat firm. After that quick chill, you can generously apply the rest of that luxurious white chocolate frosting to the sides and top. If you want tips on achieving glossy finishes on chocolate components, sometimes I use techniques similar to what I detail when making my stovetop fudge frosting. Finish it with a few perfect fresh raspberries on top, and stand back! You just made a showstopper.
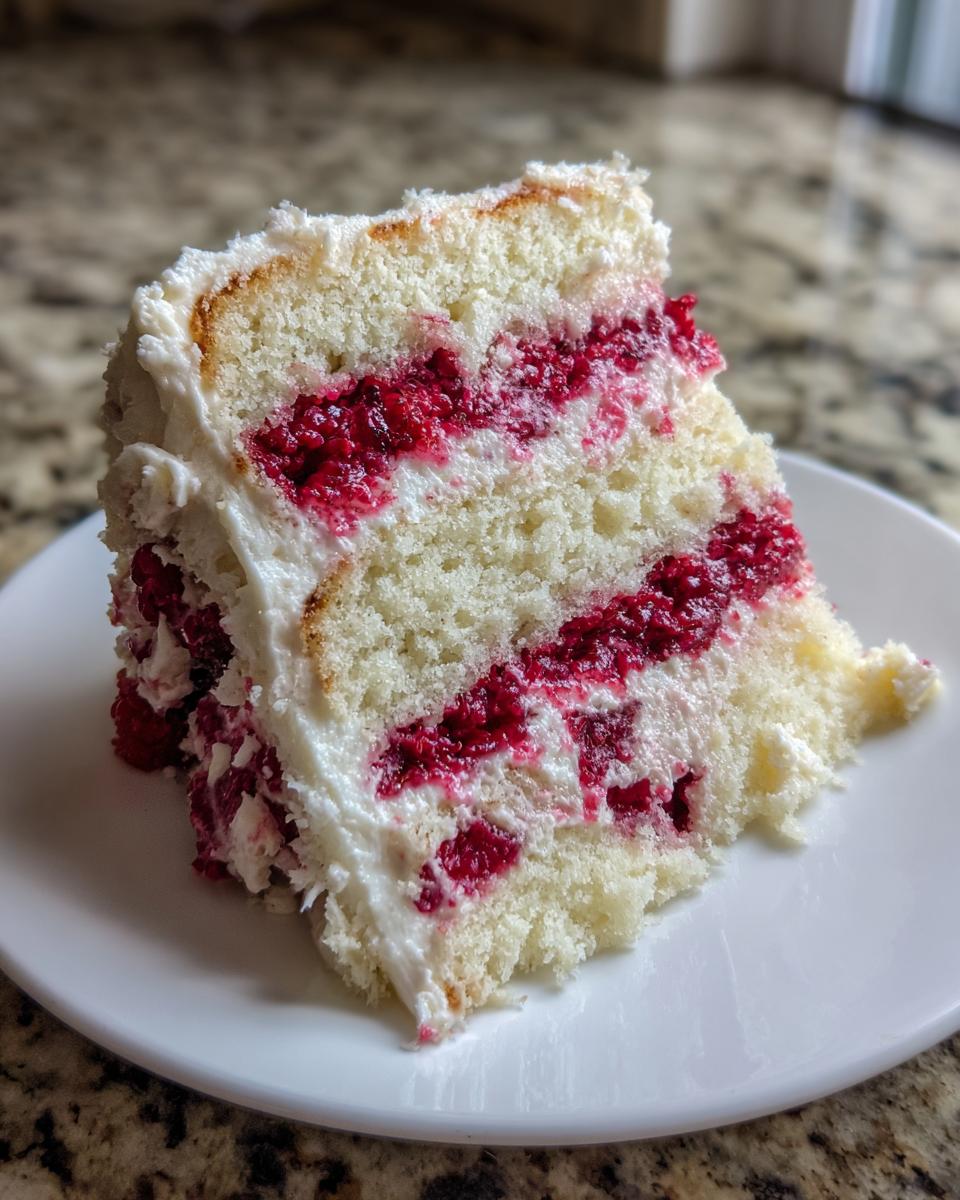
Tips for Success with Your White Chocolate Raspberry Cake
Even with the exact measurements, sometimes the tiny details separate a good cake from a truly magnificent one. Since I’ve definitely made every mistake under the sun experimenting with this white chocolate raspberry cake, I want to pass along the real secrets—the stuff that separates the amateurs from the bakers who consistently nail that professional look and texture.
Here are the three non-negotiable tips I swear by every single time I whip this up for a gathering:
The White Chocolate Temperature Check
This is absolutely critical when working with white chocolate incorporated into buttercreams or batters. White chocolate is super delicate, much more so than dark chocolate. If you melt it and try to mix that warm liquid directly into cold butter or cream, it seizes up—it gets grainy, clumpy, or worse, it turns sandy! Always let your melted white chocolate cool down until it’s barely lukewarm, or even just slightly below room temperature, before introducing it to the rest of your ingredients. If you incorporate it when it’s too warm, you’ll end up fighting gritty frosting, and trust me, nobody wants that texture. You’ll find great advice on handling sensitive ingredients like this over in my dedicated section on Baking Secrets for Perfect Cake.
Use Room Temperature Eggs AND Butter (But Not Melted!)
I harp on this a lot because it’s foundational. For our cake layers to achieve that light, airy crumb—even though they are rich layers—you need the butter and eggs to emulsify properly. If your butter is too cold, it won’t cream enough air into the sugar. If your eggs are ice-cold, they shock the creamed mixture and cause it to curdle, resulting in a denser, oil-streaked cake once baked. Take your dairy and eggs out about an hour before you plan to start mixing. They must be soft and pliable, but never greasy or melty. This consistency allows them to trap those tiny air bubbles needed for volume.
Don’t Over-Stir After Adding Raspberries
Once you fold in those fresh raspberries—whether they are going into the cake batter itself or sometimes even into the filling—you need to switch to a gentle hand. Raspberries burst very easily under agitation. If you aggressively mix them in, the juice will bleed uncontrollably through the white cake batter, turning that beautiful vanilla base into a patchy pink mess before it even hits the oven. Use a rubber spatula and gently fold them in just until they are evenly distributed across the bowl. A little unevenness is totally fine; it means you’ll get pockets of intense raspberry flavor!
Variations on the Raspberry Layer Cake Recipe
Even though this Raspberry Layer Cake Recipe is perfection in my book, I know that creativity is the heart of home baking! Sometimes you want to swap in different extracts or switch up the frosting based on what you have on hand, or maybe you just want to push the flavor profile just a little further. Since this cake is such a solid foundation—moist layers, tart filling—it handles adaptations beautifully. Don’t be afraid to experiment!
Here are a couple of simple tweaks that I’ve tried that really change the character of the final White Chocolate Raspberry Dessert without compromising the structure.
Switching Up the Cake Base Flavor
If you adore that almond-cherry pairing that occasionally pops up in fancy desserts, you can easily introduce almond extract into the cake batter. Replace the 1 teaspoon of vanilla extract listed in the recipe with half a teaspoon of pure vanilla and half a teaspoon of high-quality almond extract. Almond and raspberry are truly best friends, and it gives the cake a subtle, sophisticated edge that shouts “gourmet” without being overwhelming. It pairs wonderfully with that richness from the white chocolate, too.
The Cream Cheese Frosting Alternative
While I stand by the silky white chocolate buttercream, sometimes you just need that wonderful tang that only cream cheese can bring, especially if you’re serving this delicate cake in the summer heat. If you want to use Creamy White Chocolate Dessert frosting but crave a little lift, you can swap out some of the butter for cream cheese!
Try this simple swap: Use half the butter portion (8 ounces) and replace it with an equal amount of full-fat cream cheese, softened. Make sure the cream cheese is brought to room temperature just like the butter. You might need an extra splash of heavy cream when you finish whipping it, as cream cheese frosting tends to be slightly softer than pure buttercream. This gives you that classic tanginess that cuts the sweetness beautifully, creating a slightly different, but equally great, Elegant Dessert Recipe.
Adding a Little Crunch with Toasted Nuts
For those who love texture, you can introduce a subtle crunch without ruining the dessert’s elegance. Before assembling, lightly toast about half a cup of slivered almonds. You can either fold a small amount into the very bottom layer of the buttercream dam, or lightly sprinkle them around the sides of the cake during the final frosting stage. The toasted flavor works surprisingly well with both the vanilla cake and the fruit. If you’re interested in learning more about how different flavor profiles work together, you might enjoy the techniques I talk about in my guide on Old-Fashioned Tea Cakes.
Storage and Reheating Instructions for Your White Chocolate Raspberry Cake
Now, this is crucial: we’ve put in all this work to make a stunning, multi-layered cake, so we need to handle the leftovers correctly! A cake this rich, loaded with butter and fresh fruit filling, needs a little consideration when it comes to storage if you want it to look—and, more importantly, taste—as good the next day as it did when you first cut into it.
Here is my guide for keeping your white chocolate raspberry cake in peak condition. Remember, the texture is everything!
Room Temperature Storage (The Short Term)
If you plan on serving the cake within about four hours of finishing the frosting, you can actually leave it out on the counter. Keep it loosely covered with a cake dome or loosely tented with plastic wrap—don’t wrap it tightly, or the moisture will steam the beautiful buttercream finish right off the side!
Since this cake has a fresh raspberry filling, I really wouldn’t push room temperature storage past about four to six hours. Any longer, and you risk the filling weeping or the butter in the frosting getting too soft, causing the layers to shift. If you made this for a party, get it sliced and served before you worry too much about the leftovers!
Refrigerated Storage (The Long Haul)
For keeping your beautiful Raspberry Layer Cake Recipe masterpiece for several days, the fridge is your best friend. Place the cake, uncovered, in the refrigerator for about 30 minutes first. This allows the buttercream to firm up hard. Once it’s firm, then you can cover it gently with plastic wrap or place it in an airtight container. Stored this way, the cake holds up beautifully for up to four days. The raspberries hold their flavor well, and the white chocolate in the frosting stays firm.
The Reheating (Tempering) Process
This might be the most important tip for preserving that silky texture: never serve this chilled straight from the fridge! When the butter-based frosting gets cold, it firms up like concrete, losing all that wonderful, creamy mouthfeel we worked so hard to achieve.
Before serving any slice or the entire remaining cake, you need to let it temper. Take the cake out of the refrigerator and set it on the counter, still loosely covered, for at least two to three hours before you plan to cut it. This slow warming allows the buttercream to soften back to that perfect, luxurious spreadable texture that truly showcases the elegance of this dessert. If you’re in a real rush, you can slice what you need, and let just the slices temper on a plate for about 45 minutes. Patience wins again with buttercream, folks!
Frequently Asked Questions About This White Chocolate Raspberry Cake
I know when you’re tackling a Showstopper Birthday Cake like this, you probably have a few questions before you dive in. I certainly did when I was figuring out the perfect texture and that stunning flavor marriage! Here are the things people ask me most often about creating this impressive white chocolate raspberry cake. I’ve tried to answer clearly so you feel confident walking into the kitchen.
Can I use frozen raspberries in the white chocolate raspberry cake batter?
Oh, that’s a fantastic question, especially if fresh berries aren’t in season! The answer is yes, you absolutely can use frozen raspberries in the cake batter, but you have to be careful. My biggest recommendation is this: do not thaw them first! If you thaw them, the fruit releases a ton of excess liquid while baking, which messes with your structure and might turn your beautiful cake layers soggy. You want to toss those frozen berries right into the batter when you are about to fold them in, just like the recipe calls for the fresh ones. This keeps them mostly frozen until they hit the heat, minimizing bleeding and moisture release. It helps maintain that moist raspberry layer cake texture we worked hard for!
How do I ensure my cake layers are perfectly level?
This is all about presentation, right? We want that beautiful, clean stack for our Gourmet White Chocolate Cake! A perfectly level cake starts with good batter distribution, but even then, domes happen. Once your cake layers are completely cool—and I mean stone cold—you need to level them. I happen to love my adjustable cake leveler tool; it’s incredibly fast and gives a clean cut every time. If you don’t have one, grab a long, sharp, serrated bread knife. Lay the cake flat on your counter, hold the knife parallel to the counter surface, and slowly saw away the domed top. You might lose a tiny bit of cake, but what you get back in perfect layers is worth it! Save those trimmed bits; they are the baker’s snack!
If you have other recipe questions and want to reach out directly, feel free to pop over to my Contact Page. Also, for some great insights on achieving perfect visual results across different recipes, check out these seven secrets for beautiful baking.
Estimated Nutritional Snapshot for This Creamy White Chocolate Dessert
I always like to give a quick look at the numbers, but please remember, this is very much an approximation!
Creating something this decadent means we’re naturally looking at a rich profile, but it’s worth every single bite when you see the look on people’s faces. These estimates are calculated based on the ingredient list provided and assume 12 standard servings of this lavish Creamy White Chocolate Dessert. Since brands differ and every cook measures just a little differently, consider these figures a helpful guideline rather than a definitive medical count.
Here’s the snapshot for one generous slice:
- Serving Size: 1 slice
- Calories: 550
- Sugar: 55g
- Fat: 35g
- Carbohydrates: 58g
- Protein: 6g
We’ve got some healthy fats coming from the butter and white chocolate, of course, and a decent amount of sugar to balance out the tartness of that raspberry filling. It’s a true celebration cake, so enjoy it responsibly! If you are looking to lighten up any of my recipes, I usually share a few substitution ideas in my Baking Secrets guide, but for this showstopper, I really suggest sticking to the recipe as written!
PrintDecadent White Chocolate Raspberry Layer Cake with Silky Buttercream
Create an elegant, showstopper birthday cake featuring moist layers, tart fresh raspberry filling, and a rich white chocolate buttercream frosting. This gourmet recipe balances sweet and tart flavors perfectly.
- Prep Time: 45 min
- Cook Time: 35 min
- Total Time: 1 hour 30 min
- Yield: 12 servings 1x
- Category: Dessert
- Method: Baking
- Cuisine: American
- Diet: Vegetarian
Ingredients
- 1 3/4 cups all-purpose flour
- 1 1/2 cups granulated sugar
- 1 tablespoon baking powder
- 1/2 teaspoon salt
- 1 cup unsalted butter, softened
- 4 large eggs
- 1 teaspoon vanilla extract
- 1 cup whole milk
- 8 ounces white chocolate, melted and cooled slightly
- 1 1/2 cups fresh raspberries (for cake batter)
- 1 1/2 cups fresh raspberries (for filling)
- 1/2 cup granulated sugar (for filling)
- 2 tablespoons lemon juice (for filling)
- 1 pound (16 ounces) unsalted butter, softened (for frosting)
- 4 cups powdered sugar, sifted (for frosting)
- 1/2 cup white chocolate, melted and cooled (for frosting)
- 1 teaspoon vanilla extract (for frosting)
- 2 tablespoons heavy cream (for frosting)
Instructions
- Preheat your oven to 350°F (175°C). Grease and flour three 8-inch round cake pans. Line the bottoms with parchment paper.
- In a large bowl, whisk together the flour, baking powder, and salt. Set aside.
- In a separate bowl, cream together the softened butter and 1 1/2 cups of granulated sugar until light and fluffy. Beat in the eggs one at a time, mixing well after each addition. Stir in the vanilla extract.
- In a small bowl, whisk together the milk and the melted, cooled white chocolate until combined.
- Alternate adding the dry ingredients and the white chocolate milk mixture to the wet ingredients, beginning and ending with the dry ingredients. Mix until just combined. Do not overmix.
- Gently fold in the 1 1/2 cups of fresh raspberries.
- Divide the batter evenly among the prepared cake pans. Bake for 28 to 32 minutes, or until a toothpick inserted into the center comes out clean.
- Let the cakes cool in the pans for 10 minutes before inverting them onto a wire rack to cool completely.
- Prepare the raspberry filling: Combine the 1 1/2 cups of fresh raspberries, 1/2 cup sugar, and lemon juice in a small saucepan. Cook over medium heat, stirring occasionally, until the berries break down and the mixture thickens slightly, about 8 minutes. Cool completely.
- Prepare the white chocolate buttercream: Beat the 1 pound of softened butter until smooth. Gradually add the sifted powdered sugar, beating until combined. Add the melted and cooled white chocolate, vanilla extract, and heavy cream. Beat on high speed until the frosting is light and silky.
- Assemble the cake: Place one cooled cake layer on a serving plate. Spread a layer of white chocolate buttercream over the top, followed by a generous layer of the cooled raspberry filling. Repeat with the second layer. Top with the final cake layer.
- Frost the entire cake with the remaining white chocolate buttercream. Decorate with fresh raspberries if desired.
Notes
- For a truly moist raspberry layer cake, ensure your butter and eggs are at room temperature before mixing the batter.
- Chill the cake layers for 30 minutes before frosting to prevent crumbs from mixing into your silky white chocolate buttercream.
- If you prefer a tangier filling, increase the lemon juice by one teaspoon.
Nutrition
- Serving Size: 1 slice
- Calories: 550
- Sugar: 55
- Sodium: 210
- Fat: 35
- Saturated Fat: 21
- Unsaturated Fat: 14
- Trans Fat: 0
- Carbohydrates: 58
- Fiber: 2
- Protein: 6
- Cholesterol: 120