
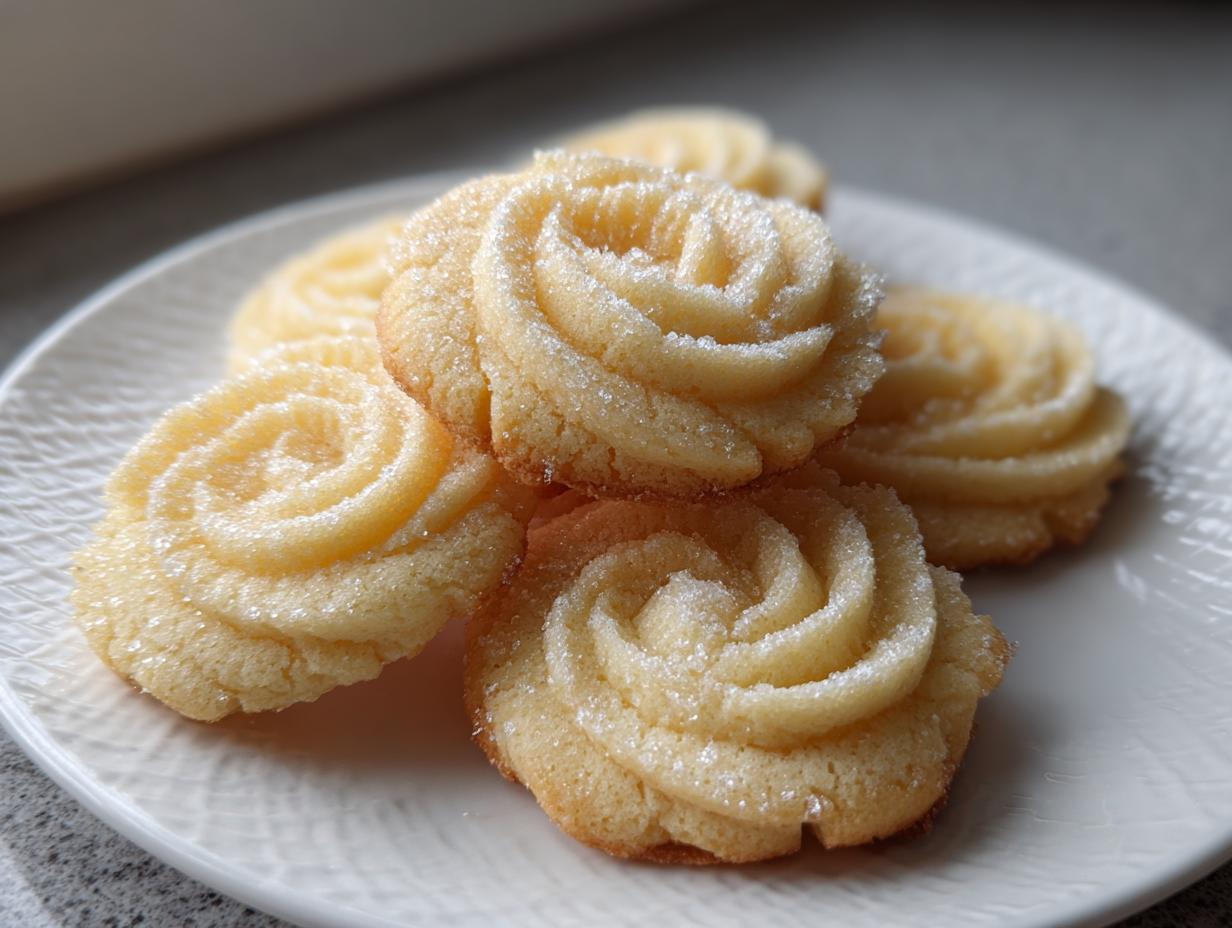

Do you remember those classic tins of cookies you’d get during the holidays? The ones that looked beautiful but sometimes tasted… well, kind of dusty? I spent years chasing the *real* experience of those treats—that deep, rich buttery flavor and that delicate, ethereal texture. After my journey from marketing director to full-time cook, perfecting this recipe was non-negotiable. I am so excited to share my absolute keeper: the Authentic Melt-in-Your-Mouth Danish Butter Cookies. Trust me, this butter cookie recipe delivers unbelievable flavor and that perfect texture that just disappears the instant it hits your tongue. It’s the real deal, and it’s easier than you think! You can read more about my whole story right here on the Gourmet Gaze About page.
- Why This is the Best Butter Cookie Recipe You Will Ever Make
- Gathering Ingredients for Authentic Butter Cookie Success
- The Step-by-Step Guide to Homemade Butter Cookies
- Baking Tips for Perfect Butter Cookie Edges and Centers
- Variations on the Classic Butter Cookies
- Serving Suggestions for Your Simple Buttery Cookies
- Storage and Keeping Your Butter Cookie Fresh
- Frequently Asked Questions About Making Butter Cookie
- Estimated Nutritional Data for Butter Cookie
Why This is the Best Butter Cookie Recipe You Will Ever Make
I’ve tested countless versions for you, and this one stands head and shoulders above the rest. Why? Because it focuses on pure, unapologetic richness and texture. If your goal is an incredible, **Simple Buttery Cookie** that delights everyone, this is your answer. I promise you’ll never go back to store-bought tins after making these Homemade Butter Cookies.
- It delivers on that promised Rich Buttery Texture Cookies experience every single time.
- It’s surprisingly quick! We can go from zero to chilled dough in under 20 minutes.
- The flavor is intensely vanilla-forward and satisfyingly sweet—perfect Teatime Cookies.
Achieving that Signature Melt In Your Mouth Cookies Texture
It all comes down to two things we do perfectly here: first, the creaming of the butter and sugar has to be light and long enough to incorporate air. Second, you absolutely must chill that dough. That chilling time is what locks everything in place so you get those delicate, soft **Melt In Your Mouth Cookies** rather than flat, greasy disks. Check out my dedicated guide on why this is the best butter cookie recipe overview if you want even more technical detail!
Gathering Ingredients for Authentic Butter Cookie Success
You won’t believe the short list needed for these incredible butter cookie treats! Since there are so few components, the quality of each ingredient really does shine through. Seriously, spend a little extra on your butter—it’s the star, and it dictates that amazing, deep flavor the Danes are famous for. If you’ve been looking for an easy vanilla cake substitute or just want to elevate your baking in general, mastering this ingredient list is step one. Don’t skimp here; this is where the magic starts for the most buttery, tender cookie you’ve ever made.
Here is exactly what you need for about three dozen Classic Butter Cookies:
- 1 cup (2 sticks or 226g) unsalted butter, softened
- 3/4 cup (150g) granulated sugar
- 1 large egg yolk (just the yolk—it adds richness without too much liquid!)
- 1 teaspoon vanilla extract
- 2 1/2 cups (300g) all-purpose flour
- 1/4 teaspoon salt
The Step-by-Step Guide to Homemade Butter Cookies
Okay, deep breath! This is where we turn simple things into extraordinary butter cookie magic. If you follow these steps closely, especially regarding texture and temperature, you can guarantee that “easy recipe” promise. We’re not looking for hard work here, just smart work to achieve those dreamy Melt In Your Mouth Cookies. Remember, the goal is a delicate dough that holds its shape beautifully. If you need a little break while waiting for the oven to warm up, check out my recipe for easy lime sorbet—great palate cleanser!
Creaming and Mixing: Foundation of the Butter Cookie
Grab your electric mixer for this part! We need to treat the butter and sugar right. Beat the softened butter and the sugar until they look genuinely light and fluffy—I mean, pale yellow and almost airy, like whipped clouds. This incorporates the air we need later. Then, gently beat in the egg yolk and that vanilla until it just comes together. You’re close now! Next, we add the flour and salt slowly, on low speed. And here is my biggest warning when making any butter cookie: Stop mixing the second you don’t see streaks of flour anymore. Overmixing develops gluten, and that gives you a tough cookie, not a tender one.
Chilling and Shaping Your Danish Butter Cookies Authentic Style
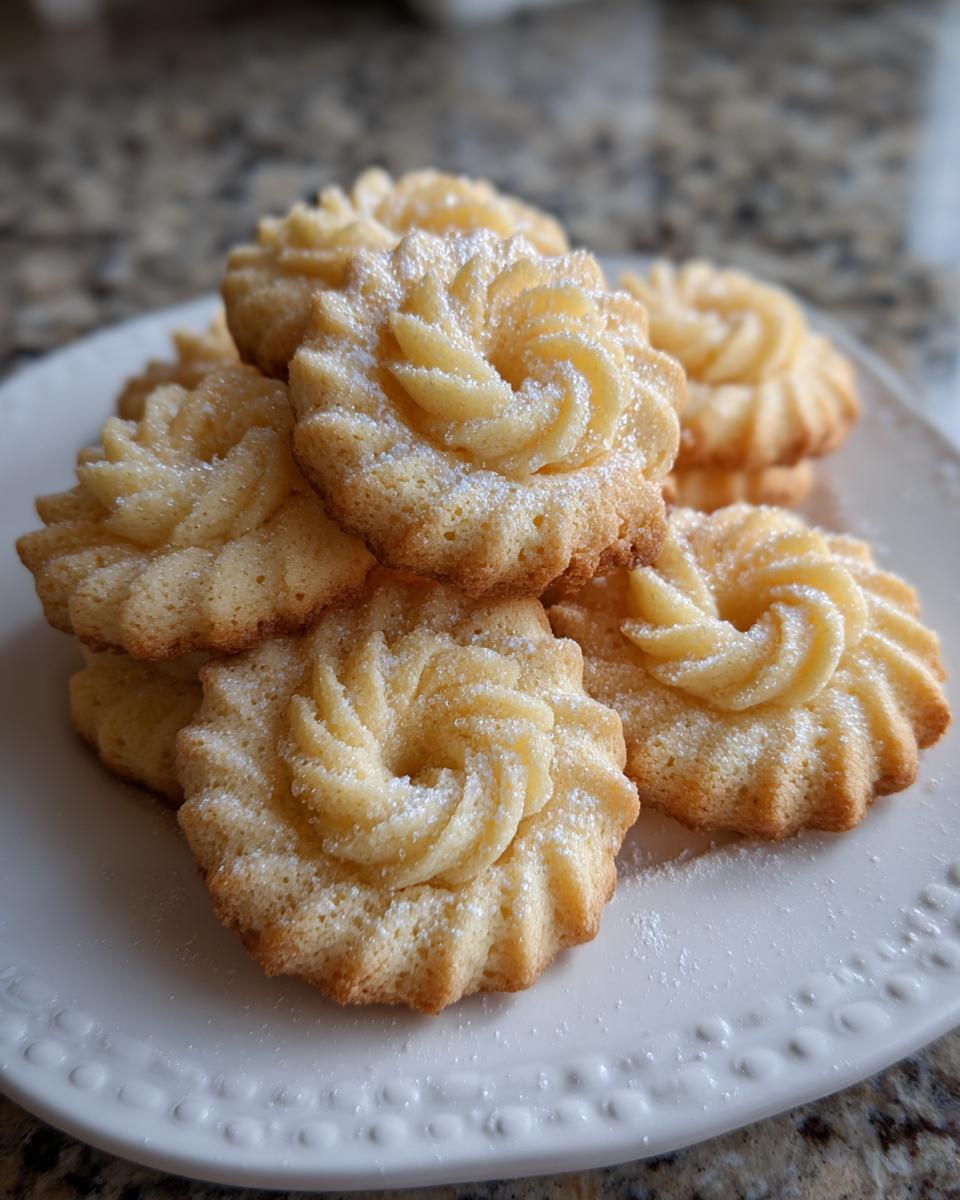
This part tests your patience, but it is non-negotiable for preventing spread! Wrap that beautiful soft dough tightly in plastic wrap—make a nice tight log—and stick it in the fridge for a *minimum* of one hour. Honestly, two hours is even better for the Authentic Danish Butter Cookies flavor to deepen a bit. When you take it out, you have two awesome choices. You can slice the log into neat rounds, or, if you’re feeling fancy and want those classic swirls, load that dough into a cookie press fitted with a nice tip. Piping those perfect rosettes is so satisfying!
Baking Tips for Perfect Butter Cookie Edges and Centers
Now that we have perfectly shaped, chilled discs of buttery potential, it’s time for the heat! This is where we lock in that famous texture. I know it sounds scary waiting for a cookie to bake when you just want to eat it, but timing here is everything. You are aiming for that perfect balance that gives you that **Rich Buttery Texture Cookies** feeling we talked about.
Preheat your oven to 350°F (175°C). Trust me on this temperature; anything hotter and you risk burning the edges before the center has that lovely melt. Lay down parchment paper on your sheets—it just makes cleanup a dream when you’re making a double batch, which I always seem to do!
These **butter cookie** rounds go in for about 10 to 12 minutes. Here is the crucial visual cue, and this is where my experience comes in: You want the edges to look just *barely* golden brown. Seriously, go look at them around the 10-minute mark. The centers should still look quite pale. If the entire top surface is golden, you’ve gone too far, and you’re trading that soft, melt-in-your-mouth experience for a snap. A pale center means that buttery dough is still tender inside.
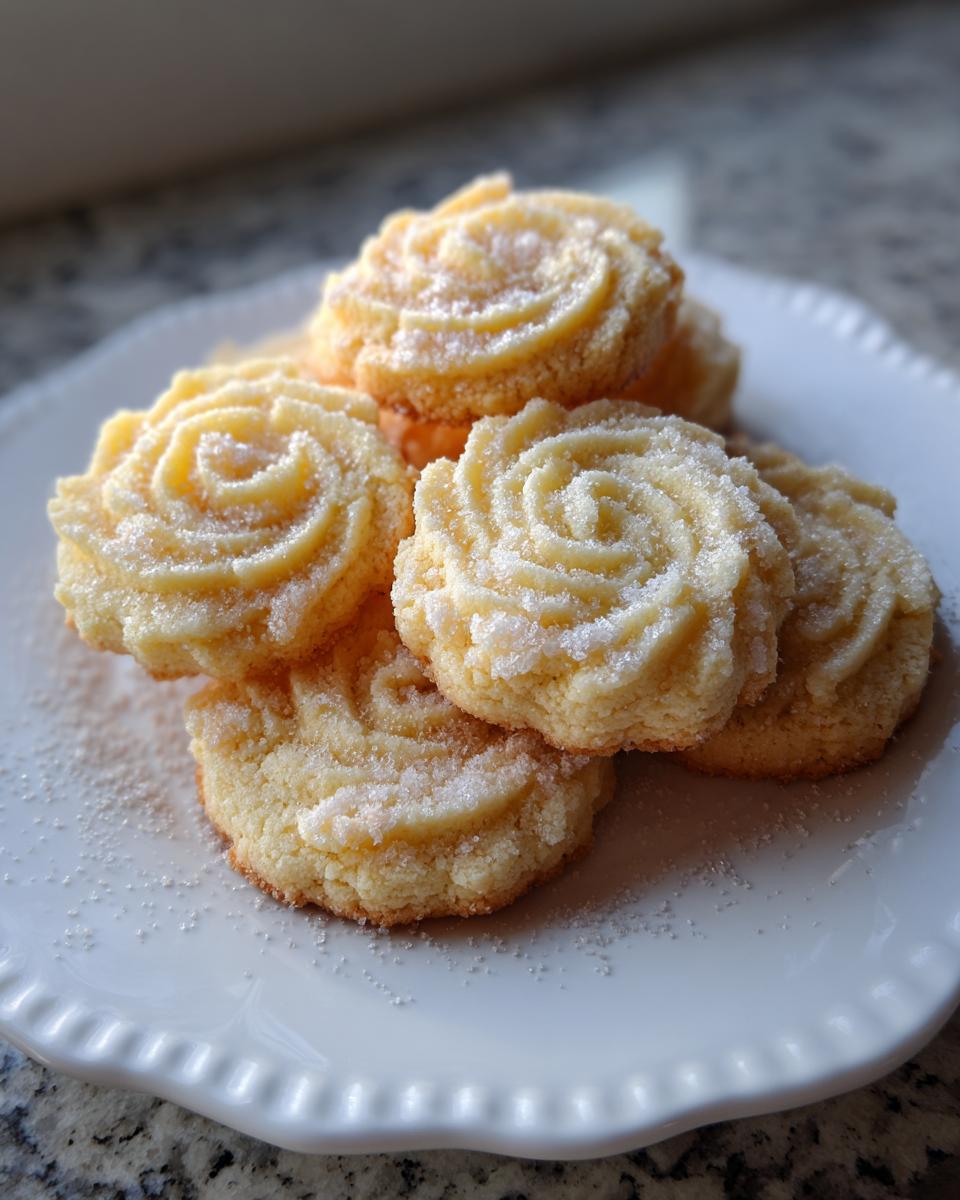
When you pull them out, resist the urge to touch them for at least five minutes resting on that hot baking sheet. They are fragile! They firm up beautifully as they cool slightly. You can check out more essential baking wisdom like this over on my main Gourmet Gaze Blog!
Variations on the Classic Butter Cookies
While I stand by the pure, unadulterated flavor of the original **butter cookie**—it’s magnificent when it’s just butter, sugar, and vanilla—I know sometimes we want to jazz things up a bit, especially for **Cookie Recipes for Gifting**. These cookies are such a wonderful blank canvas! Because the dough relies heavily on butter for structure, you want to be careful not to add too much moisture. But a little extra flavor tucked into the dough or sitting on top makes these **Classic Butter Cookies** truly feel special.
My favorite simple flavor swaps usually involve extracts or zest. Try swapping out half the vanilla extract for almond extract; that little nutty note pairs surprisingly well with the buttery foundation. For a brighter twist suitable for spring or summer, add the zest of one whole lemon or orange directly into your butter and sugar when you cream them. It infuses that citrus oil right where the flavor needs to be strongest!
Chocolate Dipped Butter Cookie Finish
If you want to elevate these from a simple drop cookie to something truly decadent for the holidays, chocolate dipping is the way to go. This is perfect for making them look like they came from a fancy French bakery! First, make sure your cookies are completely, totally cool. If they are even slightly warm, the chocolate will just slide right off or melt unevenly. I usually melt about four ounces of good quality semi-sweet chocolate chips in a small bowl right in the microwave. Give it 30-second bursts, stirring well between each one, until it’s smooth enough to drizzle easily.
Then, take one cooled **butter cookie** and dip about one-third of it right into the melted chocolate. Don’t drown it! You just want a nice cap of chocolate. Set the dipped cookies onto a sheet lined with parchment paper (you can reuse the sheets from baking, no problem!). If you want to get fancy, this is when you sprinkle on some sea salt flakes or tiny colorful sprinkles before the chocolate fully sets. If you love dipping things, you should definitely check out my inspiration for chocolate banana pops, too, for another easy dessert idea!
Serving Suggestions for Your Simple Buttery Cookies
Now that you’ve mastered the art of the perfect **butter cookie**, the fun part is deciding when and how to serve them! Because these are those fantastic, delicate **Teatime Cookies**, they truly shine when paired simply. They don’t need heavy frosting or complicated additions; their simple, buttery quality is the main event.
Forget about needing a huge dessert spread; these little beauties are perfect for an afternoon pick-me-up. I often serve them alongside a steaming cup of Earl Grey tea. The slight bitterness of the tea cuts through the richness of the butter perfectly. Honestly, you can’t beat that combination. For a wonderful pairing, I highly recommend making sure you have a good pot brewed alongside my recipe for old-fashioned tea cakes—it makes for an elegant spread!
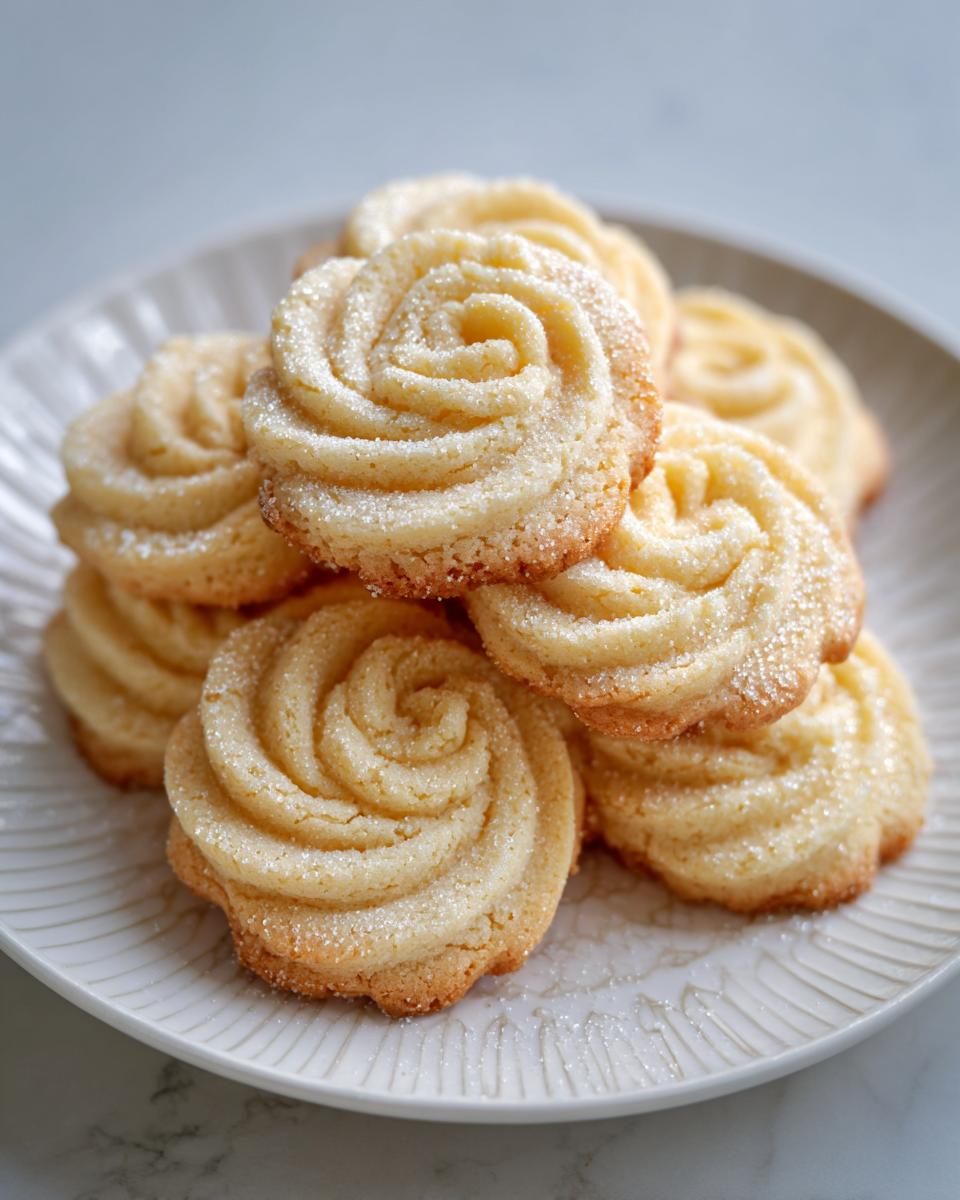
If you’re baking these for gifting, presentation is everything! Those classic rosettes look incredible stacked high in simple, clear cellophane bags tied with a sturdy twine or a vibrant ribbon. They look so much more impressive than if they’re just sitting in a plastic tub. They truly look like they came right out of a gourmet bakery display. If you want more ideas on achieving that irresistible look, check out this great post on butter cookie perfection for some visual inspiration.
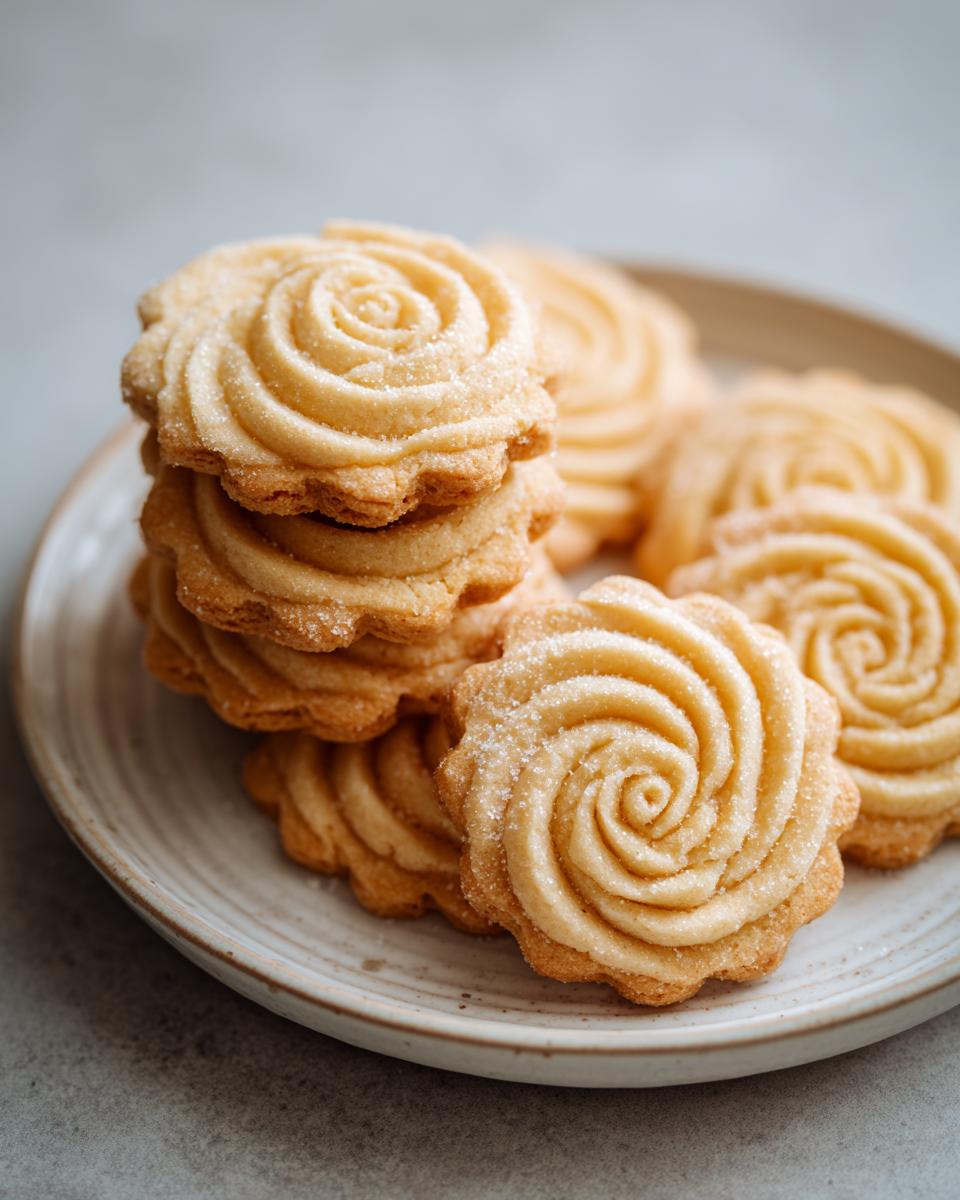
For coffee lovers, these **Simple Buttery Cookies** are fantastic dipped very briefly into a strong espresso. Just a quick dunk on one corner is enough to soften the edge just slightly, enhancing that melt-in-your-mouth sensation even more. Enjoy them slowly; these cookies deserve your full attention!
Storage and Keeping Your Butter Cookie Fresh
Okay, you’ve made the absolute best butter cookie recipe ever, and now you have dozens of delicate rounds. Don’t let them dry out! These butter cookie treats are famous for that melt-in-your-mouth quality, and that texture is incredibly sensitive to air exposure. If you leave them out on the counter uncovered, they turn sad and stale fast. That rich buttery layer needs protection!
The absolute best advice I can give you is to use high-quality, truly airtight containers. Glass jars with clamps or good locking containers are my go-to for these. You want zero air exchange. Room temperature is actually perfect for these; refrigeration can sometimes dull that delicate buttery flavor and might introduce some unwanted moisture, which ruins that delicate structure. Layer them between sheets of parchment paper—don’t just stack them right on top of each other, or you risk messing up those beautiful piped shapes!
Can you freeze them? Yes, you totally can! These Classic Butter Cookies freeze wonderfully, which is great news if you’re prepping for the holidays. Wrap the cooled cookies tightly first in a layer of plastic wrap, and then slide the whole thing into a heavy-duty freezer bag. I always try to push out as much air as possible before sealing the bag. They keep beautifully for up to three months!
When you’re ready to eat those frozen gems, just pull out what you need and let them thaw completely inside the sealed wrap on the counter for a few hours. That thawing process traps any condensation *outside* the plastic, keeping your cookies perfectly dry and flakey. It’s a little trick that saves your beautiful Homemade Butter Cookies from getting soggy. If you’re looking for other great stash-and-save snacks, check out my recipe for cheese crunch bites—those freeze like a dream too!
Frequently Asked Questions About Making Butter Cookie
I know you might have a few burning questions about getting that perfect result before you dive into this amazing butter cookie recipe. It’s totally normal! When chasing that authentic, melt-in-your-mouth texture, the details really matter. I’ve gathered the most common things folks ask me about to ensure your Cookie Recipes for Gifting turn out flawless.
Can I use salted butter instead of unsalted?
You absolutely can, but you need to adjust the salt in the recipe. Since the recipe calls for 1/4 teaspoon of salt, if you use salted butter (which usually contains about 1/4 teaspoon of salt per stick), you should leave out that extra 1/4 teaspoon completely. I prefer unsalted butter because it lets me control the sodium level exactly, which is best for these delicate **Simple Buttery Cookies**.
Why are my cookies spreading out when I bake them?
Spreading is the nemesis of the Classic Butter Cookies enthusiast! Usually, this means one of two things: your butter wasn’t properly chilled before slicing or pressing, or your butter was too warm when you creamed it with the sugar. Remember what I said about butter being soft but *still cool*? Too warm, and the structure is compromised before it even hits the oven, leading to greasy puddles instead of perfect rounds.
Is chilling the dough really necessary for these Melt In Your Mouth Cookies?
Yes, 100 percent yes! I can’t stress this enough. Chilling solidifies that high butter content. When the dough is cold, the cookies hold their detailed shape—whether you slice them or pipe them as **Danish Butter Cookies Authentic** style rosettes. If you skip the chill time, you get a delicious, but very flat, cookie instead of the tall, tender treat we are aiming for. You can even find some great tips on getting the perfect texture just like this when you read about other melt-in-your-mouth Danish butter cookies online.
If you have more questions while you are baking, don’t hesitate to reach out to me through my Contact Page!
Estimated Nutritional Data for Butter Cookie
As much as I love sharing the joy of baking, I have to remind everyone that I am a cook, not a certified nutritionist! The figures below are estimates based on the ingredient list provided for about 3 dozen butter cookie servings. Since quality of ingredients and exact measurements in home baking can vary, please treat this as a general guide rather than absolute fact.
These numbers reflect one of those truly divine, Rich Buttery Texture Cookies:
- Serving Size: 1 cookie
- Calories: 135
- Sugar: 8g
- Sodium: 45mg
- Fat: 9g
- Saturated Fat: 5g
- Unsaturated Fat: 4g
- Trans Fat: 0g
- Carbohydrates: 13g
- Fiber: 0g
- Protein: 1g
- Cholesterol: 30mg
See? Pure butter and sugar magic! Enjoy every single one of these Simple Buttery Cookies knowing you made them beautifully from scratch.
PrintAuthentic Melt-in-Your-Mouth Danish Butter Cookies
You will learn to make classic butter cookies that achieve that signature melt-in-your-mouth texture and rich, buttery flavor, just like the ones from the classic tins. This easy recipe is perfect for holidays or teatime.
- Prep Time: 20 min
- Cook Time: 12 min
- Total Time: 92 min
- Yield: About 3 dozen cookies 1x
- Category: Dessert
- Method: Baking
- Cuisine: Danish
- Diet: Vegetarian
Ingredients
- 1 cup (2 sticks or 226g) unsalted butter, softened
- 3/4 cup (150g) granulated sugar
- 1 large egg yolk
- 1 teaspoon vanilla extract
- 2 1/2 cups (300g) all-purpose flour
- 1/4 teaspoon salt
Instructions
- In a large bowl, cream the softened butter and sugar together with an electric mixer until the mixture is light and fluffy. This step is key for texture.
- Beat in the egg yolk and vanilla extract until just combined. Scrape down the sides of the bowl as needed.
- In a separate bowl, whisk together the flour and salt. Gradually add the dry ingredients to the wet ingredients, mixing on low speed until a soft dough forms. Do not overmix.
- Shape the dough into a log, wrap it tightly in plastic wrap, and chill in the refrigerator for at least 1 hour. Chilling helps the cookies hold their shape during baking.
- Preheat your oven to 350°F (175°C). Line baking sheets with parchment paper.
- Remove the dough from the refrigerator. You can either slice the log into 1/4-inch thick rounds or place the dough into a cookie press fitted with your desired decorative tip.
- Place the cookies onto the prepared baking sheets, leaving about 1 inch between them.
- Bake for 10 to 12 minutes, or until the edges are lightly golden brown. The centers should still look pale.
- Let the butter cookies cool on the baking sheet for 5 minutes before transferring them to a wire rack to cool completely. This ensures a rich, buttery texture that dissolves in your mouth.
Notes
- For an authentic Danish style, pipe the dough into rosettes or swirls.
- If you want crisp edges, bake for an extra minute or two, but watch carefully to prevent browning.
- For a variation, dip half of the cooled cookie into melted semi-sweet chocolate and let it set before serving.
- Use high-quality butter; this recipe relies on its rich flavor.
Nutrition
- Serving Size: 1 cookie
- Calories: 135
- Sugar: 8g
- Sodium: 45mg
- Fat: 9g
- Saturated Fat: 5g
- Unsaturated Fat: 4g
- Trans Fat: 0g
- Carbohydrates: 13g
- Fiber: 0g
- Protein: 1g
- Cholesterol: 30mg